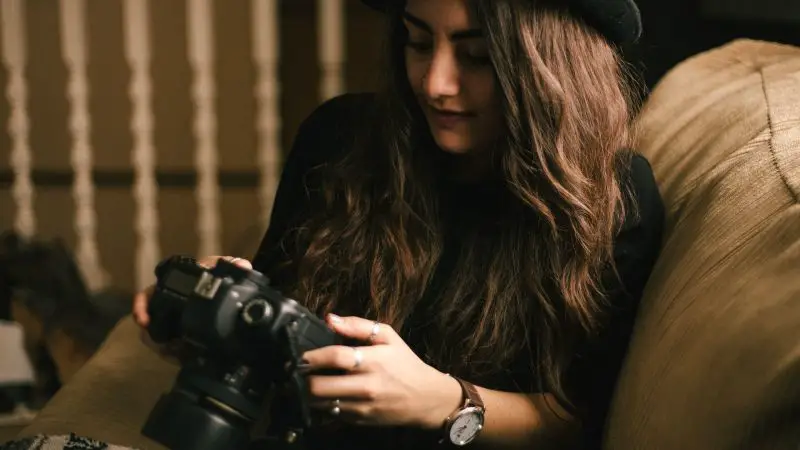
Do you have an interest in photography on an amateur level? Or have you taken a few photos that other people liked, and you want to find out how to get even better at the basics of photography? These tips on how to use DSLR camera for beginners can help anyone enter into the world of photography. Even professionals can strengthen or recall their basic knowledge of handling the camera. Now let’s start with the DSLR basics for beginner photographer!
Table of Content
Tips on How to Use DSLR Camera for Beginners
1. Know Your Camera
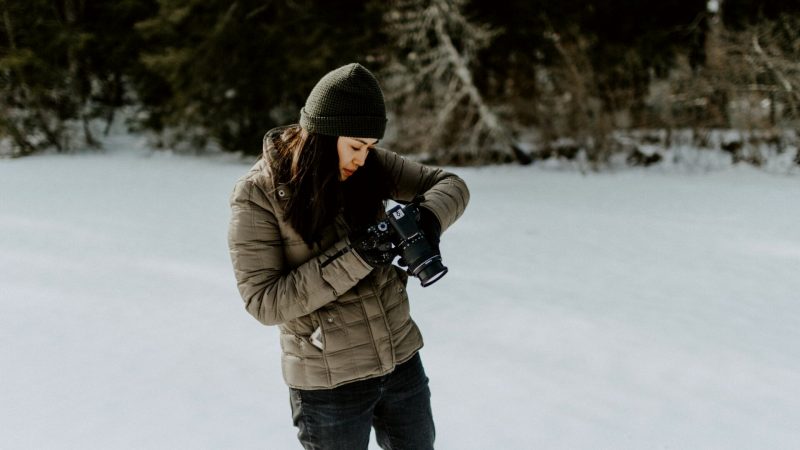
If you just bought your camera and you have no idea what you are doing, the first thing we want you to do is to relax. We are going to go over the focal camera functions. By now, you have noticed that reading the instruction manual is boring and confusing. Don’t worry you don’t have to remember every word located in there. The most important thing you need to learn from the manual is how to insert a memory card and a battery into your camera. Now mount your lens and we are ready to go!
Let’s presume that you are holding your camera in hands. The first thing you are probably going to see is the camera wheel with different modes.
These modes are essential for understanding photography and developing techniques. Most digital cameras today have four main types of camera modes: Program (P), Shutter Priority (Tv or S), Aperture Priority (Av or A), Manual (M). We are not going to include automatic modes (Auto, Action, Portrait, Night Portrait, Landscape, Macro), they represent DSLR basics for a beginner. These modes are for snapshots. Don’t get us wrong, using automatic modes you can still get decent looking photos, but using manual modes you are going to get so much more out of your photos.
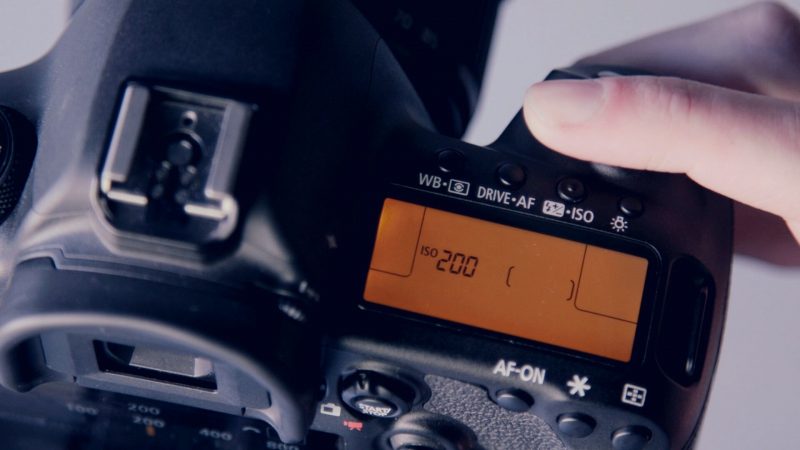
One of the most crucial things that lead to a quality photo is ISO settings of your camera, you need to correct ISO settings before taking any pictures. This setting can be in automatic mode, except when taking pictures in dark. Then you need to manually change the settings of ISO because in the dark the camera will usually make a mistake with adjusting the ISO. If you want the best possible quality outcome out of your pictures, then you will want to set the ISO on 100 preferably if possible when taking photos.
Also, one other instance, where using auto mode can be a little tricky, is with built-in flash. This probably happened to you already. You were trying to take a picture and the flash popped out while the camera was on auto mode. This is another instance where using auto mode is not recommended. Let’s give a few examples of why this is bad. Imagine yourself at a music concert, where you are trying to take pictures of the band. If you are using auto mode and it’s dark, the built-in flash will pop up. This flash will not help with the lighting because it will not reach the stage at all, it will only be a bother to people around you.
Another reverse situation is the flash not turning on while the camera is in auto mode. Now picture a bright sunny day. You are trying to take a portrait picture of your friend. Because the sun is too bright it can often create unwanted shadows on the body or on the background. This is a perfect time to use flash to negate these shadows. But, if you are using auto mode, the camera will not turn it on because it thinks you have enough light for the picture.
Now let’s get back to manual modes of the camera. Before you start using the manual mode you will need to learn a few things about your DLSR and photography in general. Educate yourself about aperture, ISO value and exposure time. You can educate yourself about these subjects on Pixobo. If you don’t understand something, feel free to send us an email. After understanding these concepts, you can finally get away from auto mode and enter into the amazing world of photography.
Related: Is Buying A DSLR Worth It?
2. Create a Story

Every picture needs some kind of composition. This means that you need to have a motive to actually make a meaningful picture. I am not saying that snapshots are bad and that you should avoid them. Sometimes some snapshots are better than a well prepared and toughed out the picture. But if you are aiming for that perfect picture then you should spend some time thinking about it.
Ask yourself what do you want to represent with this picture? What is the motive? What is the meaning behind it? All this needs to be answered before actually triggering the camera to take the shoot. In these scenarios, you can’t go with the rule of: “This looks nice!”
You are probably wondering how to find a motive and how to know if you found the right one? There is no rule in making you see the “right” motive. But a few of the things that you can keep in mind are:
- Exotic locations
- Weather to die for (lighting, sunrise, dawn, storms, hurricane)
- Good hair or makeup and outfits for people
- Micro and macro photography, showing something that the human eye does not usually look at
Try focusing on one subject. Look at it from all locations and angles. Every angle will give you a different motive and meaning to the picture. Try to find a way of putting the motive in action and making a new meaning to it. I always say and always will say, photography is an art and it’s all about playing around and having fun while creating something new every time.
In the end, the best way of selecting a motive would be to go by the rule: “What is not important?” What can you delete or blur and leave out of the picture that will not make the picture composition be off? As soon as you find an answer to that, it will be pretty clear what the motive is. And it will be easy for you to continue working on that motive as you go.
Related: 30 Creative Photography Ideas For Beginners: Get Creative With Different Photography Styles
3. Light Is Everything

This is one of the things that you either chose to master or just rely on automatic features. Mastering this will give your photos a new perspective. Sure, in the beginning, most of us rely on the automatic feature simply because it takes too much time to adjust settings every time. There is nothing wrong with doing this either, but your pictures will turn out average. In most cases, scenarios like a winter wonderland, bright sun or light-shows, your pictures will be nonexistent.
The reason for this is because the camera is focusing on the overall frame and balancing everything, while you want just one detail to stand out. In the case of the winter photos, it will give you pure white photos. Light-shows will appear dark with few light spots. It is a fight that the camera will win every time if you don’t learn how to control your exposure.
Related: Low Light Tips: How To Get Good Lighting For Indoor Photos
4. Composing like a Professional
One of the key things on how to use a DSLR camera for beginners. This will help you present your subject in the best light possible. Following this, there is a rule known as the “rule of thirds” which is mostly used for composing the image. This rule is based on the fact what is most appealing to the human eye and what will give the human eye visual excitement.
Most digital cameras today and even your phone camera come with an option that allows you to see lines on your screen. These lines will divide your screen into nine squares. It will show you three lines that will make it easy for beginners to find the 3rd of the frame. As you go, it will be easy for your eye to detect what exactly is a 3rd of a frame. But in the beginning, get the most out of the helping lines on your screen. But then again, by breaking these rules you can achieve different and interesting looking compositions.
Making the size of your background and subjects achieve interesting effects. This is also not a set rule, nor do you need to play around with it. But seeing where the photography business is going, more and more pictures are required that are different and have an unusual look. So just create your own rules. If you feel like breaking all the existing rules, do so. Maybe in the future people will see your photos and look up to you because you created a trend that has not been seen before.
Related: What Are The Elements And Principles Of Photography?
5. Blur and Sharpness?

Purposely leaving a picture blurred or sharp has its effects as well. Making photos more interesting is all a personal choice. No one will ever tell you that you should have blurred something or not. But controlling this kind of camera options will allow you to play around more. Making some spots blurred or sharp will direct your viewer to look in the direction that you are sending them in. Making the motive and subject of the picture even more visible and appealing to the eye.
You can read more about how to create a blur in pictures in our article about it.
6. Don’t Breathe?

The right moment can decide will your picture be shaky or stable. Some might say that taking pictures on one foot with one arm that is holding the camera might be the most ridiculous thing you can do while taking pictures. Professional people will say it’s an amateur move.
The rule would be to stand on both feet, while holding your camera with both arms that are supported by your body, with a good posture. I really do want to say that this is a rule that you should follow but it really isn’t. Yes, of course, it is better to do it this way. But there are exceptional situations that require flexibility. Most of the time, some of the pictures that you take this way will turn out better than the ones you took by following the rule.
The only rule you should follow is to not hesitate for too long. Just take the picture. Make a million of them, one will turn out ideal. This rule is especially connected to taking pictures of animals and children. Their behavior is unpredictable and waiting too long can cost you a good picture.
7. Organization
The organization is one of the things the human kind can’t live without. We are born through an organization and we learn to live by it. Functioning without it makes it hard to live. Yet when it comes to picture organization, we fail.
Why is that so? Can’t we organize our pictures on time and keep it like that? Why is it every time we try to do it, we give up halfway through it?
And why is it that always the best pictures disappear and vanish when we most need it? So for all of those who are starting off: “GET ORGANIZED”. I can’t stress this word more. Seriously, getting organized at the beginning, it will save you the frustration later on. This is also one of the most important tips on how to use a DSLR camera for beginners.
The best way of achieving this is to get a program that will organize your pictures for you and keep them safe. The organization can be a saver for later projects that require your older photos in them. In general, programs will help you sort everything by categories and dates, so nothing ever gets lost.
Related: How To Build A Photography Portfolio?
8. Learn from Your Mistakes
The best way of learning is from your own mistakes and a way of getting better is to look back at your old photos. No… not the photos of you as a baby. I’m talking about the old pictures that you took with the knowledge that you had at that point. Look at what has changed and what is still a problem for you.
It’s not only your opinion that matters, ask the people you usually share your pictures with, what they think. Where are my strengths and weaknesses? Work on what is pulling you back. If it’s not your fault but some technical reasons, upgrade your camera and gear. Don’t let it hold you down. Don’t be scared of perfecting the things that you still lack. We wish you all the best in your upcoming adventure!
If you need a new DSLR camera, read our article about what is better for beginners, Canon or Nikon?
If you enjoyed our beginner’s guide please share it with others. Best of luck!
Also, check our basic tips for taking good photographs!