Blurred background photography is a phrase used to describe a photography style where the background is out of focus. Following that definition, you might be confused and ask yourself why would anyone create a picture that is out of focus and does it make any sense to actually do that. But mastering the art of blurring a part of the picture, makes the picture stand out much more then you think. It makes the picture appear professional and some would say magical.
Now, I’m not saying that having pictures with no blur, or so to say sharp and clear, is a bad thing. There will be many situations where sharp pictures work better for the topic and concept of the photo and every blur is denied. Needless to say, more and more photographers go for the blur effect just because it looks like you spent hours editing the picture when in real life it was just a few clicks and adjustments on the camera.
Table of Content
Not All Blur Is Equal
Maybe the next few sentences will sound odd to you. Did you know that there is more than one way to create a blur effect and that there are different types of the blur? Few types of blur would be: subject-movement blur (or just movement blur) and camera movement blur. Movement blur is where every movement that has been done during the taking of the picture is blurred because the shutter was not fast enough to catch the movement clearly. Camera movement is a type of blur where in the end result you will get everything blurred except the subjects that were moving at the same speed as the camera itself while taking the picture.
These types of pictures that you get are not necessarily bad, and as we mentioned that few concepts appreciate the sharp picture, the same rule can be applied for these types of blur.
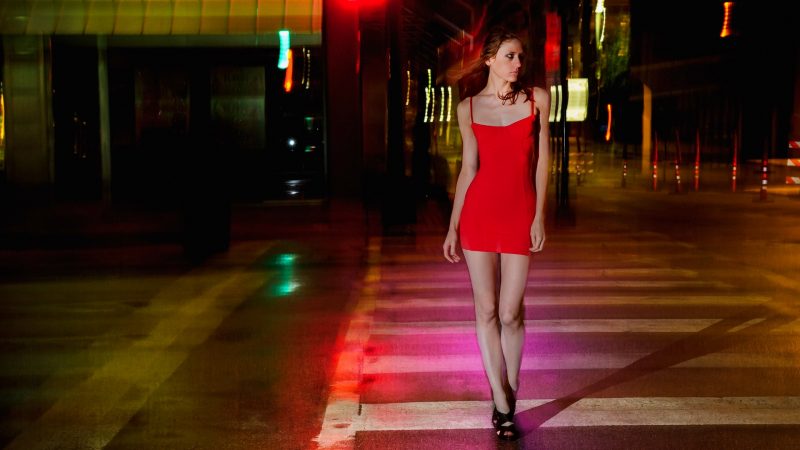
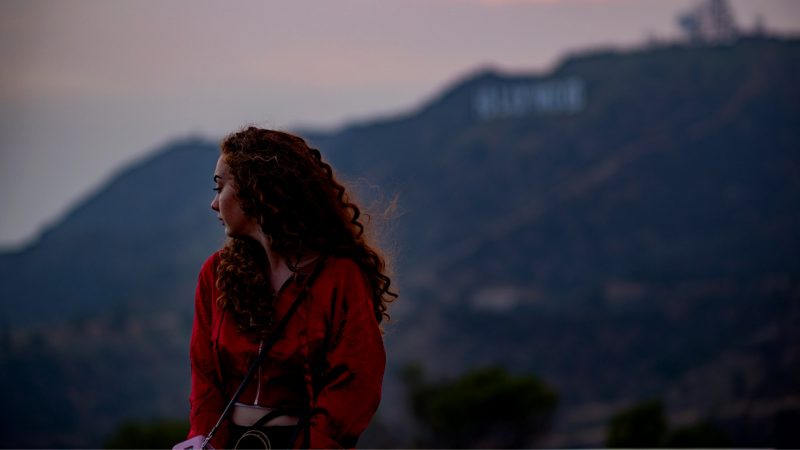
Probably the most common type of blur is the kind where the background is out of focus leaving the closest or chosen subject sharp. This kind of a blur really depends on the location you are taking the picture. Taking a picture in a room with a white wall behind the subject does not need any background blur since the wall is clean there is nothing drawing the attention away from the subject in the picture.
Blurred Background Photography for the Win
Outdoor shooting would be one of, if not, the most popular location to use this kind of a blur.
In this case, the background is filled with a lot of unnecessary things that draw the attention away from your main subject and by blurring everything in the background you can get rid of all these problems. Since more and more people do their shootings outdoor these days it seems logical why this type of blur is one of the most popular ones.
The easy way of achieving this kind of blur would be by positioning your subject as close to the camera as possible, leaving the camera no choice but to focus just on the subject and automatically blur everything in the background.
This does not mean that you need to put your subjects face close to the camera to achieve this kind of a blur, in many cases moving your subject one to two meters away from the background will be enough for the camera to distinguish what needs and does not need to be in focus.
Frontal Blur?

Yes, it is not only possible to blur the background of your picture but also the front part. This is blurred background photography in reverse. What I mean by this is that putting something in between your subject and camera and focusing the camera on the subject will leave whatever it is, that is standing closest to the camera, a blurred mass.
This technique is, sadly, not so popular and used as the background blur but it can create amazing pictures as well. Try it out and see for yourself.
Photoshop Blur
If you are stuck with a smartphone camera and you can’t or don’t want to invest in a DSLR camera, there are still ways of making your pictures blurry (Check out our tips on How To Take Good Photos With Phone).
One of the most popular ones would be using Photoshop. This is easily achieved with a brush that has an effect on it. Mastering this skill is for some will be easy and for some difficult. There are many ways and filters for achieving it and practice makes it perfect. Play around with it until you find the perfect way that works for you. There are no set of rules for this. Image taking and editing is an art of expression on its own.
You can also outsource photo editing to professionals. I wrote about the benefits of outsourcing photo editing and why it makes sense for most photographers in this article – Photo Editing Service.
Be More Open
Mastering the blur effect is difficult but in the end, it will be worth it. This subject requires flexibility, you need to be ready to fail a million times and move the subject around until you figure out what position of the camera will bring you the perfect blur. Never take the position of your model and background for granted, move around and keep an open mind. Be ready for failure but also for achieving that perfect image that you had envisioned in your mind.
Keep practicing and good luck.
Related: How Do You Take Blurred Action Photos?
Millimeters Matter

Keep in mind that not all lenses are made for making the background blurry. In this case, so to say, the perfect lens would be anywhere from 50mm. Adding on to this theory, not all devices can achieve the perfect blur. Try taking the same picture with a “professional” camera and with a smartphone camera. You will notice that the smartphone is not really made for taking blurred out pictures, the reason for that would be the image sensor.
A smartphone image sensor is made for making the picture appear as sharp as possible. Not to mention that most smartphone cameras do not have any kind of zoom lens like you would see on a DSLR camera. Most smartphone cameras have a wider lens and that makes it pretty difficult to achieve any blurriness.
Hot Gear?
Being skilled at making a picture blurry with the camera or with photoshop is something that will bring your photography experience to the next level. This way you will always keep the focus on the main subject and the picture composition gets new meanings. By blurring out an unnecessary thing you bring harmony to the picture and make it more appealing to the eye. And by blurring out movement you bring dynamic to the table and the picture appears almost alive and magical.
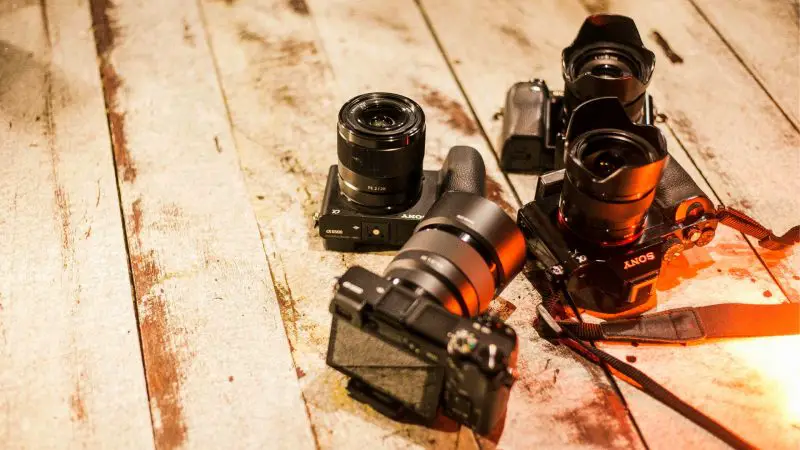
Needless to say, blur does depend on the technology that you are using so getting your gear upgraded is a big plus. Getting a better DSLR camera or a 50 mm lens will up your game. (Click here to find out Is Buying A DSLR Worth It?)
Related: How To Choose The Best Camera For Your Needs – 7 Step Guide
Better Additional Gear!
At some point, you might decide that for blurred background photography you want more than just a lens or a camera body. I’ll give you a list of six things that can up your photography game instantly. Let’s start:
1 – Remote controlled shutter
What if you find yourself in a situation where you need to press the trigger to take a picture but if you move your camera the frame will be off? There is a simple solution for that. Getting a remote-controlled trigger is the best way of preventing your frame to be off. It’s easy to set it up with any digital camera.
Aside from using it like this, remotes can be very useful on holidays or vacation trips. In these situations, you don’t need to have anyone to take your picture or ask a stranger for help. With the remote, you can easily take your own group photos without leaving anyone out of it to take the picture.
Related: What Is The Slowest Shutter Speed You Can Use Without Getting Camera Shake?
2 – Tripod

Let’s say you have a remote and want to take a group photo but you have nowhere to put your camera? What then? Easy…you get yourself a tripod (Click here to see what are the Best Tripods For Photography In 2019). The best friend of every adventurer, who is traveling around the world and has no one to hold his camera. He does it with a tripod as well. It’s easy to set up, light enough to carry it around and it can be folded to a minimum size, so it does not take up almost any space at all.
There is only one thing that you need to be sure of by getting a tripod. Can it hold the weight of your camera? If yes, then it is perfect. Every other detail is personal preference and you don’t necessarily need it. Most tripods will come with instruction of how much weight they can handle so just keep in mind to check that before buying it.
3 – Separate Flash
Now you are probably thinking: “But every camera comes with a flash why do I need a separate one?” The answer to this question would be in the strength of the flash itself. Yes, it is true that cameras have a flash, but external flashes tend to be of higher quality when it comes to their performing skills. Also, it gives you the possibility of playing around with the light in the picture.
Taking photos at night or on a party usually requires the additional flash. This way the pictures will be of higher quality with white light and not the yellow light that your camera already has. Flashes can also be used for taking pictures during the day. When you wish to eliminate the yellow light, that comes from the sun. You do this by killing light with light. In this case, the white light will kill the yellow light and the picture will have balance and no shadows that are unnatural.
4 – Foldable Reflector
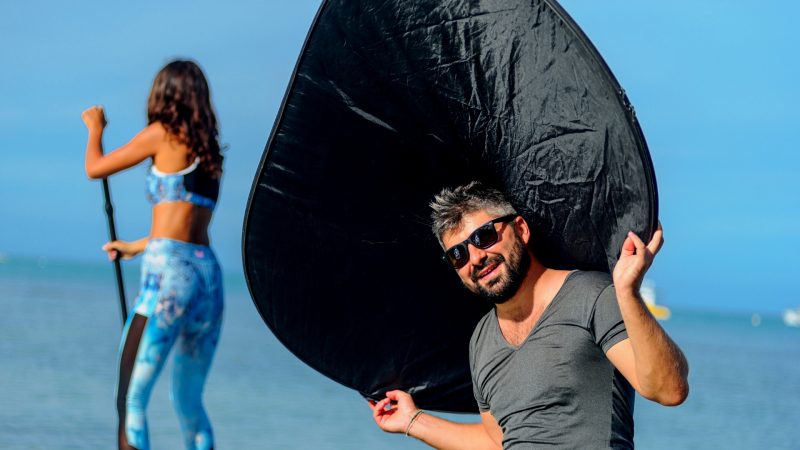
This kind of gear is optional, and most people tend to forget about it. The most common situation you would see a foldable reflector being used would be at a wedding photo shoot. It requires an additional person to be in charge of it. This is the reason rarely someone uses it. But every studio that is doing professional shooting has at least one of these. Think of it as a reflector that will take the white light and point it at the subject. This technique makes the subject stand out in photos because the light is only put on it, making the background appear a little darker and not as important.
Now you might understand why it is mostly used at weddings. You can find these reflectors in different sizes and colors. Most common would be a white reflector with a black back. The white will create nice pure lighting while the black absorbs all what is unnecessary. Aside from that, we have gold and silver reflectors, these give the picture a slight coloration and makes it appear magical. These come in different sizes but since they are all foldable and light, it is easy to carry them around.
5 – Extra Memory Card
You can never have too much memory for photos that you make. Having an extra memory card with you will ensure that you never run out of memory. Also, this gives you security in case the first memory card decides to stop working.
This does not happen that often but when it happens it is catastrophic. With no memory, you can’t take pictures, but you are already out and going back to your house will cost time. The model is waiting, everyone is frustrated by the delay and you are losing a good job and money you could have made if you only had an extra memory card with you. Always be prepared for the worst.
6 – Organisation Programs
Programs that were specially made for organizing your pictures and keeping track of them, so nothing gets lost. This is one of the mistakes people always make. They store their pictures on phones, SD cards, USB drives or their computer. But what if any of these decides to give up on life? You are left with all of your pictures gone…. most likely for forever. It is scary to even think about it so think ahead.
Get yourself a program that will keep track of all of your pictures and that has a reliable backup, so nothing ever goes wrong. There are many programs that you can invest in for this task. Search around and find the best that works for you. If you are a beginner that wants to continue doing photography, then I highly suggest getting a program like this. In the first months, it might not seem like a big deal. But after doing photography for one or two years, tracking your older pictures down on all USB drives that you collected isn’t really that easy nor is it practical.