As a photographer, we always want our photographs to be as sharp as possible even when zoomed in. We don’t want to introduce noise and blur in our otherwise great looking images. Especially in wildlife or sports photography where the subject is moving really fast, most of the time we want to freeze the action.
However, there are times when blurring the image creates a dramatic effect to your photos and this is called motion blur. There are photographers known in using motion blur to their images, and they are also known as movement photographers.
Table of Content
What is Motion Blur Photography?
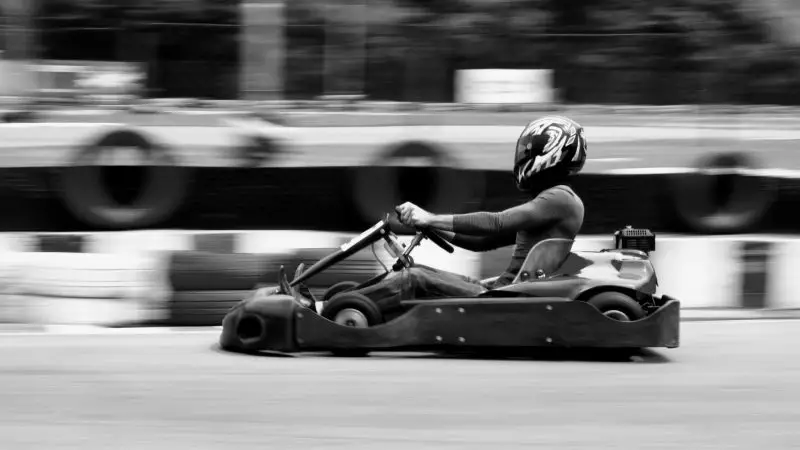
Motion blur is a photography technique in which you take a photograph of a moving object, and it creates a streaking effect on the final image. This is different from the blur caused when you involuntarily moved your camera while taking a photo of a static object (otherwise known as camera shake) which produces rather undesirable results.
Intentional blurring or streaking of a moving object in a photo for the purpose of showing motion is called motion blur photography and is usually achieved by using slow shutter speeds in your camera.
And while the concept is pretty intuitive, there is more to motion blur photography than just using slow shutter speeds just to make something appear blurred in the photo.
Honestly, I don’t want to get too technical, but before we go on further, I believe it is necessary that we review some basic terminologies in photography.
There are three pillars of photography:
1. Aperture
2. ISO
All these three pillars of photography have a deeply intertwined relationship, and together they control the amount of exposure that the camera’s sensor receives.
How to Achieve Motion Blur Technique?
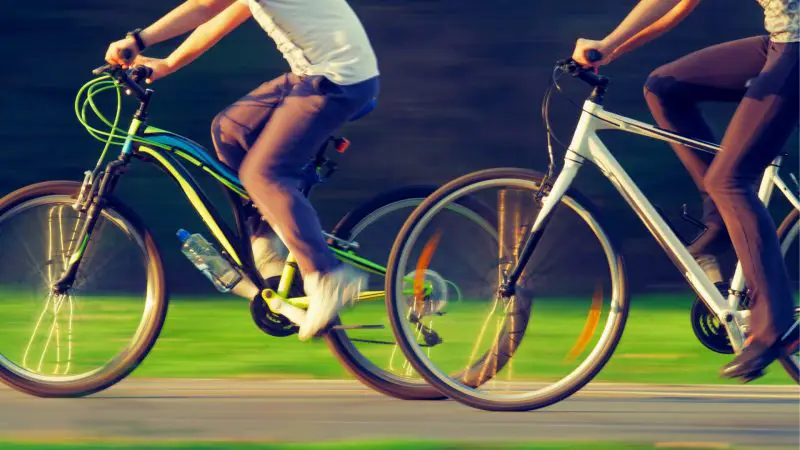
Depending on how you manipulate these three mechanisms, your camera’s sensor is getting exposed to more or less light thus making your image brighter or darker and different details in the image will become more or less visible.
It is important that we understand how to tweak these mechanisms in your camera especially shutter speed in order to create great looking blurred action photos.
Shutter speed is the length of time that your camera shutter will open and close to allow light into the camera sensor and capture a scene.
Shooting a photo with a really fast shutter speed will result to a very sharp and precise image, and even if the subject of the photo is moving, it will look like it’s frozen in place. Shooting with a slower shutter speed of a moving object will capture that motion, thus causing motion blur to that part of the scene that is moving.
What Camera Settings to Use for Motion Blur?
If you got used to taking photos of partially static objects like leaves of trees, flowers, or other things that will move in the slight ruffle of the wind, you would want to adjust your shutter speed, make it faster to say 1/1600 of a second so to freeze any motion that the subject might do and remove any blur that might be caused by camera shake.
You would want landscape images to be as sharp as possible and you don’t want to introduce blur and noise due to many elements in the scene that might move while you’re shooting the image, so you’re going to use pretty fast shutter speed.
But consider this: how about when you take a picture of a race car zooming fast?
Take a look at the photo below:
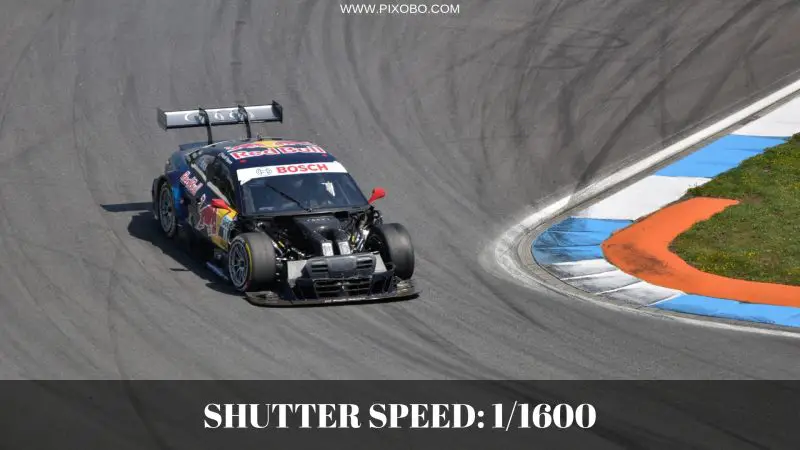
In this example, we can see a photo of a race car running on a race track which was shot at a really fast shutter speed of 1/1600 which is why it seems the car’s motion and the background is frozen. If you examine carefully, it is only implied that the car is running fast, but it is hard to say how fast the car is running or if the car is moving at all and just parked there.
Now let’s take a look at another photo:
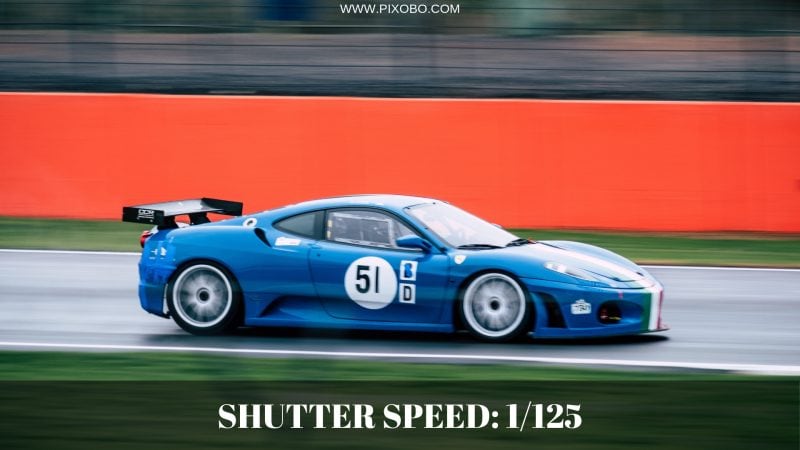
See the difference?
This photo was shot at a shutter speed of 1/125 of a second which is pretty slow compared to the speed of the race car. You can see that the image of the race car is almost sharp, but the background is completely blurred towards the direction the race car is heading. Unlike the first photo, you can easily tell that the race car is moving at a fast pace and you can feel a sense of speed and excitement due to motion blur that was incorporated while shooting the photo.
Also learn how to take amazing motorcycle photography.
Let’s take a look at another example:
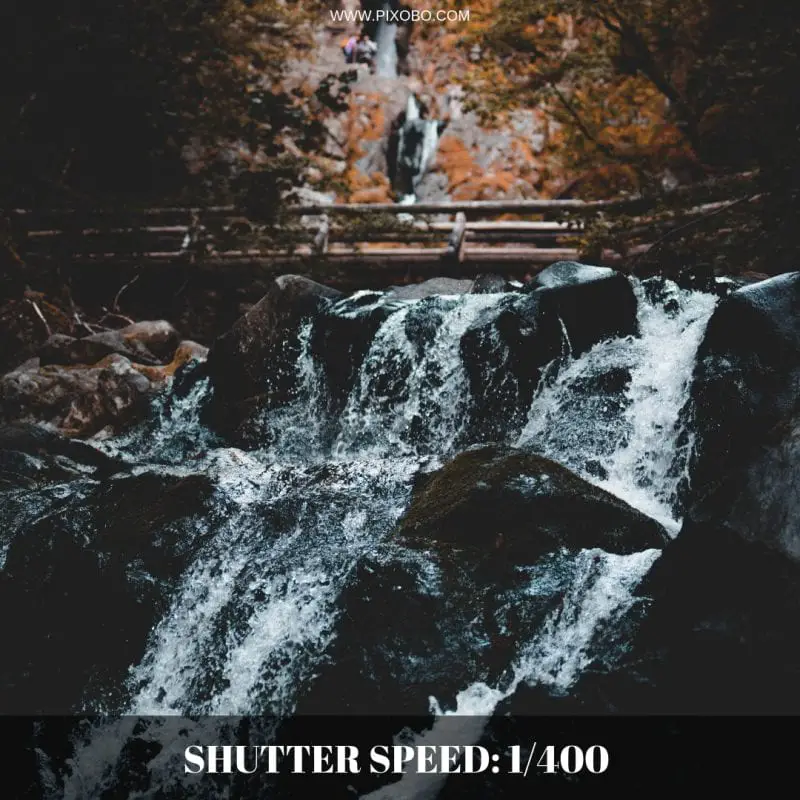
In this photo, we can see water flow out of a waterfall. Shot from a pretty fast shutter speed of 1/400 of a second, everything in this photo is completely still – the rocks, the trees, the flow of water. We can even see the droplets of water that are otherwise not visible with the naked eye.
Shooting scenes like this with a fast shutter speed has its purposes, but take a look at a pretty similar photo which is rather shot using a very slow shutter speed:
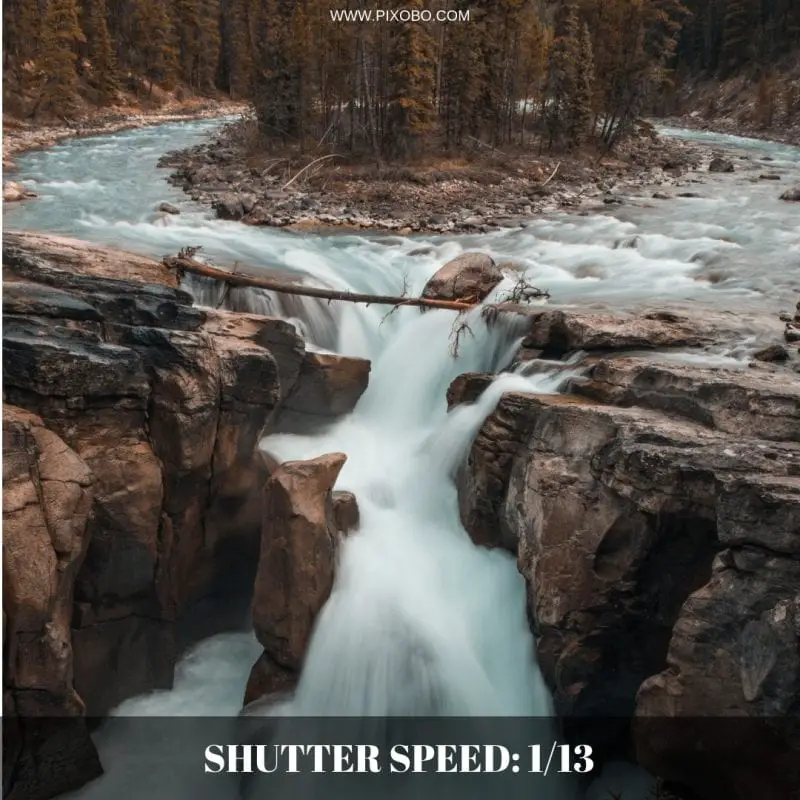
This one was shot at 1/13 of a second which is really slow. Can you see the difference of emotion conveyed between the two photos of similar subjects? In this photo, the subject which is the water flow and even the splash of water is completely blurred while the elements in the background like the trees and rocks are pin-sharp. Here you can actually feel the flow of water is serene and full of life.
But Why Would You Want Motion Blur in the First Place?
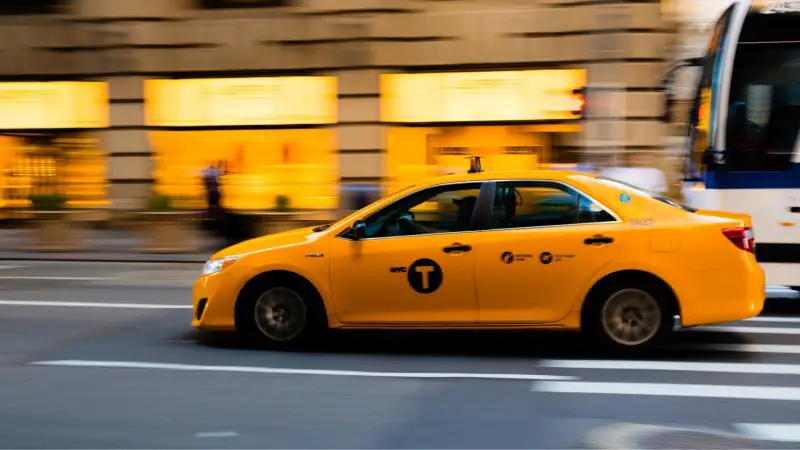
The goal of movement photographers for taking blurred actions photos, for the most part, is simply adding a sense of speed and movement to a subject. It can also show a long stretch of time like the photos of a busy street and the sky below:
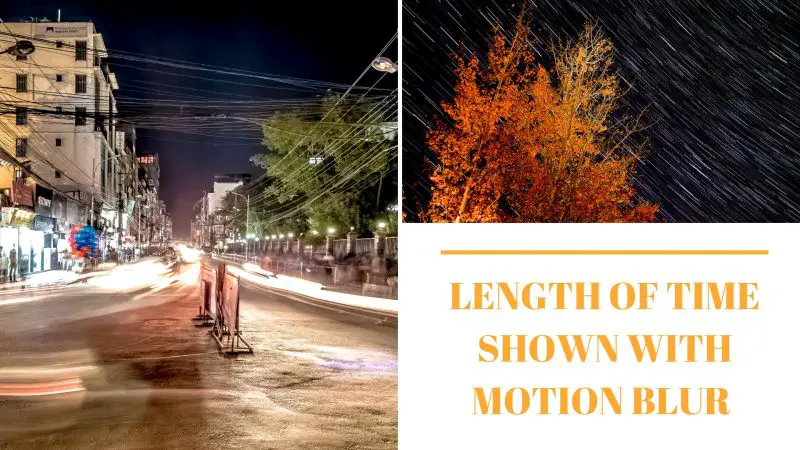
Another reason to use motion blur is to isolate a subject from other moving elements in the scene or eliminate elements that may distract the viewer from the subject. Also, movement can also convey mood and emotion like in the images below:
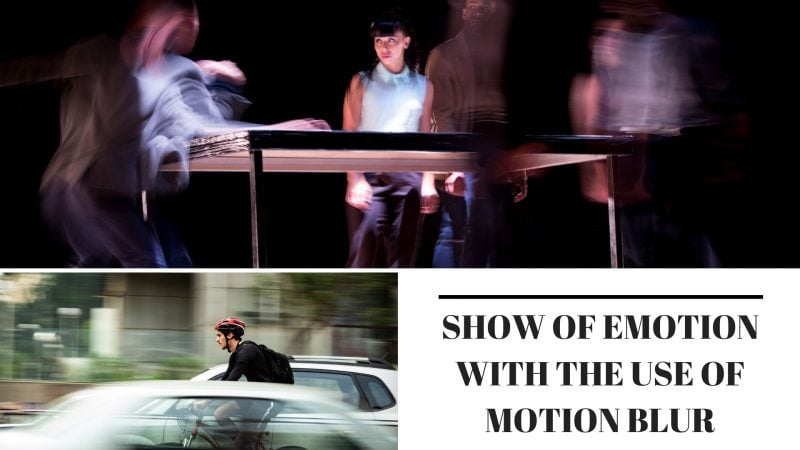
Remember that to make motion blur images effective; there should be at least one element in the image that is kept in focus. Though there are abstract images out there in which everything is blurred, they are very rare and quite difficult to make them visually appealing.
There are two different approaches to achieve these results:
- Keep the subject in focus and blur everything else
- Blur the subject and keep everything else in focus
These two methods might be on the opposite side of each other, but they are similar in that they both use slow shutter speeds.
So you might ask, how slow should the shutter speed be in order to take blurred action photos?
Well, there is rarely a single answer to that question. It really depends on the motion you’re trying to capture, how fast or slow that motion is and your objective or desired result.
So the key to all of this is experimentation. Play with your shutter speed settings until you get your desired final image as different settings lead to dramatically different results.
Method 1: Keeping The Subject in Focus and Blurring Everything Else
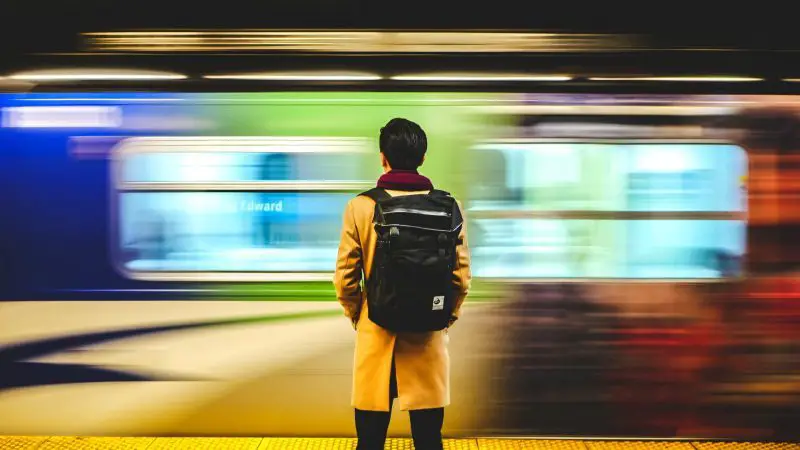
Remember the race car photograph earlier?
This type of motion blur is achieved through panning. This technique keeps your subject as sharp as possible while blurring everything in the background conveying the subject’s movement.
To achieve this, the slow shutter speed needs to be used. However, instead of keeping your camera still like what most photographers do, you’ll be moving your camera in the same direction and at the same rate as your subject.
In our race car example, to achieve this kind of result, you’ll need to have a clear view of the race car and pan along with the same direction as it goes, matching its rate of movement. This is more difficult than it sounds and it will take some time for you to pull it off correctly, but once you’ve mastered how to do it, it will be a very valuable photography skill in your repertoire.
Here are some tips on how to effectively execute panning in order to create visually appealing blurred action photos:
-
Experiment with different shutter speeds.
Set the Mode dial on your camera to Shutter Priority Mode or Tv in Canon cameras. There is no precise answer to how much shutter speed is needed for a correct shot, but as a piece of advice from some movement photographers, start from 1/30 of a second and move up from there. Don’t lower your shutter speed too much to keep your subject sharp.
-
For best results, choose a subject that moves in a relatively straight trajectory.
This allows you to predict where they will be going.
-
Make sure to have enough room to swivel your camera or your body to move your camera.
You don’t want to start panning just to be abruptly interrupted when you hit someone with your elbow right? Especially in a crowded environment like an audience seat, keep in mind the movement of your body while keeping your focus on your subject so position yourself where you won’t be obstructed by anyone or anything.
-
Keep your hands steady and make sure to keep the subject at the same portion of the frame during the entire shot.
Yes, not as easy as it sounds but you need to practice this in order to be successful. Try with something slower first like track-and-field runners before you try out on faster objects like race cars. Remember, the faster the subject is moving, the harder it will be to shoot through panning.
-
Use a tripod with swivel if you have one.
Especially if you’re having a hard time keeping your hands steady. Take note that this can only be applied for subjects that move in a straight plane like race cars. For sports and action shots that are unpredictable, you don’t have any other choice but to hold your camera with your hands.
-
If your camera has Vibration Reduction or Image Stabilization functionality, by all means, use it.
This function helps tremendously in making panning more consistent and producing better motion blur images. Vibration Reduction feature usually has two settings to choose from: Normal and Active. Use Normal for most panning situations.
The only situations where you will use the Active option are when you are shooting from a moving vehicle, or you are shooting an object with a somewhat unpredictable movement like shooting a horse rider that has up and down movement as the horse gallops.
-
If your camera doesn’t have fast auto-focus, half-press the shutter button early.
Start half-pressing that shutter button as the subject approaches. Position something or someone on the spot where your subject will appear and pre-focus on it. Once your subject passes through, change your focus settings to manual (to keep your camera from re-focusing mid-shot) and make sure to keep the subject on that same part of the frame while panning.
-
Don’t stop panning even after you’ve released the shutter button.
This will ensure the sharpness of the subject and the smoothness of the motion blur from start to finish.
-
Shoot a lot of images and don’t give up.
Don’t be surprised if you shoot 20 or 30 images and you only get one good shot while the rest are a blurry mess. Use Burst shooting mode to take several images in a row while holding down the shutter button, hoping that at least one of those shots is a keeper.
Also, be patient and practice a lot. It can be quite frustrating at first, but it’s a lot of fun once you start getting the good shots. Start practicing in scenes like race events where there are objects that do a lot of repetitions or busy streets where there is a never-ending supply of moving objects.
Don’t worry too much if the subject doesn’t end up as sharp as you want it to be. Sometimes blurring the main focus of the image can add to that emotion of speed.
Method 2: Blurring The Subject and Keeping Everything Else in Focus
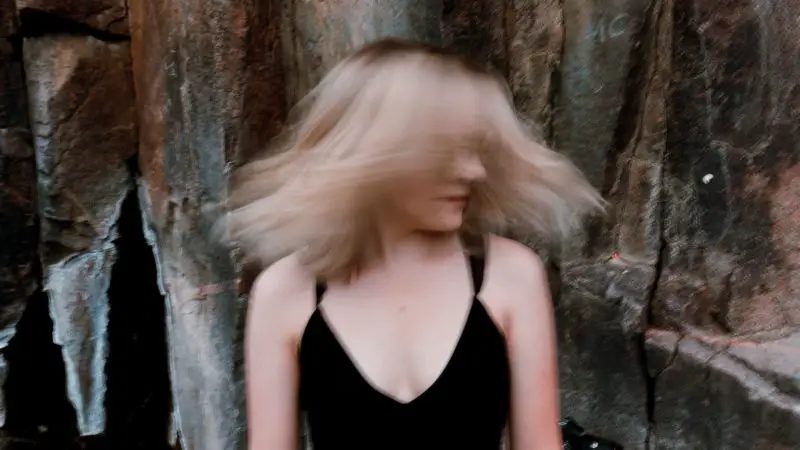
This is probably the most common for capturing movement and is much easier than panning. For this method, there is no other way but to use a tripod. Keep in mind that you’ll most likely use very slow shutter speeds, so handheld methods will usually end up with a blurry mess.
But when done right, the result will be similar to the waterfall photos example above – the moving subject is blurred while the rest of the image remains sharp.
This method can create amazing and stunning results that it created a new method of photography called Long Exposure. Long exposure photography uses some really slow shutter speeds, ranging from a few seconds to a few hours.
It is commonly used to produce motion blur images from objects that move very slowly like the clouds from the daytime sky and the stars during the night.
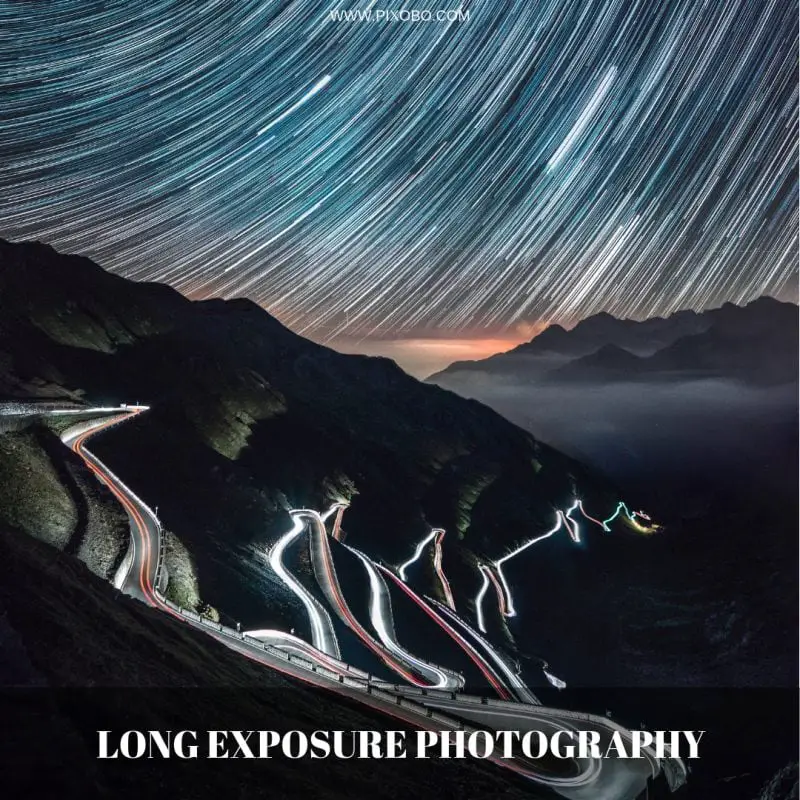
There are two things you must notice in this picture which is taken with an exposure of a couple of minutes. The first thing you notice are the stars in the sky created circular streaks of light due to long exposure. Another thing to note here is the streaks of light on the road, which are actually headlights from the vehicles that became pretty much invisible, again because of long exposure.
Related: A Lesson in Long Exposure Landscapes
Here are some tips to achieve the best results in using this method:
-
Set the Mode Dial of your camera to Shutter Priority Mode or Tv in Canon cameras.
This mode will let you manually set the right shutter speed for your scene, and your camera will automatically choose other settings like aperture and ISO to ensure that the image is well exposed. Again, like in the panning method, it is hard to tell how slow your shutter speed needs to be, so keep on playing with your shutter speed settings until you get your desired result. Depending on the speed of movement of your subject, start with a shutter speed of 1/30 and lower it from there.
-
Watch out for overexposure.
Especially for long exposure photography, you’re gonna be using really slow shutter speeds, much slower than shutter speeds used in panning method which means you’re letting in light for a longer period of time. That means you’re risking your final image to be overexposed especially when shooting in broad daylight.
This is where adjusting aperture and ISO comes in. Sometimes leaving your camera to adjust these parameters automatically just doesn’t cut it. You have to set your camera to Manual Mode in order to tweak these parameters.
Camera Settings: Aperture/ISO
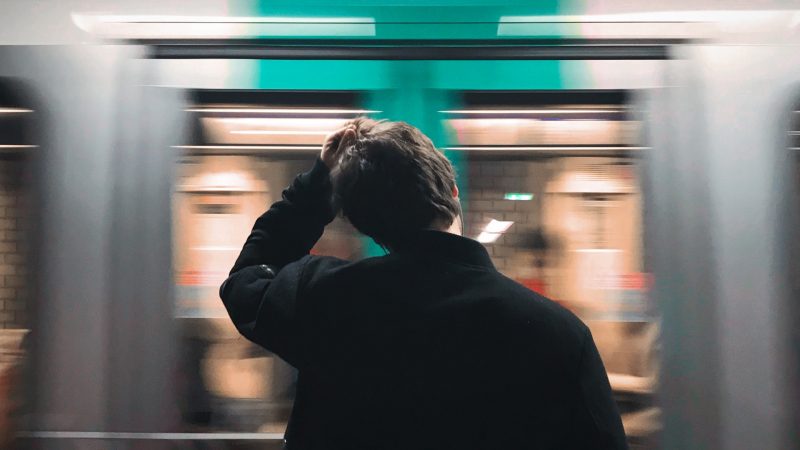
Aperture is the iris of your camera. It’s a series of interlocking blades that creates a circular opening that can be made bigger or smaller. Similar to our own eyes in which depending on the amount of light present in the scene, the iris controls the pupil of our eyes in order to control the amount of light entering and reaching the retina.
The dimmer it gets, the larger the pupil becomes to let in more light and vice versa. Aperture is measured in f-stops, e.g f/5.6. The larger the number, the smaller the aperture gets the lesser light that gets through your camera. In daylight settings, it is important to keep your aperture high in order to limit the amount of light that gets through your lens thus avoiding overexposure.
On the other hand, ISO is the measurement of the sensitivity of your camera’s image sensor to light. Higher ISO values mean higher sensitivity to light resulting to a brighter image. Be careful when using higher ISO values though, as this may introduce noise to your images. Using a pretty slow shutter speed at broad daylight, you need to keep your ISO to a minimum (around ISO100 will suffice).
Adjusting these two parameters will allow you to compensate for slow shutter speeds when there is too much light.
-
Tripod is your best friend.
This goes without saying, but in order to keep your background in focus, you need to be perfectly still. The only way to achieve this is through your sturdy tripod.
-
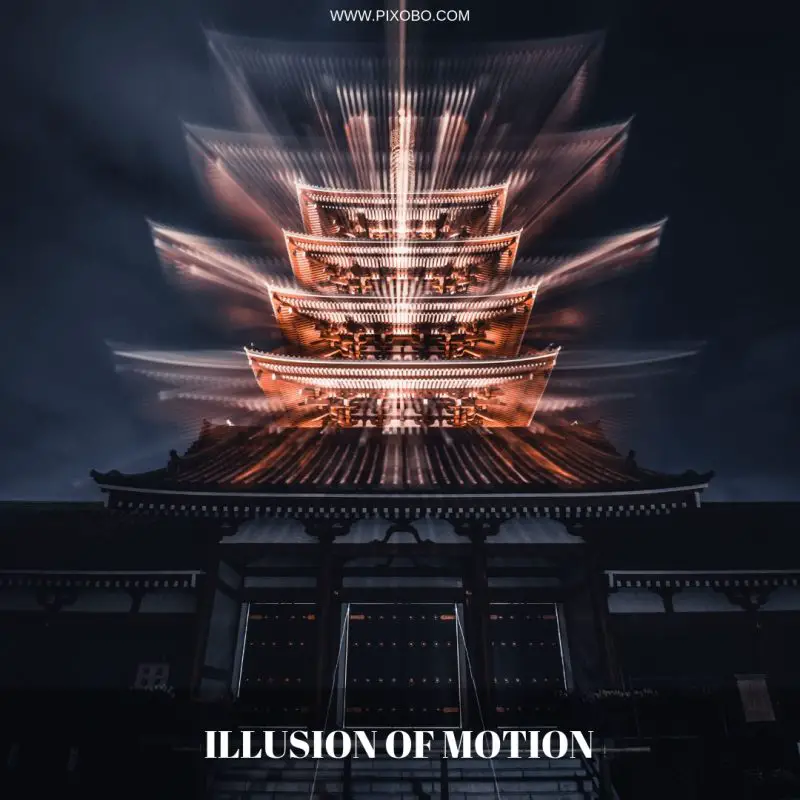
For static objects, try zooming in to create an illusion of motion.
This is another technique you can try out when shooting long exposure shots. Basically, you physically rotate your lens to change its focal length in the midst of exposure. The result is an illusion of motion from a rather still object like the castle lights in the photo below:
-
Try using Neutral Density Filters.
Sometimes even manually adjusting your aperture and ISO isn’t enough during long exposure shots during the day, your resulting images are still overexposed, and sometimes glare and light leaks will make way and totally mess up your shots. This is where Neutral Density (ND) filters come in. Think of a ND filter as sunglasses for your camera – this will reduce the amount of light even further during those long exposure shots.
Motion blur photography needs a lot of practice and doing trial and error in order to be successful. Keep playing with your parameter settings and always aim to improve for each bad shot that you take.
Remember, the fulfillment and satisfaction it brings to you as a photographer is incomparable whenever you produce those stunning and breath-taking images like in our examples above. This is definitely one of those valuable skills to keep improving as a photographer, and it is all worth it.
Related: 5 Tips for Taking Great Action Shots of Kids
