Quick answer: For most studio work, shoot in Manual mode at ISO 100, set your shutter speed to your camera’s flash sync speed (around 1/160–1/200s), and pick your aperture by subject — f/2.8–f/5.6 for portraits with a soft background, f/8–f/16 for products that need to be sharp front-to-back. Set white balance manually to about 5500K and shoot RAW. The rest of this guide explains why, and gives exact settings for portrait, product, fashion, food, and action work.
The studio is the one place in photography where you control everything — light, distance, background, timing. That control is what makes consistent, professional results possible, but it also means the camera settings are on you, not the weather. Get the core five right and the studio becomes predictable.
Table of Content
The five settings that matter in a studio
Before the per-subject numbers, understand the five controls you’ll actually adjust. If any of these terms are new, our guide to the basic parts of a camera explains each one. Studio settings are simpler than outdoor ones precisely because the light isn’t changing under you.
1. Shoot in Manual mode
When you’re working with flash, the camera’s automatic metering can’t read the burst of strobe light before it fires, so auto and semi-auto modes guess wrong. Switch to Manual (M) and set exposure yourself. It’s the one non-negotiable for studio flash.
2. Keep ISO at 100
You have full control of the light, so there’s no reason to raise the sensor’s sensitivity and invite noise. Use ISO 100 as your default. If a shot is underexposed, add light or open the aperture before you touch ISO — raising flash power costs you nothing in image quality, while higher ISO costs you detail. Only push to ISO 200–400 if you genuinely can’t add more light. For cleaning up the rare high-ISO frame, a good noise-reduction tool helps.
3. Match shutter speed to your flash sync speed
This is the setting most people get wrong. With studio strobes, your shutter speed must stay at or below your camera’s flash sync speed — typically 1/160s to 1/250s depending on the body (1/200s is a safe default). Go faster than sync speed and the shutter curtain is still partly closed when the flash fires, leaving a black band across part of the frame.
Here’s the part that trips up beginners: with flash as your main light, shutter speed does not freeze your subject — the flash does. A studio strobe’s burst lasts a fraction of a millisecond, far shorter than any shutter speed, and that brief pulse is what stops motion. Your shutter speed mainly controls how much ambient room light mixes in. Want to push past sync speed (say, to kill bright ambient light)? You’ll need a flash system that supports High-Speed Sync (HSS), which many studio strobes don’t. (For ambient-light blur questions, see our guide to the slowest usable shutter speed.)
4. Choose aperture by subject
Aperture controls depth of field — how much of the scene is sharp. Remember that a smaller f-number is a wider aperture (f/2.8 is wide and shallow; f/16 is narrow and deep):
- Portraits: f/2.8–f/5.6 for a shallow depth of field that separates the subject from the background. Stop down to f/8–f/11 when you want the whole face tack-sharp, as in commercial headshots.
- Products: f/8–f/16, so the entire product stays in focus front to back. This is the opposite of portraits — product shots need deep depth of field, not blur.
- Groups: f/5.6–f/8 to keep several people across a row acceptably sharp.
5. Set white balance and shoot RAW
Most studio strobes are daylight-balanced at roughly 5500K. Set a custom Kelvin value to match, or use the “Flash”/”Daylight” preset, rather than leaving the camera on Auto White Balance, which can drift between frames. For mixed lighting (strobe plus tungsten or LED), photograph a grey card and set a custom white balance from it. And always shoot RAW — it preserves far more tonal and color data than JPEG, so you can correct exposure and white balance in post without degrading the file.
Ideal camera settings by studio photography type
The five principles above flex by subject. Here’s where to start for each common type of studio work — then refine by checking your histogram.
Portrait photography
Portraits live and die on light and focus. Start in Manual at ISO 100, shutter at 1/160s (sync speed), and aperture around f/5.6 — wide enough for a soft background, narrow enough to keep both eyes sharp. Drop to f/2.8 for a dreamier look, or stop down to f/8–f/11 for a crisp, commercial headshot. A short telephoto lens (85–135mm) gives the most flattering perspective. New to portraits? Our portrait photography tutorial covers the fundamentals.
Product photography
Product work is about sharp, accurate detail, so depth of field is your priority. Manual mode, ISO 100, shutter at sync speed (1/160s), and a narrow aperture of f/8–f/16 so the whole product is in focus. A 50–100mm macro lens captures fine texture without distortion. If you sell what you shoot, our list of the best websites to sell photography is worth a look.
Fashion and editorial photography
Fashion and editorial images run in magazines, so they have to be sharp and cleanly lit. Manual, ISO 100, shutter at sync speed (1/160–1/200s — not 1/800s, which would band with strobes), and aperture f/5.6–f/11 depending on how much of the outfit and set you need in focus. A 50–135mm lens covers most looks. Light shapes the mood here more than any single setting, so invest your attention in modifiers.
Food photography
Food rewards detail and the right angle. Manual, ISO 100, shutter at 1/125–1/160s, and aperture f/5.6–f/11 to hold the whole dish in focus — drop to f/2.8–f/4 only when you want a single hero element sharp and the rest soft. A 50–100mm macro lens is ideal for close work. Good light, low ISO, and a tripod will do more for a food shot than any clever setting.
Action photography
You can shoot motion in the studio, and how you do it depends on your light source:
- With studio strobes: the flash freezes the motion, so stay at ISO 100 and sync speed (1/200s). Set your strobes to a lower power — shorter flash duration freezes faster movement. Aperture f/4–f/8.
- With continuous light only (no flash): now shutter speed does the freezing. Raise it to 1/500s or faster, open the aperture (f/2.8–f/5.6), and push ISO up as needed to keep exposure. This is the one studio scenario where high ISO is justified.
For more on freezing movement, see how motion blur works.
Studio camera settings cheat sheet
Starting points for each type — all in Manual mode, RAW, white balance ~5500K. Adjust to your meter and histogram.
| Type | ISO | Shutter | Aperture | Lens |
|---|---|---|---|---|
| Portrait | 100 | 1/160s (sync) | f/2.8–f/11 | 85–135mm |
| Product | 100 | 1/160s (sync) | f/8–f/16 | 50–100mm macro |
| Fashion/Editorial | 100 | 1/160–1/200s (sync) | f/5.6–f/11 | 50–135mm |
| Food | 100 | 1/125–1/160s (sync) | f/5.6–f/11 | 50–100mm macro |
| Action (strobe) | 100 | 1/200s (sync) | f/4–f/8 | 70–200mm |
| Action (continuous) | 800–3200 | 1/500s+ | f/2.8–f/5.6 | 70–200mm |
Lighting and gear that make the settings work
Settings only get you halfway; in the studio, the light does the heavy lifting.
Modifiers: softbox vs umbrella
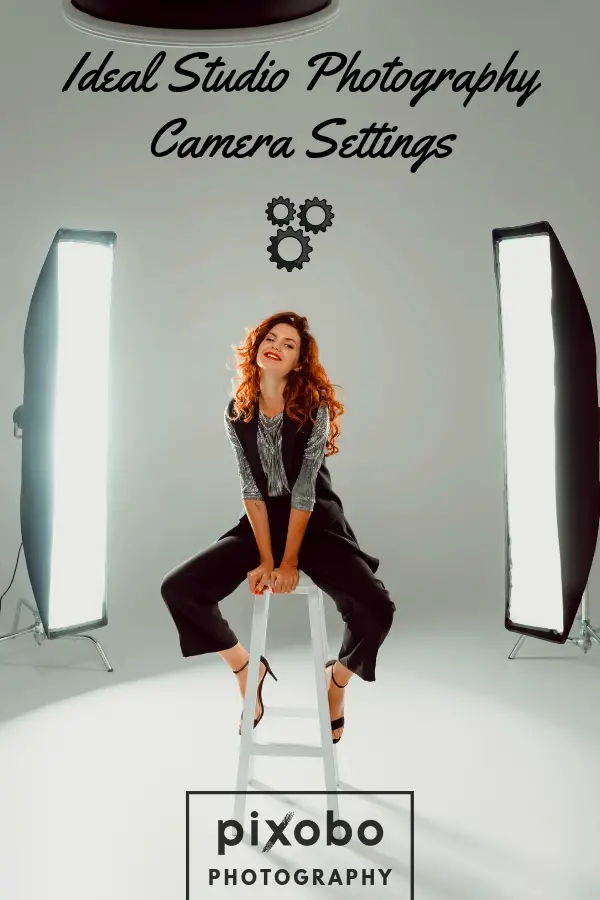
A bare strobe is harsh, so you shape it with a modifier. A softbox gives controlled, directional soft light and is the studio standard — its enclosed shape keeps light off the background unless you want it there. An umbrella is cheaper and more portable but spills light everywhere, which is harder to control. Start with a softbox for portraits and products.
Reflectors and triggers
A reflector bounces light back into the shadows to soften contrast — a cheap, essential tool that comes in white (subtle), silver (punchy), and gold (warm). Wireless flash triggers fire your strobes reliably without sync cords: mount the transmitter on your camera’s hot shoe and a receiver on each light.
Lenses and camera bodies
Lens choice depends on subject distance and the look you want. Wide-angle (24–35mm) suits tight spaces and groups; standard and short-telephoto (50–135mm) flatter portraits and product detail. The most versatile single lens for studio work is a 24–70mm f/2.8 zoom. For bodies, any modern full-frame DSLR or mirrorless camera handles studio work well — resolution and dynamic range matter more than speed when your subject is lit and still. See our lens picks for Canon, Sony, and Olympus, or browse our recommended gear.
Working with models
Camera settings are only part of a portrait or fashion shoot — a relaxed, well-directed model is what makes the image. A few things that consistently help:
- Brief first. Talk through the concept, mood, and a few key poses before you pick up the camera, so you’re both telling the same story.
- Build rapport. A few minutes of conversation produces more natural expressions than any pose you can dictate.
- Direct clearly. Give specific, visual cues — “chin down slightly,” “weight on the back foot” — and demonstrate the pose yourself if it’s quicker.
- Show and adjust. Share a frame or two on the back of the camera; positive feedback keeps a model confident and engaged.
Quick troubleshooting
- Black band across the frame: your shutter speed is above flash sync — drop it to 1/160–1/200s.
- Photos too dark even at the right shutter: raise flash power or open the aperture; leave ISO at 100.
- Colors look off or shift between shots: set a manual white balance (~5500K) instead of Auto, or shoot a grey card.
- Part of the product is blurry: your aperture is too wide — stop down to f/11–f/16.
Frequently asked questions
What ISO should I use for studio photography?
ISO 100 in nearly all cases. You control the light in a studio, so add flash power rather than raising ISO. Only push to ISO 200–400 if you can’t add more light, or higher when shooting action under continuous light without flash.
What shutter speed works with studio flash?
Stay at or below your camera’s flash sync speed — usually 1/160s to 1/250s, with 1/200s a safe default. Faster shutter speeds cause a black band unless your flash supports High-Speed Sync.
What aperture is best for studio portraits versus products?
Portraits: f/2.8–f/5.6 for a soft background, or f/8–f/11 for a sharp commercial look. Products: f/8–f/16, so the whole item stays in focus.
Should I shoot in Manual mode?
Yes. Automatic modes can’t meter the flash burst before it fires, so they misjudge exposure. Manual mode gives you the consistent, repeatable results studio work needs.
RAW or JPEG for studio work?
RAW. It keeps far more exposure and color information, which makes correcting white balance and recovering highlights or shadows in post much easier.
Glossary
- Aperture: the lens opening that controls how much light enters and how much of the scene is in focus. Smaller f-number = wider opening = shallower depth of field.
- Shutter speed: how long the sensor is exposed, in fractions of a second. In flash photography it mainly controls ambient light.
- ISO: the sensor’s sensitivity to light. Higher ISO brightens the image but adds noise.
- Flash sync speed: the fastest shutter speed at which the whole sensor is exposed while the flash fires — exceeding it causes banding.
- White balance: the setting that keeps colors neutral under a given light source, measured in Kelvin (K).
Studio photography rewards practice more than gear. Lock in the core five — Manual, ISO 100, sync-speed shutter, subject-appropriate aperture, manual white balance in RAW — then experiment from that foundation until the settings become second nature.