Smartphone cameras are easy to use. They are convenient and we are able to shoot great photos with a device that can fit in our pocket. Still, these cameras have a lot to offer in terms of available settings and even multiple cameras. Of course, wherever we have a plethora of options, we are bound to make some mistakes.
People who use their smartphone cameras every day, don’t realize the mistakes they are making, yet they don’t know why their photos are of low quality.
Today, we’re going to point out the 6 most common mistakes that everyone does while using their phone cameras.
Table of Content
6 Most Common Phone Camera Mistakes Everyone Does
1. You Fail to Recognize the Subject

Numerous times, it happened to me that I see a photo on Instagram with the plain blue sky. And I always ask myself „what is the subject in this photo?“ It’s not that I hate sky shots. In fact, I absolutely love them but they also require some effort. At least have the sun up in the sky or some clouds in order to have a subject. Remember that the photo should carry some kind of a message with it and if the photo is without the subject, then the message simply isn’t there. You need to be able to take a look at your photo and immediately tell your audience what it’s about.
How do you remedy the situation?
Well, just look at the example above, the one about the sky. Would it be interesting to look at the sky without some clouds or sun? It’s boring. The same applies to other situations. If you’re taking a photo of a beach, don’t go just for the sand or the sea. Instead, have a couple of subjects there. It could be palms, people, a hut, a lifeguard station, etc. These subjects will point out to the viewer where to look and will immediately give your photo a significant quality boost.
Related: Basic Tips for Taking Good Photographs
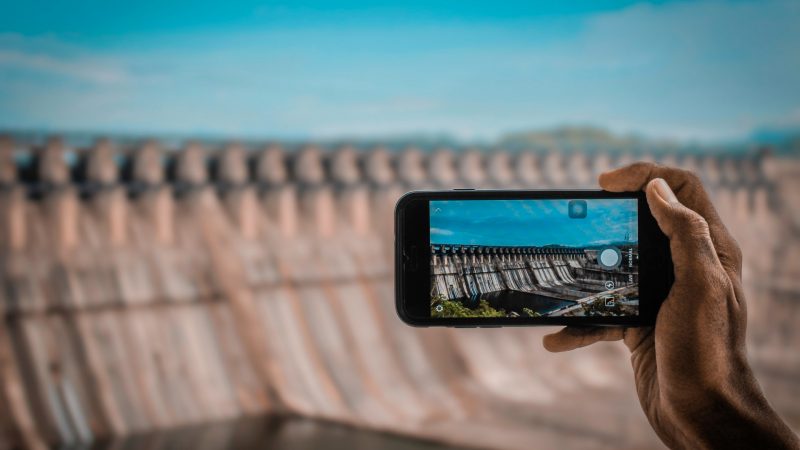
2. Your Photos are Out of Focus
This is the most annoying mistake that we all make at some point with our phone cameras. Smartphone cameras aren’t as reliable as a full-fledged DSLR. In that regard, the focus might wobble, especially if we’re talking about the cheaper phone cameras. This results in blurry selfies or even out of focus photos with landscapes or portraits.
Our phones will just refuse to properly focus on the subject – at least in some cases. Thankfully, 99.99% of the phones allow you to manually focus on the subject. When you’re in your camera app, simply tap on the object/subject you want to focus on, and the situation will be under control. Sometimes, the focus will not work and this is usually connected to a specific case – macro photography.
When it comes to macro photography, smartphones aren’t exactly the most capable devices. Trying to shoot too close to the subject will lead to a photo that is extremely blurry, your eyes are going to hurt from looking at it for the next two days. Obviously, this is an exaggeration but you got the point. For those who love macro photography and want to have that sharp camera focus even at the shortest distances should probably take a look at our review of a Huawei P30 Pro, a first phone that is suitable for macro photography. This phone is expensive but it’s worth every dollar, especially for photographers.
Related: How To Take Good Photos With Phone
3. Absence of Proper Exposure
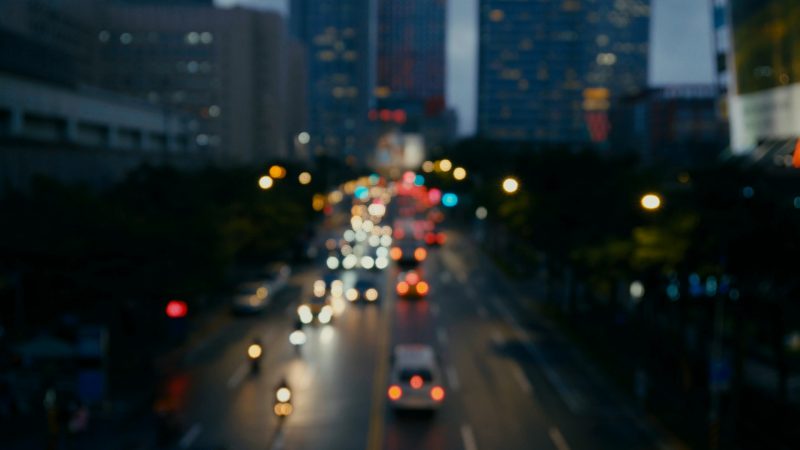
Proper exposure is very important for quality shots. If a photo is overexposed, it will turn very bright and lose all the details in the process. In contrary, an underexposed photo is very dark and once again, all the details are lost in vain. You can notice this feature when pointing the phone camera outside, from your window. What happens then? Well, the phone needs some time to expose the photo properly. You go from a properly exposed photo to underexposed photo, and after a second or two, you can clearly see what’s outside the window. This also happens with the human eye. If you’ve spent a lot of time outside during the day, coming inside into a dark room makes it twice as dark – and vice versa.
The fix for this mistake is rather simple. Let your phone adjust the exposure automatically. Wait a few seconds before taking a shot and everything should be good. The point is not to shoot at the exact second you pull out your phone. If the exposure can’t adjust itself, then turn the subject to the other side and play with the lighting a bit. If that’s not good enough, you’ll need to fiddle around with ISO and aperture. In many cases, this is not needed and applying the first two solutions almost always works.
Related: What Is The Best Time For Outdoor Photography?
4. Mediocre or Bad Night Shots
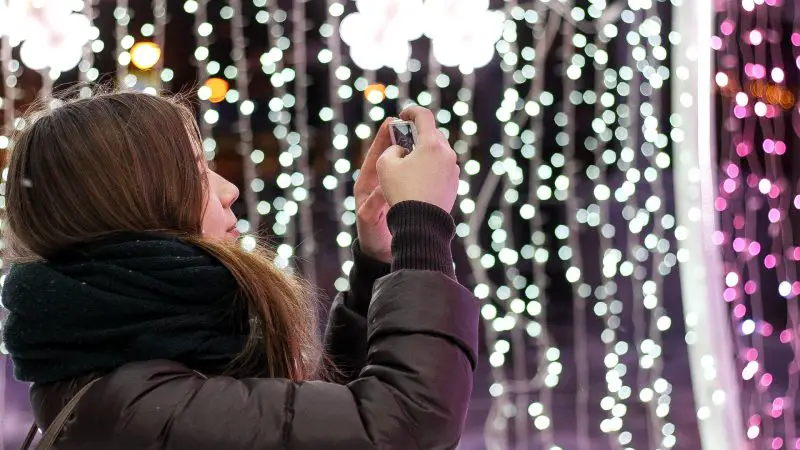
One thing where DSLR significantly beats a smartphone is the night photography. Sure, we have some brand new flagships that can take stunning night photos but a DSLR has a huge sensor that simply is a better solution for night photos. Now, you can say that you don’t have a flagship phone and that is a reason why your night shots are bad. You may be right but many mid-range phones now have a night mode that can produce some nice looking photos. During the night, the aperture opens more in order to let in more light, which results in bad exposure. Once again, the analogy with the human eye. The pupils expand in the dark and shrink during the day.
In the low-light conditions, you can try several solutions. The first is to bump up the ISO setting. The higher the ISO, the more your camera will be sensitive to light. This will also reduce the blur by the camera shake. Next, turning your HDR mode on can also be a solution but not every phone has it. For those who have this option, this will take a couple of shots at different exposures and combine them for a final result. Since the camera snaps a few shots, remember not to change anything on the photo before the processing is done. Subjects should stay in the same place, as well as your camera!
Finally, you can turn on the optical stabilization. I know, I know, only flagships have that but it should definitely make a huge impact on the low-light photo quality.
Related: The Ultimate Night Photography Guide for Beginners
5. Inappropriate Background

When we focus on one thing, we usually forget about other things. That’s how it is with real life and in photography. For that reason, a background behind your subject can drastically ruin or improve the photo. Then, when you take a photo, you will see that your subject looks quite good but there’s a lot of stuff in the background that distracts the viewer from the subject. In that case, you’ve made a mistake! There are a couple of solutions for this. First, you can choose the right background. If you have a slight bit of talent for photography, you’ll most likely know where to put your subject.
Now, have you heard of the Bokeh effect?
It’s a nice blur effect that surrounds your subject, which blurs the background and puts the focus on the subject. Thankfully, every smartphone has the ability to produce a buttery-smooth Bokeh. You can turn it on by selecting the Portrait mode and stand a bit closer to the subject. This will blur the background, making the subject the center of the photo. Use this option if you don’t have a good background.
Related: Better Pictures with Bokeh Effect, Blurred Background Photography
6. Using the Flash

Don’t use the flash. Please. Many people think that using a flash produces a better image. Yet, you are going to have a stunningly-bright light that blinds you and makes your face and eyes ugly. It just makes the photo look unappealing and unnatural. This also applies to portrait shots. Don’t EVER use flash in that case. Instead, find a place with better lighting and shoot the portraits there.
Now, why is there a flash on the phone, then? There are multiple reasons. For example, you can take a photo of literature. In this case, it looks much better when the flash is used, compared to a photo without flash. The flash is here to make the photos look brighter but it’s not suitable for putting those photos on social media. Another alternative is to use it as a flashlight, in order to avoid stepping into your dog’s poop while you’re coming home drunk from a Friday night party.
Related: 5 Reasons Why Some Phone Cameras Are Better Than A DSLR Camera
As you can see, these smartphone camera mistakes are quite easy to fix. You don’t have to be a nuclear physicist to properly expose your photo, to find the right background or to tap on a screen to focus on the subject. Of course, the quality of your photos will drastically depend on the smartphone but you should always squeeze every bit of performance out of the given phone camera.
That way, you’ll master the smartphone photography and you won’t have a problem using any phone for that purpose. If you are looking for what to photograph check our 30 Creative Photography Ideas for Beginners: Get Creative With Different Photography Styles.
Also, check out our list of the best smartphone cameras for photography in 2019.