Industrial photography is one of those photoshoots where safety comes first and good photography comes second — deliberately. Since you are working next to machines that can easily crush you, think twice before going for that creative composition. “Is it safe?” should follow a reaction like this: “Wow, this is an awesome idea for a great shot!” Look around and be aware of your surroundings: where your attention is and where it should be. Safety, if not taken seriously, can have lasting consequences. If you are standing close to machines, once they start working there is usually no quick way to stop them. It takes time to power them off, and a small accident can easily become a serious one. Maybe that danger and the adrenaline that comes with it explains why some people love industrial photography so much — but we still need to be careful. It is also one of the better-paying commercial fields, so it is worth seeing where it ranks among the most profitable photography niches.
Safety Comes First

Your personal safety is the top priority. You also need to show viewers that the site follows safety rules and that the people in your images are protected. Industrial photography has unique challenges. While portrait, landscape or event photography let you capture emotion directly from people, industrial scenes often rely on machines, textures and process to tell a story. How do you create a story when the actors are inanimate? Is it even possible? Yes — but safely and deliberately. To make this practical, here is a concise on-site safety checklist you can use and adapt for every shoot. Keep it printed and review it with the client/site contact before you set up.
-
Required PPE: Hard hat, safety glasses, high-visibility vest, steel-toe boots, hearing protection (as required), gloves. Confirm any site-specific PPE with the site contact.
-
Permitted and Restricted Zones: Ask the site contact to mark permitted photo zones and no-go areas. Never cross marked barriers without an escort and written permission.
-
Emergency Contacts: Get the site manager’s name, phone, and nearest on-site first aid/medic. Note facility emergency number and local emergency services access points.
-
Lockout/Tagout Verification: For shots near energized machinery, confirm with the site rep whether lockout/tagout (LOTO) is required and who authorizes it. Do not place equipment in or near machinery unless LOTO is confirmed in writing.
-
Spotter/Assistant: When your camera or body will be in risky positions, assign a trained spotter to observe your workspace and hold a safety line if needed.
-
Fall and Overhead Hazards: Confirm rigging points, overhead crane paths, and exclusion zones for lifted loads.
-
Power and Fire Safety: Know where power shutoffs, fire extinguishers, and evacuation routes are located.
-
Insurance & Permits: Verify insurance certificates and required site permits before shooting (see the Permissions & Insurance section below).
This checklist is short but focused — go over it with the site contact before any gear is unpacked. If any of these items are unsettled, delay the shot. Industrial photography has its own visual language. Your job is to show experience and tell a story to viewers who usually won’t be on-site: investors, managers, clients, or the public. Your images should communicate scale, process, organization and — when appropriate — warmth. Below are practical tips and expanded checklists to help you prepare for a reliable, professional shoot.
What Your Client Wants and How to Plan For It
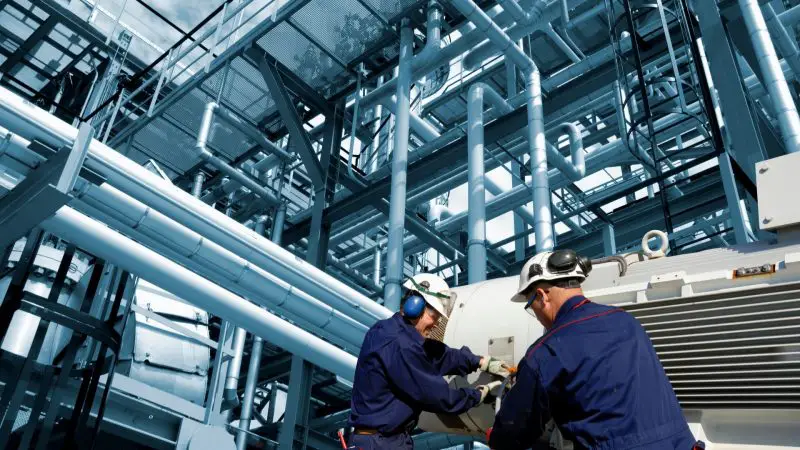
Your story will largely depend on who hired you and how the photographs will be used. Typical uses include product catalogs, company websites, investor pitch materials, or internal reports. Rarely, you may be asked for artistic images for a gallery or internal display. The purpose should change how you shoot. Here are three concise sample shot lists tied to common client goals — use them as a starting point and adapt to the brief.
-
Catalog (product-focused)
-
Close-up of product detail (texture, serial plate)
-
Product on the production line with operator handling it
-
Clean isolated product on neutral background
-
Product in packaging or final assembly step
-
Scale shot showing product relative to a person
-
-
Website hero (brand & facility)
-
Wide shot of the production floor showing activity
-
Hero portrait of a lead operator in PPE
-
Detail shot of a critical machine lit for drama
-
Environmental shot of the site exterior or key infrastructure
-
Team shot for about-us pages
-
-
Investor pitch (process & scale)
-
Sequence of process steps (5–8 images showing stages)
-
Close-ups of proprietary machinery or control panels
-
Shots showing throughput and scale (wide with people for context)
-
Quality control checks and packaged output
-
Data/metrics overlay images (photo plus infographic-ready frames)
-
A short client-brief template you can use to align expectations:
Client Brief Template (one paragraph to share quickly): Objective: (e.g., website hero images to show scale). Deliverables: (number of final images, formats, resolution). Style references: (three example images or links). Timeline: (shoot date, first draft delivery, final delivery). Approval process: (client contact for shot approval, rounds of revisions). Special requirements: (insurance, LOTO, PPE, confidentiality).
If the client agrees to this on email, you’re aligned. If they don’t, keep clarifying before you arrive.
Practical Pre-Shoot Scouting
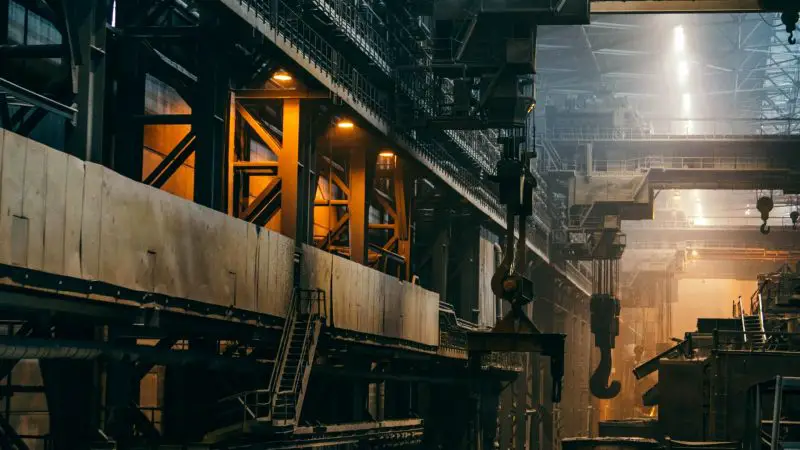
Go to the area beforehand without your full kit so you aren’t distracted by shooting. This is time to observe, measure and plan. Here’s a photographed-location scouting checklist to make the time useful:
-
Light sources: natural windows, skylights, fluorescent banks, tungsten lamps — note direction and color temperature.
-
Hazards: moving machinery, hot surfaces, slippery floors — map them and mark safe camera positions.
-
Power availability: note outlet locations, voltage, and where extension cords can run safely.
-
Rigging/anchoring points: beams, bollards and tripod-friendly surfaces for cranes and elevated gear.
-
Staging areas: where you can set lights, cases, and a clean change area for wardrobe swaps.
-
Access and traffic patterns: peak shift times, forklift routes, and breaks in production where shots are possible.
-
Cell reception and Wi‑Fi: if you need to upload or tether images on site.
Recommended gear checklist for lighting and power management to bring when you return with the camera:
-
Battery-powered strobes or LED panels (with spare batteries)
-
Light stands and sandbags (for safety)
-
Extension cords, power strips, and GFCI adapters
-
Diffusers, gels, and C-stands
-
Grip tape, gaffer tape, and cable covers
-
Reflectors and flags
Always confirm where you can run cords and place stands — never run a cable across an active walkway unless it’s covered and signed off by the site safety officer.
1 – Always Try to Use the Company’s Logo
When appropriate, include the company logo on safety gear or signage visible in the frame. It helps establish brand identity and conveys organization. Don’t fake logos or add them in post without client approval.
2 – Be Prepared to Get Dirty (Professionally)
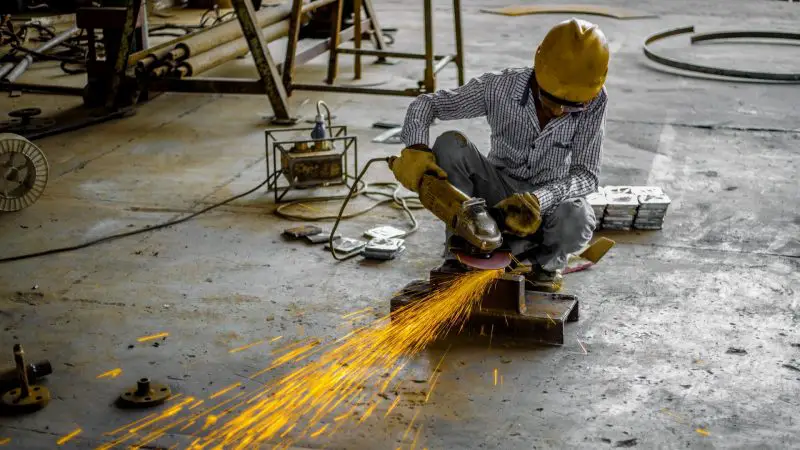
Industrial locations are messy. Wear durable clothing you don’t mind getting dirty. Bring extra clean working clothes for staged shots so your subjects can look neat for marketing images. Crouch, kneel, or lie down when necessary — but always use a pad or knee protection and confirm with a spotter if you’re close to moving parts.
3 – Connect the Work Area to the People
Show workers using tools and equipment that belong to their role. Authenticity matters: don’t hand props to someone whose job wouldn’t use them. If you need a staged action, explain it clearly and get the worker’s consent and the site’s written permission.
4 – Always Show Appropriate Safety Gear
Include helmets, safety glasses, gloves, and other PPE in your frames. These details reassure viewers about workplace standards. Subtle composition — a helmet in the foreground, a first aid kit in the background — can communicate safety without being didactic.
5 – Scout the Location (detailed above)
We already gave a scouting checklist. Use it. Note lighting, hazards, power and rigging points. Plan where your stands and generators will go before you bring them in. If you can, create a small site diagram and mark the shot locations.
6 – Make a List of Your Desired Process
Work with an on-site operator who can walk you through the production steps. Ask what runs when and whether there are slow or paused periods you can exploit. If you only have a day or two on-site, a staged shot list tied to the process will save time.
Permissions, Permits and Insurance (short checklist)
-
Client clearance: written permission from the company or site manager to photograph on location.
-
Site waivers: any release forms for workers appearing in images.
-
Insurance confirmation: provide proof of liability insurance and confirm minimum coverage if requested by the client.
-
Permits: confirm if the facility or local authority requires filming permits; secure them in advance.
-
Contact list: site contact for day-of authorizations and emergency procedures.
Carry digital copies of all approvals and insurance certificates on your phone and in your kit.
7 – Look for Interesting or Unusual Angles
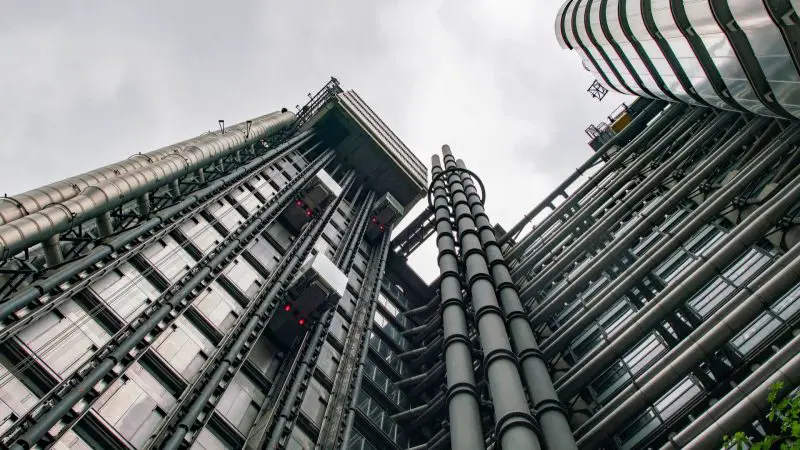
Try viewpoints from high and low: bird’s-eye, frog-eyes, and mid-level near the process. A crane or small camera jib can add a new dimension to typical footage. If you plan to use cranes or elevated platforms, follow these best practices:
-
Confirm rated rigging points and load limits with site engineering.
-
Use a certified operator for any mechanical lift and keep a safety perimeter below the lift path.
-
Secure equipment with appropriate safety cables and secondary tethers for any elevated camera.
Quick mounting and tethering best practices for elevated gear
-
Always use rated carabiners, safety straps and a secondary tether in case the primary mount fails.
-
Attach tethers to structural points confirmed by site staff — not to temporary or painted surfaces.
-
Test all mounts on the ground and document the mounting method in case of incident review.
8 – Use Action Cams to Capture First-Person Views
Small action cameras like GoPros are useful for tight or mobile angles where a full camera isn’t practical. But action cameras still need safe mounting and good data capture practices. Consider these best practices:
-
Mount to a stable, approved harness point and use a secondary tether. Never rely on adhesive mounts alone when life or expensive gear is on the line.
-
When mounting to moving equipment, confirm with the site rep that mounting will not interfere with machine operation or violate warranty or safety rules.
-
Use remote triggering or secure your recording to continuous power if you expect long takes and want consistent frame capture.
-
Keep redundant capture (a simultaneous handheld or tripod-mounted camera) for important frames in case of data loss.
These measures reduce risk and increase the chance of usable footage.
9 – Move the Camera Around
Static GoPro placements are useful, but moving the camera — handheld, on a gimbal or with a slider — helps show depth and scale. Video can complement stills where process and motion are central. For still images, move between wide environmental frames and tight detail shots to give clients choices.
10 – Use Light to Create Highlights
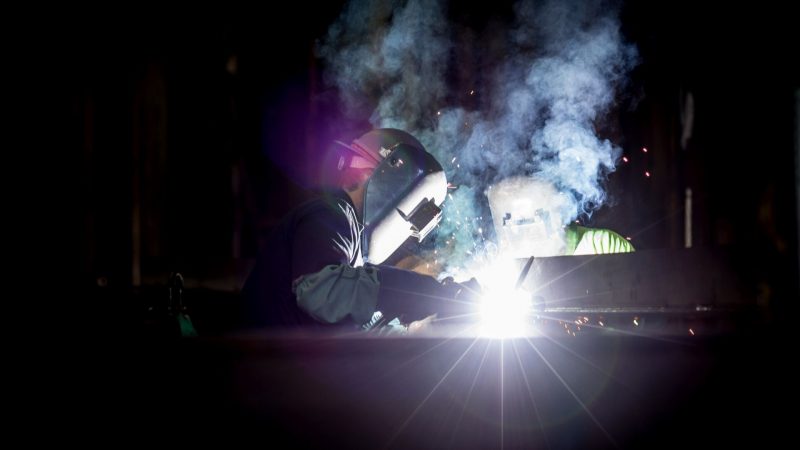
Light makes machines and tools sing. Use a fill light to establish even exposure, then add a focused highlight to emphasize a tool, a control panel or the worker’s hands. Below are technical exposure recommendations for common industrial conditions. These are starting points — always test and adapt on site.
-
Poor light (dark interior, little ambient): Aperture f/2.8–f/5.6, Shutter 1/125–1/250s (to freeze motion), ISO 800–3200 (depending on camera), White balance: 3200–4000K for tungsten or set custom. Use LED panels or strobes as fill and accent lights.
-
Mixed light (windows + fluorescent): Aperture f/4–f/8, Shutter 1/125s, ISO 200–800, White balance: shoot RAW and set to Auto or custom Kelvin after test shots; use gels to balance color temperature between sources.
-
Bright workshop (good ambient light): Aperture f/5.6–f/11 for depth of field, Shutter 1/125–1/500s, ISO 100–400, White balance: daylight or custom; add small off-camera flashes for punch.
Technical camera settings guidance (compact):
-
Aperture: Use wider apertures (f/2.8–f/5.6) for selective focus on details; stop down (f/5.6–f/11) for environmental and group shots to keep more of the scene sharp.
-
Shutter speed: Freeze motion with 1/125–1/500s depending on worker movement and conveyor speeds. For slow shutter creative blur, secure all safety approvals and use tripods and remote triggers.
-
ISO: Keep as low as practical to reduce noise; modern cameras can handle 800–3200 ISO in low light, but test for acceptable noise levels for the client’s deliverable size.
-
White balance: Prefer RAW + custom white balance or Kelvin adjustments on the camera. In mixed lighting, use gels to correct for dominant color casts and shoot a gray card when possible.
-
Shoot mode: Use continuous / burst modes for sequences of actions and single-shot for composed portraits or detailed product stills. Tether when practical for immediate review.
For faster setup, see the quick-start presets below.
Quick-Start Technical Settings (three scenario presets)
-
Poor light interior (no strobes): Aperture f/2.8–f/4, Shutter 1/125–1/250s, ISO 1600–3200, Lighting: high-CRI LED panel + reflector.
-
Mixed light with strobes: Aperture f/5.6, Shutter 1/125s, ISO 200–400, Lighting: key strobe with gelled fill to balance window light.
-
Bright workshop with natural light: Aperture f/5.6–f/8, Shutter 1/200–1/500s, ISO 100–200, Lighting: small off-camera flash for rim light/highlight.
11 – If You Plan to Stage or Destroy Products, Get Written Approval
Staged destructive shots (breaking, cutting or otherwise altering product) can be eye-catching, but they also carry ethical, legal and safety risks. Replace vague instructions with clear requirements:
-
Obtain written client permission that specifically allows staged or destructive photography. The permission should state what will be done, who is responsible, and who will absorb material losses.
-
Get a site safety sign-off: work with the safety officer to document procedures, LOTO needs, and emergency steps before any destructive action.
-
Limit destruction to materials pre-approved for disposal or samples the company has set aside. Never destroy in-use inventory or customer property without formal authorization.
For example: “Imagine the client wants a dramatic shot of a product being stress-tested.” You would request a signed approval form that lists the test, the materials used, the safety plan, and the personnel who will supervise. Do not proceed without that documentation.
12 – Always Bring Extra Clean Working Clothes
This helps you stage productively neat shots for marketing. Bring multiple sizes and PPE options for workers who might appear on camera. Keep labeled bags for dirty and clean gear.
13 – Be Pleasant, Persistent and Clear

Approach workers politely and explain the shot. A short script you can adapt works well:
“Hi — I’m [Your Name], the photographer today. We’re aiming for a few quick shots of this step. Could I show you how I’d like you to position your hands? It’ll only take 2–3 minutes and I’ll make sure you’re safe and comfortable. Thanks — I appreciate your help.”
Small courtesies go a long way. Explain why you need a specific pose and how it helps the company’s image. Never coerce workers to stop their tasks; schedule brief pauses when production allows.
14 – Use More Than One Camera and Recommended Lenses
Multiple cameras with different lenses increase your options and reduce reshoot risk. Choose lenses based on the job:
-
16–35mm (ultrawide): For sweeping environmental and facility interior shots that show scale.
-
24–70mm (standard zoom): Versatile for mid-range environmental portraits and detail shots; fast and flexible.
-
70–200mm (telephoto): For compressed perspective, isolating machinery detail or shooting from a distance where you cannot approach.
-
Macro or 90mm: For extreme detail on small parts and textures.
Use different lenses on different bodies so you capture a wide, a mid and a tight perspective simultaneously. This saves time and ensures you don’t miss a critical moment.
15 – Post-Production Deliverables and a Simple Checklist
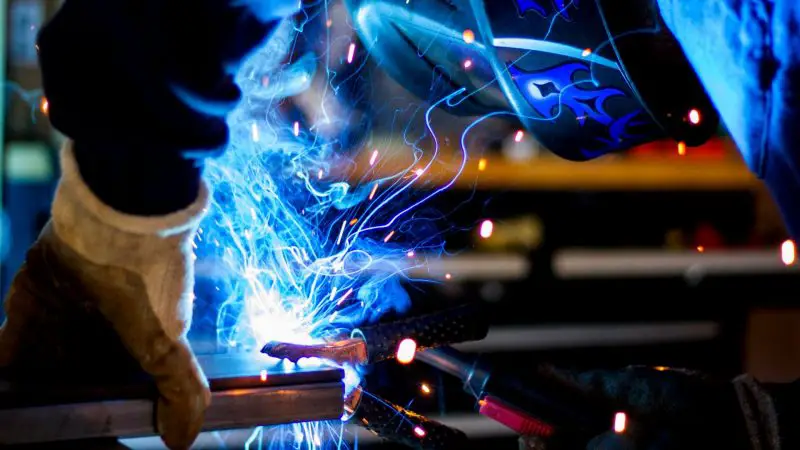
Clients often expect finished files ready to use. Discuss post-production scope in the brief and provide a simple deliverable checklist:
-
Color correction and white-balance consistent across the set.
-
Cropping and composition to client-specified aspect ratios.
-
Retouching level: remove minor blemishes only; retain realistic textures unless the client requests otherwise.
-
File formats: JPEG for web, TIFF or high-quality JPG for print; provide original RAW files only if agreed.
-
Naming convention and folder structure: agreed-upon format for easy client ingestion (e.g., client_project_location_shotnumber).
These items reduce confusion and speed approvals.
16 – Use Colored, Translucent Sheets Thoughtfully
Colored, translucent sheets can introduce mood and separation in a metal-heavy environment. Use them to add color accents or diffuse harsh light, but keep the look intentional. Avoid overuse; clients often prefer authentic-looking images rather than stylized scenes unless that look is part of the brief.
We hope these expanded tips, practical checklists and tech presets will help you plan safer, more efficient and more effective industrial photoshoots. Review the safety checklist before each shoot, confirm permissions and insurance, and bring the right lenses and backup cameras. Small preparation pays off. Also, check our basic tips for taking good photographs.