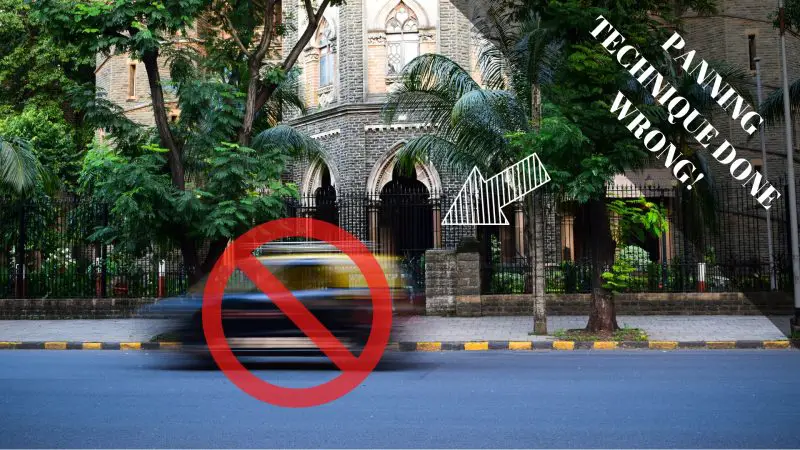
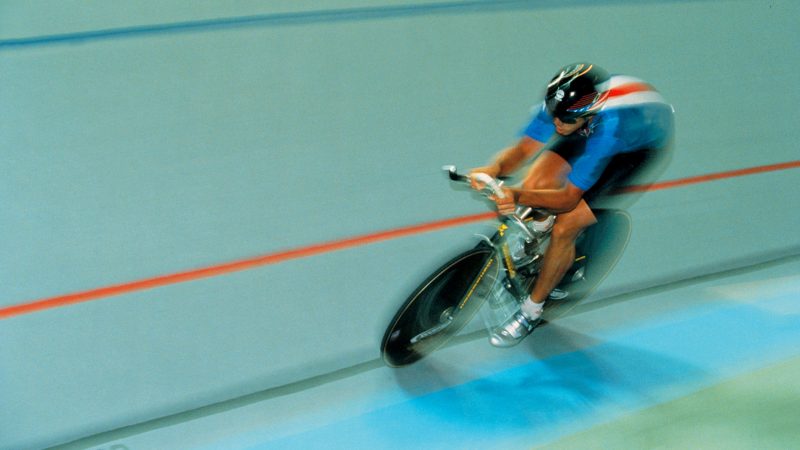
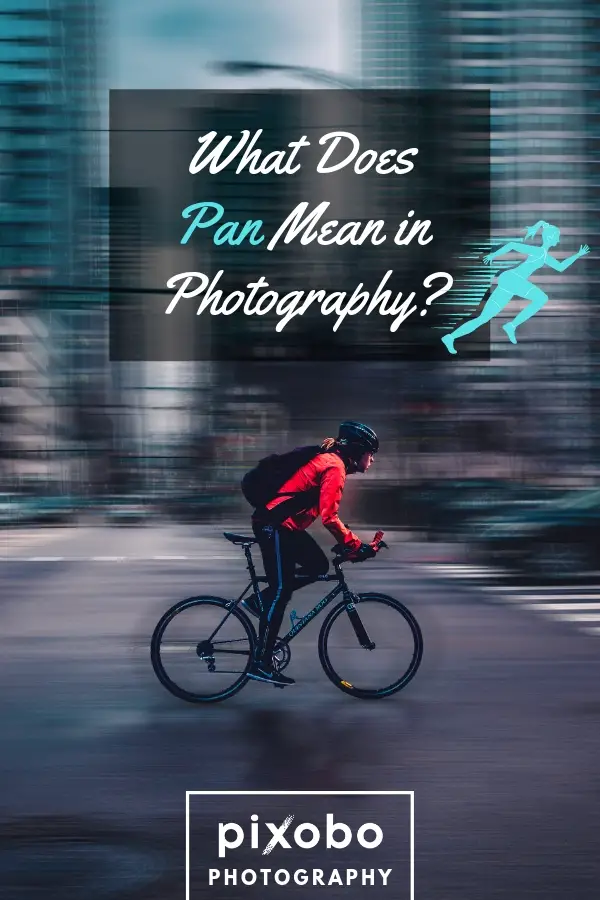
Panning in photography means moving your camera horizontally to follow a moving subject while you take the shot. Done right, it keeps the subject sharp while the background blurs into streaks — so the photo feels like motion and speed. Panning is a slow-shutter technique: you deliberately pick a shutter speed slow enough to blur the background (roughly 1/30 to 1/250 of a second, depending on how fast the subject is moving) and then track the subject smoothly through the frame.
It is the classic look you have seen in racing shots: a car or motorcycle pin-sharp against a background smeared into horizontal lines. Below is exactly how it works, the shutter speeds to start from, and the step-by-step technique to nail it.
Table of Content
The Purpose of Panning
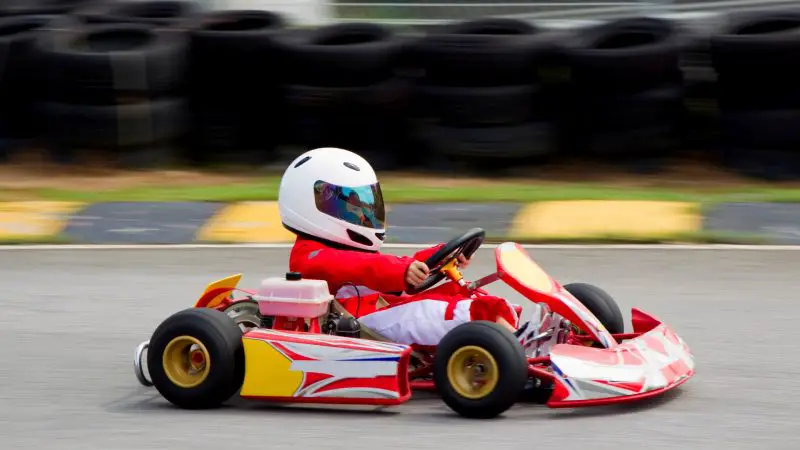
The whole point of panning is to convey motion and speed without losing the details on your subject. A static “freeze” shot of a fast car at 1/2000s can look like the car is parked. A panned shot of the same car at 1/125s keeps the car sharp but streaks the background, so the viewer instantly feels the speed.
The trick is the shutter speed. A slower shutter speed blurs the background more dramatically — but it is harder to keep the subject sharp, because any unevenness in your tracking shows up as blur on the subject too. A faster shutter speed is more forgiving and keeps the subject crisper, but the background blur is subtler. So panning is a balancing act between “enough background blur to show speed” and “slow enough that you can still track cleanly.”
Compare that to keeping the camera completely still on a tripod and using a slow shutter: there you get the opposite — a moving train blurs while the background stays crystal-clear. Both create motion, but only panning keeps the moving subject sharp. (One note on terminology: panning works because you match the camera’s movement to the subject’s, so the subject stays in roughly the same spot in the frame while everything else moves relative to it.)
What Shutter Speed Should You Use for Panning?
There is no single “correct” panning shutter speed — it depends on how fast your subject is moving and how much background blur you want. A good rule of thumb: the faster the subject, the faster the shutter speed you can use and still get a strong sense of motion. Start in the middle of the range below, take a few frames, and adjust.
| Subject | Starting shutter speed | Notes |
|---|---|---|
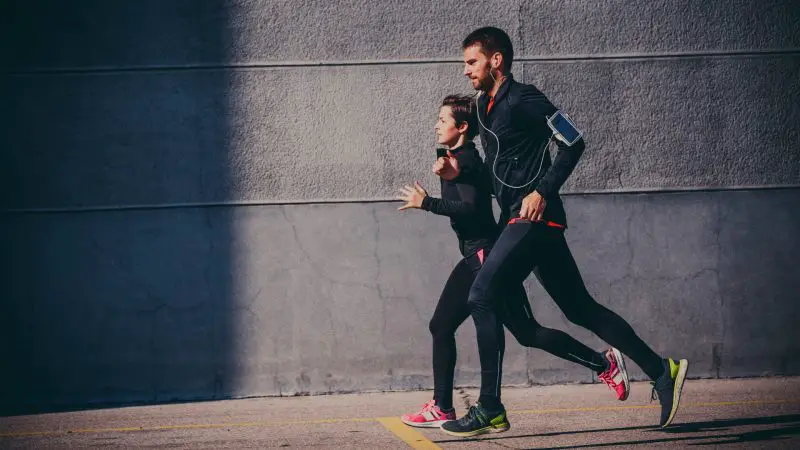
| Walking person / jogger | 1/15 – 1/30s | Slow; needs steady tracking |
| Cyclist / runner | 1/30 – 1/60s | Classic starting point |
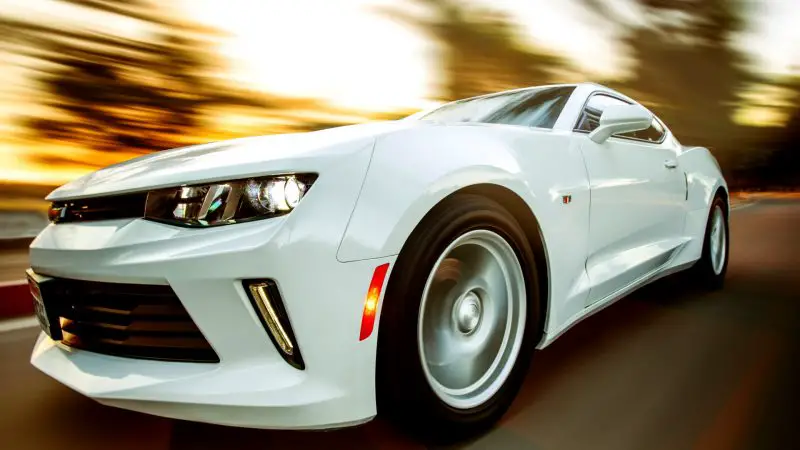
| City traffic / cars | 1/60 – 1/125s | Forgiving, strong blur |
| Fast cars / motorsport | 1/125 – 1/250s | Sharper subject, subtler blur |
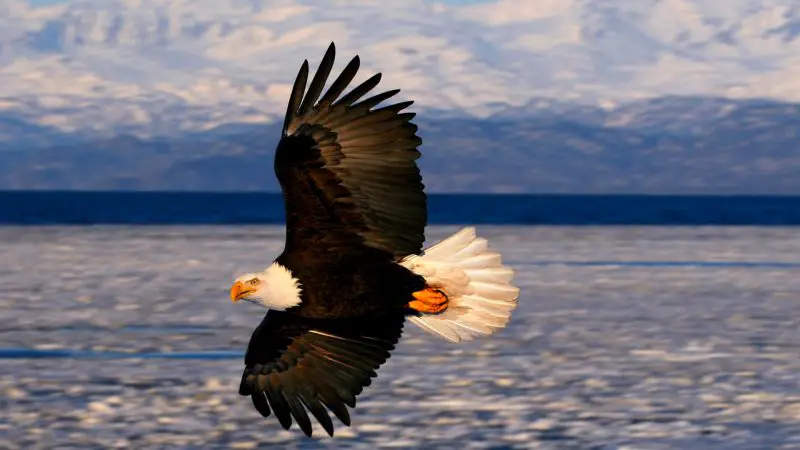
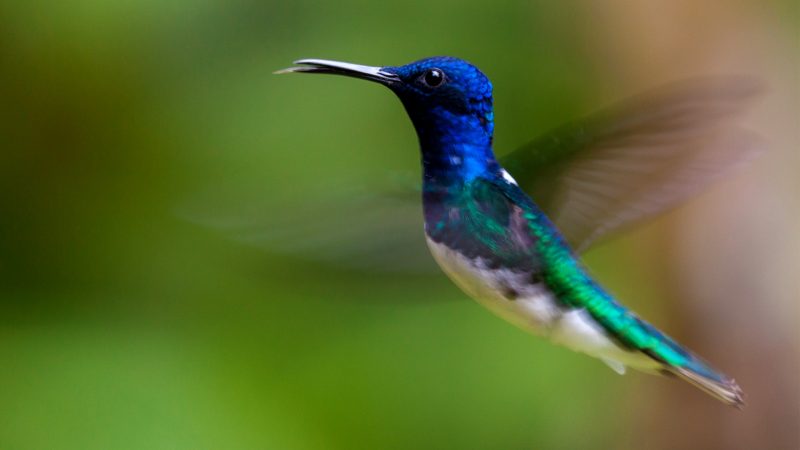
| Birds / trains at speed | 1/250 – 1/500s | Easier to keep sharp |
If your shots come out with the subject blurry too, speed the shutter up a notch. If the background is too sharp and the photo lacks energy, slow it down. To control the shutter speed directly, use Shutter Priority mode (S on Nikon/Sony, Tv on Canon) and let the camera handle aperture, or shoot manual. In bright daylight you may need a low ISO or a polarizing/ND filter to avoid overexposure at these slower speeds.
How to Use Panning in Photography: Step by Step
1. Start With a Slower Shutter Speed
A good all-round starting point is 1/30 of a second. It is not optimal for every subject, but it is a reliable sweet spot for learning the motion. From there, adjust to the subject’s speed using the table above. In low-light conditions with a fast subject you may need to compromise, but most panning lives in the 1/30 to 1/250 range. Go too slow and you will fight camera shake on top of the intended background blur.
2. Use a Tripod or Monopod for Stabilization
The goal of panning is to track your subject steadily on a single horizontal plane and avoid any vertical wobble. If you are following someone on a bike, your camera should move only side to side, never up and down. A tripod or monopod with a fluid, swiveling head helps enormously — especially with a longer lens, which magnifies every shake. For slower subjects you can pan handheld; for very fast ones, support is almost essential.
Related: Shooting Horizontal vs. Vertical Images: A Helpful Guide
3. Don’t Obstruct Your View of the Subject

Keep your subject in clear focus throughout the pan — anything that crosses in front of it adds unwanted blur. A plain, single-colored background also helps: busy backgrounds with lots of strong colors and shapes distract the eye and make the motion streaks look messy rather than clean. Continuous autofocus (AI Servo on Canon, AF-C on Nikon/Sony) set to track the subject makes this far easier than it was on older cameras.
4. Try Flash With Rear-Curtain Sync
For a more creative result, set your flash to rear-curtain (second-curtain) sync so it fires at the end of the exposure. Combined with a slower shutter, this freezes the subject with a crisp pop of light while the motion blur trails behind it — a polished, intentional look. Flash is optional, though: in daylight or the golden hour you usually will not need it, and you rarely need full power.
5. Keep Panning After You Release the Shutter
Press the shutter gently — jabbing at it introduces camera shake — and, crucially, follow through. Keep tracking the subject smoothly even after the shutter has fired, the same way a golfer follows through on a swing. This keeps the motion blur even and smooth from edge to edge, instead of glitchy or jerky at the end of the frame.
6. Anticipate Shutter Lag
Shutter lag is the tiny delay between pressing the button and the photo actually being taken. It is mostly a problem on older cameras and entry-level compacts; modern mirrorless bodies are nearly instant. If you do notice lag, learn to anticipate it — press the shutter a fraction before your subject reaches the spot you want — and keep panning through it.
Is Panning an Advanced Technique?
It takes practice, but it is absolutely something a beginner can learn — you do not need to wait until you are “advanced.” Expect a low keeper rate at first; even seasoned photographers throw away most of their panning frames. The fix is simply reps: shoot a lot, review, adjust your shutter speed and tracking, and shoot again.
Practice on whatever moves near you — passing cars, cyclists, a dog running in the park. The honest truth is that there is no such thing as a single “perfect” pan; the aim is to get the subject as sharp as the conditions allow while the background carries the motion. Get outside, pick a slow shutter speed, and start tracking.
Frequently Asked Questions
What does pan mean in photography?
Panning means moving your camera horizontally to follow a moving subject while the shutter is open. It keeps the subject sharp while blurring the background into motion streaks, giving the photo a strong sense of speed.
What shutter speed is best for panning?
Panning uses a relatively slow shutter speed — typically between 1/30 and 1/250 of a second. Use the slower end for walkers and cyclists and the faster end for cars and motorsport. Start around 1/60s and adjust based on the result.
Why is my subject blurry when I pan?
Usually because your tracking is not smooth or your shutter speed is too slow for the subject. Speed the shutter up a notch, use continuous autofocus, move only on a horizontal plane, and follow through after the shutter fires.
What camera mode should I use for panning?
Shutter Priority (S or Tv) is ideal because it lets you set the shutter speed directly while the camera handles exposure. Pair it with continuous autofocus so the camera keeps the moving subject in focus throughout the pan.