
Instagram remains one of the best places for photographers to show work, attract clients, and build a recognizable portfolio. This article gives nine practical, actionable tips focused on Instagram: how to set up a clear bio, use Stories effectively, choose hashtags that help, schedule posts, prepare images for Instagram’s formats, and convert engagement into bookings. If you photograph professionally or as a serious hobby and want a straightforward plan for Instagram, these steps are written so you can apply them today.
Table of Content
How to Grow Your Photography Business on Instagram?

Start with a simple question: what do you want Instagram to do for your photography? Is the account mainly for lead generation (clients contacting you), portfolio exposure (brand-building), or community (finding peers and collaborators)? You can pursue more than one goal, but naming a primary objective helps you choose images, captions, and calls to action with purpose.
-
Goal: Get local portrait clients — focus on bio, local hashtags, and a clear booking link.
-
Goal: Build an editorial portfolio — prioritize a consistent feed look and storytelling in captions.
-
Goal: Share behind-the-scenes and tutorials — lean into Stories and Reels for process content.
Since Instagram is one of the few media platforms dedicated to photography, it’s a core channel for most photographers. If you currently mix personal snapshots with client work, consider a separate, focused account for your photography business. Use a searchable name — ideally your business name — so potential clients can find and remember you. If you need ideas for naming, see how to name your photography business. Related: Instagram Photography Names: Step by Step Tutorial for Photographers
1 – Instagram Bio! (Switch to a Business Profile)
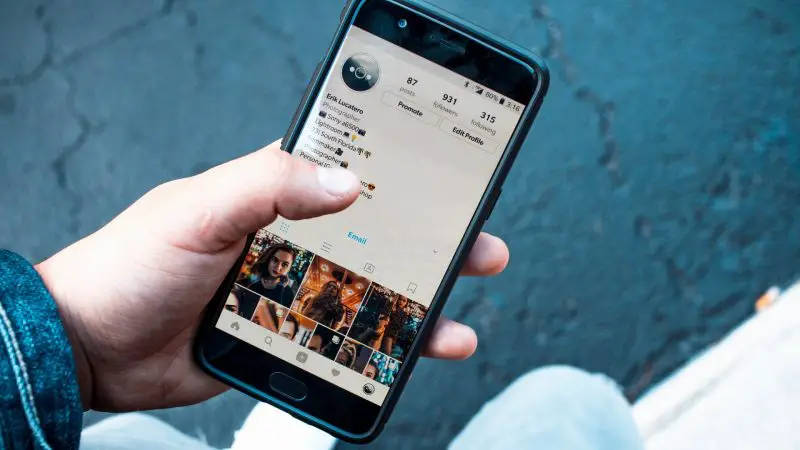
Your bio is not filler; it’s a one-line elevator pitch plus a call to action. Say who you are, what you shoot, and what you want visitors to do next. After reading your bio, a potential client should know what you do, where you’re based (if location matters), and how to book or see more work.
-
Example two-line template: Jane Doe | Portrait & lifestyle photographer
-
Followed by location and CTA: Based in Austin — booking: inquiries & portfolio below
Short, practical tips:
-
Keep it concise: short phrases are easier to scan than long sentences.
-
Limit emoji use: one or two for personality, not for information.
-
Include one clear CTA: Book, Inquire, or Portfolio, and prioritize a single link in the link field.
Concrete bio example you can adapt:
-
“Alex Rivera | Fine art & editorial photographer”
-
“NYC — editorial & portrait commissions”
-
“Portfolio + booking ⬇️” (link field points to your prioritized URL)
How to switch to a business profile and set the photographer title (do these four steps):
-
Open the Instagram app and go to your profile.
-
Tap the menu (three lines) and choose Settings & privacy.
-
Select “Account” then tap “Switch to Professional account” and choose “Business.”
-
Pick the category “Photographer,” set contact options (email/phone), and connect a Facebook Page if offered (optional).
Why this matters: a business profile enables contact buttons, access to insights (analytics), and shows the photographer category on your profile. Use those features to make it easier for clients to reach you. Related: 17 Simple Things for “About Me” Photographer Bio That Your Clients Will Love
2 – Use Stories That Build Interest (Story Template)

When I say “Story,” I mean Instagram Stories — short posts that disappear after 24 hours unless you save them as Highlights. Stories are great for human, ephemeral content: behind-the-scenes, quick tips, polls, and process clips. Save repeatable sequences as Highlights so new visitors quickly see your process and personality.
Reusable Story template (6 items, with suggested durations and CTAs):
-
1) BTS shot (5–10s): short video of the location. CTA: “Want this look? DM for rates.”
-
2) Setup detail (5–8s): lens or light quick clip. CTA: “Ask me which lens I used.”
-
3) Before / after (single image split): show raw vs edited. CTA: “Save this edit tip.”
-
4) Client reaction (5–10s): candid smile or comment (with permission). CTA: “Book a session — link in bio.”
-
5) Quick tip (10s): one practical tip or camera setting. CTA: “Swipe up / link for full guide” (if available).
-
6) Poll or question sticker (throughout): invite followers to vote or ask questions. CTA: “Vote: studio or outdoor?”
Mini example sequence for a portrait session:
-
Slide 1: BTS clip: “Today: golden-hour portraits” (5s).
-
Slide 2: Poll sticker — “Outdoor or studio?” (interactive).
-
Slide 3: Before/after image: “Raw → final edit” (visual comparison).
-
Slide 4: CTA: “Want portraits like these? DM for availability.”
Save these sequences as Highlights with clear labels: BTS, Edits, Clients, Tips. That gives newcomers a quick path to understand your work and process.
3 – Make It Visible: A Practical Hashtag Method (Consolidated Cheatsheet)
Hashtags are discovery tools: they help non-followers find your posts. Random or giant hashtags bury your work. Use a purposeful mix and keep it compact. Below is a 5-point checklist and a local example to copy and test.
-
Pick 3 niche tags with mid-level usage (roughly 10k–500k posts). These get you in front of focused viewers.
-
Pick 2 medium tags (500k–2M posts) for broader visibility without immediate burying.
-
Include 1 branded tag unique to you (business name or campaign tag) and use it consistently.
-
Use 5–8 tags total. Fewer looks cleaner and performs as well or better than dozens.
-
Prefer the first comment for placement if you want clean captions; hashtags in the first comment still work for discovery.
Local example you can adapt for a portrait post: #AustinPortraits (niche), #GoldenHourPortraits (niche), #EditorialPortrait (medium), #PortraitPhotography (medium), #AlexRiveraPhoto (branded).
-
Track tag performance in a simple spreadsheet: date, post link, tags used, new followers, inquiries or notable reach.
-
Rotate tags across posts; don’t use the exact same set every time.
-
Avoid only the largest hashtags (10M+ uses); your post will disappear quickly there.
Related: Best Instagram Photography Hashtags to Use as a Photographer
4 – Image Size, a Clear Export Workflow, and a Simple Posting Schedule

A predictable posting routine helps followers return, and consistent sizing keeps your portfolio looking professional. Below is a copyable weekly posting template and a single, clear export workflow for vertical, square, and horizontal posts.
Copyable weekly posting template
-
Tuesday — Portfolio image (single image). Stories: 1 BTS + 1 tip.
-
Thursday — Client feature or carousel (2–6 images). Stories: client reaction + poll.
-
Sunday — Quick tip, behind-the-scenes, or mini-tutorial (carousel or short Reel). Stories: recap of the week.
Stories frequency: 2–4 short Story posts on scheduled days; add spontaneous Stories for big shoots. This template is a starting point — pick days that fit your schedule and audience.
Quick-reference image size guide (prepare images to these exact pixels before export)
-
Vertical (portrait): 1080 × 1350 px, 72–150 ppi, JPEG quality 80–90.
-
Square: 1080 × 1080 px, 72–150 ppi, JPEG quality 80–90.
-
Horizontal (landscape): 1080 × 566 px, 72–150 ppi, JPEG quality 80–90.
One clear export workflow (use this in Lightroom, Photoshop, or similar):
-
Set canvas/crop to the target pixels above. For Lightroom: use export dimensions with long edge set to 1350 (vertical) or 1080 (square/horizontal) and exact pixel aspect.
-
Resolution: 72–150 ppi is fine for web. Export as JPEG with quality 80–90 to retain detail without excessive file size.
-
Sharpen for screen: apply mild output sharpening for “screen” or “standard” depending on your editor. Name files clearly and upload in the orientation you prepared.
About framing: if your photo doesn’t fit a square canvas without awkward crops, place it centered on a prepared square background (color or subtle texture) in your editor before exporting the final pixel dimensions. That keeps your composition intact and avoids in-app cropping surprises. Related: 13 Most Popular Types of Instagram Photos That Will Get You More Likes and Followers
How to test best posting times — a 2-week A/B plan with specific metrics and cadence:
-
Week 1 (Time A): Post your planned content at Time A (e.g., Tuesday at 11:00 AM and Thursday at 6:00 PM).
-
Week 2 (Time B): Post similar content at Time B (e.g., Tuesday at 8:00 PM and Thursday at 10:00 AM).
-
Measure: track likes, saves, comments, and new followers per post. Compare average engagement across the two weeks and choose the better-performing time. Repeat the A/B test every 6–8 weeks to account for seasonal shifts.
5 – It’s Social Media for a Reason

Don’t forget the social part. The algorithm favors genuine interaction. Practical, repeatable actions:
-
Reply to comments and DMs within 24 hours when possible; prioritize quick replies for leads.
-
Like and leave thoughtful comments on posts from clients and fellow photographers — small, specific reactions work better than generic replies.
-
Use interactive Story stickers (polls, questions, countdowns) to invite participation and increase visibility.
Community prompts you can reuse: ask which location followers prefer for shoots, run a quick poll on editing style, or invite questions for a monthly Q&A Story. These are simple, low-cost ways to start conversations that can become referrals.
6 – Instagram Is Not an Online Marketplace (Mostly)
Instagram is primarily for sharing ideas and images; it can lead to bookings and sales, but overtly salesy posts often underperform. When promoting a product (prints, sessions, workshops), frame it with a short story: why it matters, who it’s for, and the clear next step to buy or book. That context makes promotional posts feel useful, not pushy. Related: How to Make Money as a Photographer on Instagram?
7 – Offer Exclusive Content
Make Instagram the place followers get something they don’t see elsewhere. Share process shots, short tutorials, or client moments exclusive to Instagram. Exclusive content encourages followers to check your profile regularly and helps convert casual viewers into engaged fans.
Related: Instagram Rules and Regulations for Photographers
8 – Hashtags (Practical Reminders)

This section gathers the key hashtag advice in one place so you can test efficiently. Use the 5–8 tag mix, rotate tags, track performance, and prefer placing tags in the first comment for cleaner captions. Keep tags relevant and specific to the photo, location, and style.
-
Use location tags for local clients (city, neighborhood, or venue).
-
Track which tags bring followers or inquiries in a short spreadsheet.
-
Rotate sets so you don’t reuse the identical combination each time.
Related: Best Instagram Photography Hashtags to Use as a Photographer
9 – F Stands for Fun (and Strategy)
Keep the joy in the process. When you enjoy creating, your work shows personality — and people respond to personality. Try these community engagement prompts and test one playful post per week to see what connects:
-
Ask a simple preference: “Which style do you prefer — moody or bright?”
-
Run a mini-challenge with a branded tag: “Share your best sunrise photo and tag #MyMorningShot” (use your branded tag).
-
Share a work-in-progress and ask for one line of feedback.
-
Host a 24-hour Story poll on a creative choice for an upcoming shoot.
-
Request captions for a behind-the-scenes photo and repost the best answer.
Maintain an experimental mindset: try one playful idea each week and track engagement to learn what resonates with your audience.
As you build consistency and test what works, your presence will grow. Systems and small routines make it easier to keep momentum. Which single link to prioritize in your bio?
-
Priority link: your booking or contact page if your main goal is client work.
-
If your goal is portfolio exposure, link to a curated portfolio page with a clear contact CTA.
-
If you need multiple destinations (shop, blog, booking), use a simple landing page or link tool and make the top item the action you most want visitors to take.
Practical reputation and feedback tips:
-
Monitor comments and mentions regularly; thank people who take time to explain concerns.
-
If a commenter raises a specific issue, acknowledge it and offer to continue the conversation privately: “DM me so we can sort this out.”
-
Remove or report abusive comments that violate community standards; protect your mental space and your community tone.
Final action list — five things to do this week:
-
Set your account to Business and choose Photographer in the category.
-
Write a concise bio with a single CTA and one prioritized link.
-
Create and save one Story sequence as a Highlight (BTS, Edits, or Tips).
-
Prepare three images using the export workflow above and schedule them across the weekly template.
-
Run the 2-week A/B timing test and measure likes, saves, comments, and follower change; repeat every 6–8 weeks.
I hope these Instagram photography tips help you get more visibility, better client leads, and a feed you enjoy updating. Related: Pinterest for Photography Business: Best Platform for Photographers?
Don’t forget to connect your social media links in the bio and monitor performance: likes, saves, comments, and follower changes show what your audience prefers. Consider detailed feedback from strangers when it’s specific and actionable; not every negative reaction matters, but patterns are useful. Test, track, and adapt.
Related: 7 Tips on How to Promote a Photography Business on Instagram