If you are a new product photographer, you must have heard about lightbox. But what exactly is it? How can it help your product photos be more eye-catching? With the help of a lightbox, how can you get the best results? How can you choose the right one?
Continue reading, and you’ll know everything you should know about using a lightbox for product photography.
Table of Content
What Exactly Is Lightbox for Product Photography?
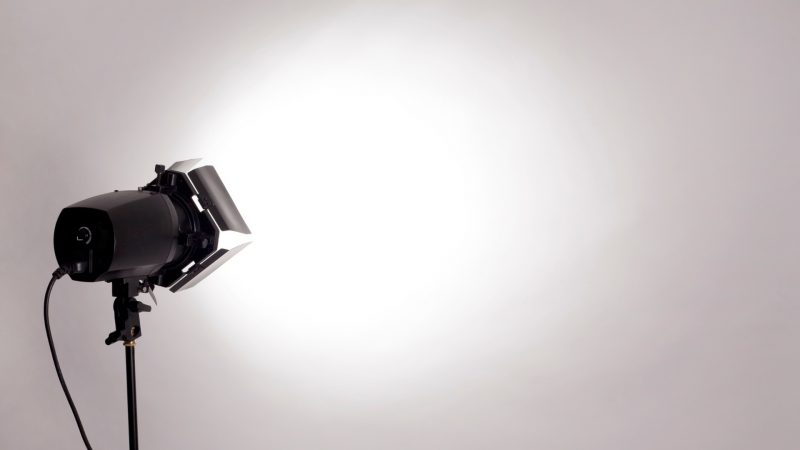
A lightbox for product photography is a small box that you can use as a mini-studio while taking photos of small products such as jewelry. Also sometimes called light tents, the four sides of a lightbox are covered with a white material that will serve as your backdrop. These translucent sides will diffuse the light from multiple sources. (Diffusion is what turns hard light into soft; our guide to hard light vs. soft light explains why bigger sources mean gentler shadows.)
There are usually three light sources that are placed inside the box to illuminate your product. Each of them is placed on each of the three sides of the box. The front of the box has an opening (or no cover at all), so you can take photos of your product. If you only use one light source, there will be some shadows, and the images will appear 3D.
The size of this compact studio will be determined by the size of the product being photographed. However, the most crucial aspect is the light source. Therefore, a photographer should create a lightbox that can creatively capture all of the important details of the product using artificial lights, along with the limited space.
Related: A Complete Guide to Still Life Photography | Expert Photography
Advantages of Using Lightbox for Product Photography
As a product photographer, you want your photos to look more attractive than ever. For the full workflow, see our product photography guide. With the help of a lightbox and a creative mind, you can elevate the quality of your photos through consistent lighting. Lightbox photography is about providing the best artificial lighting. But aside from that, here are some of its advantages that you can enjoy.
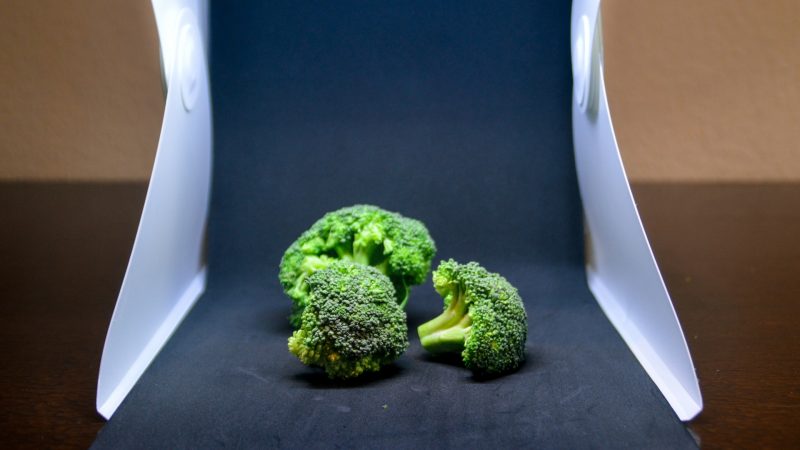
- Aside from jewelry, a lightbox is also ideal if you are taking photos of food, smartphones, cameras, and other small products.
- You don’t need a very sophisticated camera. Any kind of camera, including your smartphone, may be used.
- You can highlight the key features of your product from different angles.
- Lightbox is inexpensive.
- You can also make your lightbox at home.
- Great alternative if you have problems getting natural light.
- You can take photos any time of the day, even at night.
- Using lightbox minimizes post-processing editing.
Disadvantages of Using Lightbox for Product Photography
Using a lightbox is not the best technique in product photography. Just like other techniques, it has its drawbacks. However, the better way to say it is that the lightbox does not apply to all small products and all kinds of situations. With that, here are some of the disadvantages of using a lightbox for product photography.
- Space is limited. You cannot be flexible as compared to using natural light or room light.
- Placing the lights in different directions can be very challenging, especially if your product is highly reflective such as a wine bottle.
- Your creativity will be limited. You may not be able to add some personal touch, especially if you are into beauty products.
- The available sizes of lightboxes may not always fit your photography area. They may either be too tall or too wide.
- The use of a lightbox is not always applicable if you want to have a background for your product.
Is It Better to Make Your Own Photography Lightbox Instead of Buying One?
Generally speaking, it is still better to buy a photography lightbox. But if your only purpose is to save money, making your own photography lightbox may be better than buying one.
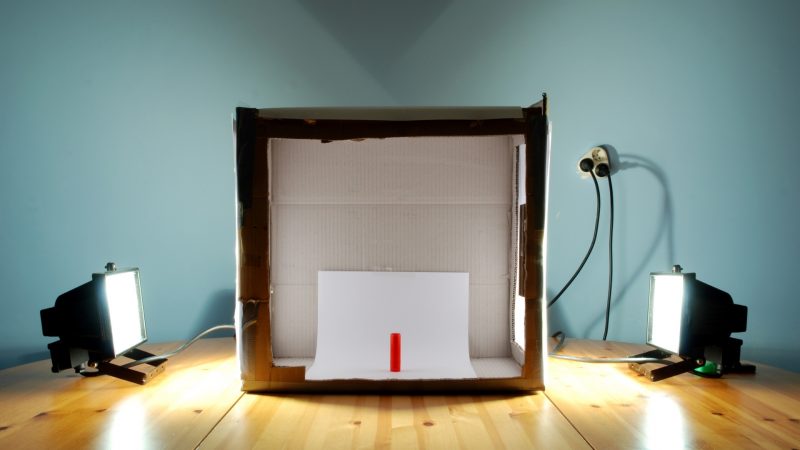
If you prefer a DIY lightbox, you don’t have to buy some of the materials. You can use cardboard or a small piece of wood. However, there are some notable disadvantages you must face.
Cons of DIY Photography Lightbox
1. Time Consuming
If you are very busy and time is very important for you, it’s better to buy one. Making a DIY lightbox will eat a lot of your precious time. First, if you’re not used to doing it, it’s difficult to accurately measure and cut the material. Second, you may not have the right tools. In some cases, you may still have to spend money on the other materials needed.
2. Prone to Poor Design
Contrary to what you might be thinking, making a lightbox is not as simple as making a box and putting some lights inside. If you use cardboard and the lights are not placed correctly, it may cause a fire. On the other hand, if you use wood, it might be too heavy to move or bring along with you. However, most lightboxes in the market are handy and foldable.
3. Sourcing of Light Is Not Easy
Looking for the right source of light is probably the most challenging part of making your own lightbox. Aside from the fact that you need to buy it, you have to do the trial-and-error method before you can find the right lights for your box. This can also be time-consuming. But if you will buy a lightbox, the manufacturer will do the job for you.
How to Use a Lightbox to Enhance the Quality of Your Product Photos?
As mentioned above, providing the most appropriate lighting is very crucial if you choose to use a lightbox when taking photos of small products. Aside from the camera, there are other tools you should prepare. It also requires a truckload of patience. Here is the step-by-step procedure on how to use a lightbox for your product photography.
Equipment needed:
1. Lightbox – If you’re using fabric for the backdrop, make sure it is clean and has no wrinkles. Before using it, wash and iron it if necessary.
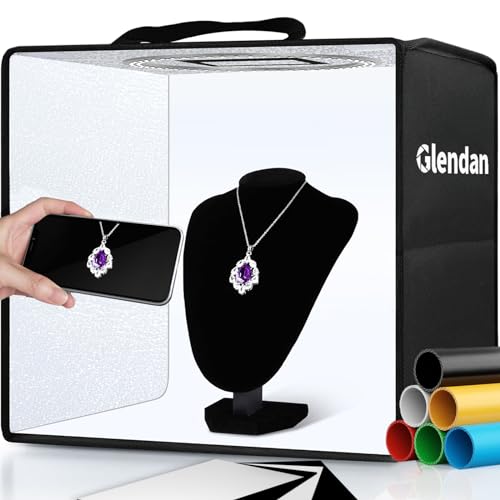
- 【Stepless Dimming & High CRI】Our light box features 112 high-quality LED light beads with a dimmable range of 0%-100%. Easily adjust the brightness for the desired lighting effect. With a high Color Rendering Index (CRI) of 95+ and no strobe, our lightbox creates brighter, softer lights, resulting in more natural and textured photos.
- 【Multi-angle Shooting】Capture the perfect product features and beauty with our light box photography. Its multiple openings design allows you to choose any photo shooting position.
- 【6 Color PVC Backdrops】Photo box included 6 waterproof backgrounds (White/Black/Orange/Blue/Green/Red) made of thick PVC. These sturdy backdrops are wrinkle-free, making it effortless to change background colors and create various shooting scenes.
2. Source of light – Use LED light bulbs or compact fluorescent lamps but don’t combine them. Otherwise, lighting will not be equally dispersed.
3. Camera – As mentioned above, you may use any type of camera, including your smartphone.
4. Table – Any kind of sturdy table will do, as long as it is bigger than the lightbox. The height should make you feel comfortable when taking photos.
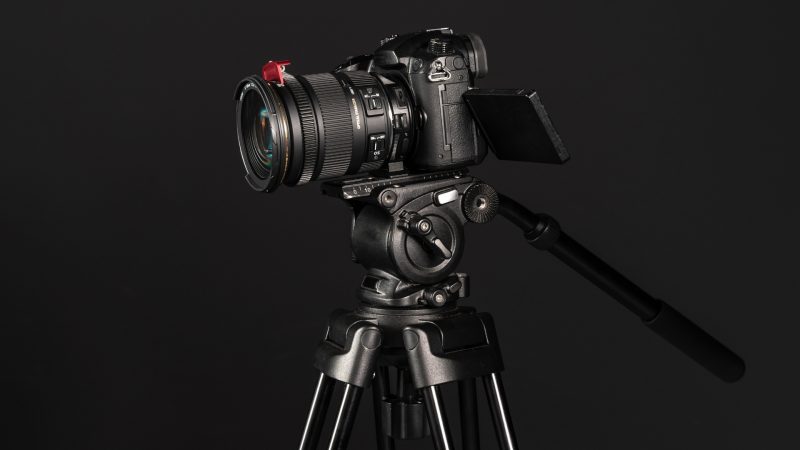
5. Tripod – Aside from providing stability, you can also use longer shutter speeds to obtain better results. Needless to say, it will make you feel more relaxed.
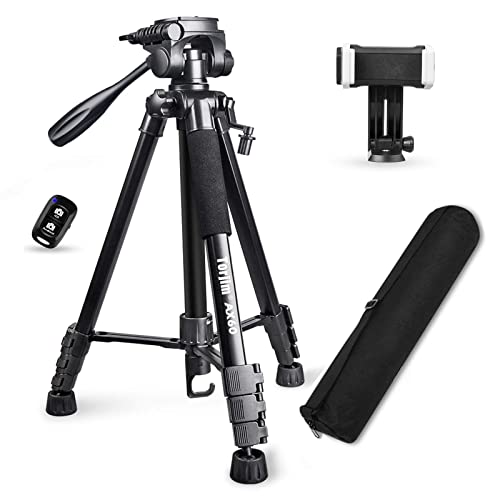
- 【60" Adjustable Height】 The maximum height of the adjustable tripod is 60 inches. 4-section column legs with a quick release flip-lock knob allows it to be folded to a shorter height of 17.6 inches, which can meet various shooting needs.
- 【360° Rotation Function】 The convenient handle and built-in bubble level can realize the tripod translation and tilt movement, so as to meet any angle required by the user. It comes with a standard 1/4 "quick release plate, you can install and remove the camera in seconds. That supports most DSLR cameras. So you get perfect photos and stunning panoramas every time.
- 【Lightweight Solid & Sturdy Rubber Feet】Stable rubber feet provide superior stability in a variety of terrains, which plays an important part in your travel. This special triangular stabilizing structure can withstand 11 pounds and can support entry-level Nikon, DSLR, SLR, action camera, Canon cameras, etc.
6. Reflector – This is optional. In some cases, it can add direct light. It could be a small mirror, a white sheet, or anything that reflects light.
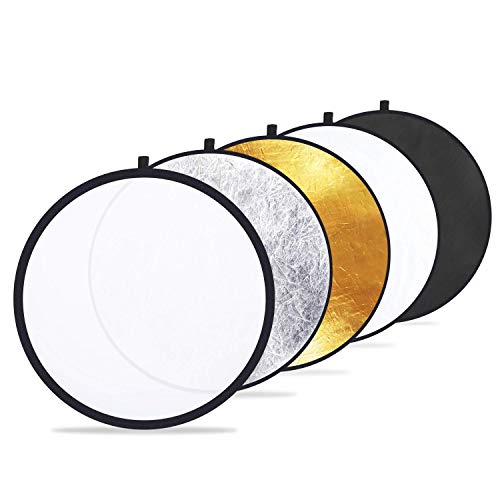
- 5-In-1 Lightweight Reflector: Includes gold, silver, white, black, and translucent
- Versatile Reflector Uses: Gold warms image; Silver enhances brightness; White reflects light; Black eliminates unwanted light
- Portable Multi-Disc Light Reflector: Collapsible for travel or storage; Ideal for photographers on the go
Step 1: Set Up the Lightbox
Place your lightbox on the table and make sure it is stable. Also, make sure the height of your tripod is enough for the table. If the backdrop is attached to the top of your lightbox (light tent), it should fall naturally at the back of the lightbox (and sometimes the sides) until it reaches the bottom. Nevertheless, some lightboxes are already pre-assembled.
Related: Best Tripods for Photography
Step 2: Camera Set-up and Settings
Before you start taking photos, set up your camera on a tripod and adjust the settings. Select your desired aperture based on how you would want your product to appear in the photos. And because your background is white, set your ISO setting to the lowest number (usually 100). In doing so, you can expect your shots to have sharper images.
Related: What is Auto Iso and How/When to Use It – A Complete Guide
Step 3: Clean Your Product
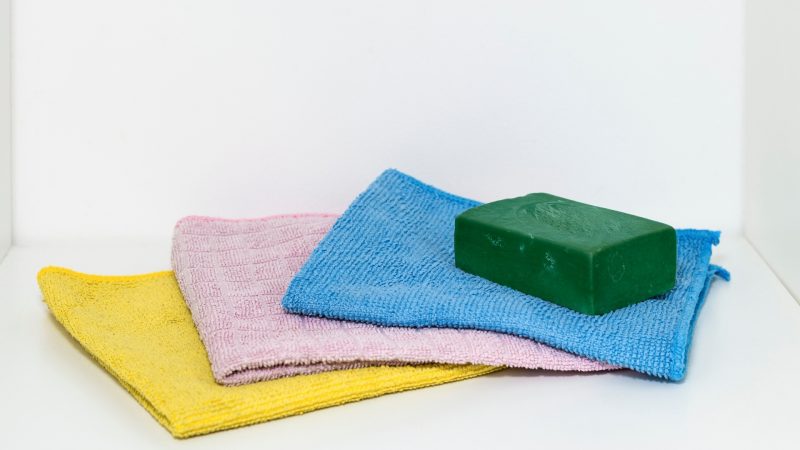
Make sure that your product is clean and dry. Remove all the dust, debris, or any visible marks. If your product is washable or can be cleaned using soap and water, wash it. Use a microfiber cloth to remove even the smallest dirt particles if the product is not washable. If your product is food, make sure it’s fresh and new. It’s better than to “clean” it during post-processing.
Step 4: Place Your Product
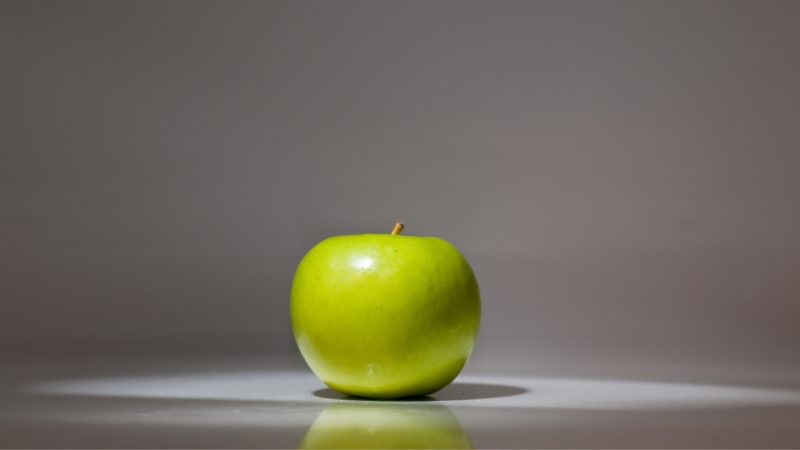
Place your product very carefully at the center of the lightbox. To make sure that there will be no shadows, the lights should be directly opposite to each other. When you take photos of your product, consider the angle from which you wish to photograph it. It can be eye-perspective, off-centered, or overhead. To do this, the lightbox should be big enough.
Step 5: Experiment With the Lights
If you want to show some shadows, slowly move your product forward or backward. However, leave some space so that you won’t see the edges of the backdrop. On the other hand, you can also face the lights slightly away from your product. If you want the background to be all-white, add another light above your product. Also, avoid exposing it to direct sunlight.
Step 6: Take Photos

To have brighter photos, manually adjust the Exposure Compensation setting to one or two steps. For best color results, set your white balance manually to a level that matches your source of light. To avoid having a blurry foreground, set the focus on the part of your product that is closest to your camera. Take as many photos as you can.
Step 7: Edit Your Photos
As mentioned above, editing your photos is easier if you use a lightbox. Here, you will need photo editing software such as Adobe Photoshop. If you were not able to change the white balance earlier, you can easily do it here by simply adding a thin border to your final output. This is why it’s better to use the RAW format instead of JPEG.
Related: Do Photographers Edit Their Photos?
How to Choose the Right Lightbox for Your Product Photography?
Using a lightbox is fun and very easy to learn. A great lightbox can also make a major difference in sales. No wonder that many online sellers have been using it for their products.
But whether you are a new or an experienced product photographer, you should still know how to choose the best lightbox for you. Here are some useful tips:
1. Design
A lightbox with a sleek design is very attractive to look at, but do you need it? Remember, the real design that you need is the one that serves the purpose. Does it have a powerful lighting system? Is it applicable to different kinds of small products? So, while choosing a design, prioritize functionality over appearance.
2. Durability
A durable lightbox can stand firmly while you are moving it in different positions. It should be made of durable structural materials such as hard-polypropylene so it won’t easily wear off while assembling and disassembling it. If possible, choose the one with waterproof backdrops so you can bring it anywhere during rainy days.
3. Size
Choose a lightbox that is big enough to allow you to easily move the product while still receiving the appropriate amount of light. However, it should not eat too much of your space. If you need a bigger lightbox, choose the one that’s made of lightweight material for easy storage. Make sure it has an easy-to-carry case or bag if you’re bringing it on travel.
4. Features
Some lightboxes offer more than one backdrop with different colors and have an adjustable brightness dimming. On the other hand, some of them have several openings, so you have many choices of angles according to the size of your product. But while these extra features are tempting, buy the one with the features you only need.
5. Portability
As a product photographer, you may have to go to different places. Aside from being lightweight, choose a foldable lightbox that is easy to collapse and folds flat, allowing you to carry it with less effort. A portable lightbox should also be user-friendly and easy to assemble. Additionally, a bigger lightbox should not be an excuse not to be portable.
6. Price
The statement that most items, including lightboxes, are expensive because of their excellent quality is not necessarily accurate. Some brands are inexpensive simply because they are not well-known. So before buying a lightbox, check the different brands and read the product reviews. Sometimes, the cheaper brands have more positive reviews than negative ones.
Related: Top 6 Best Portable Photo Studio Boxes | Photo Light Boxes