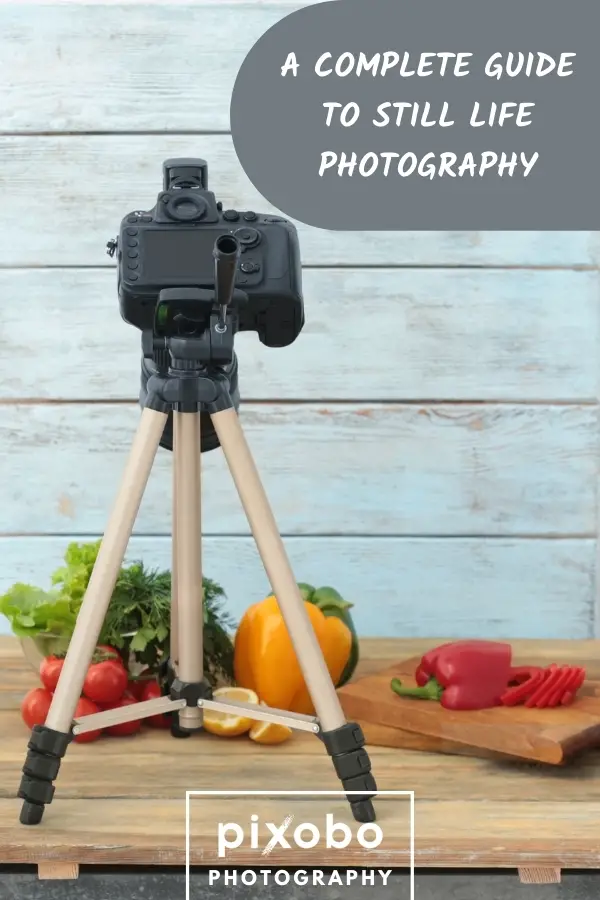
As a photographer, you may have read or heard about still life photography. However, you are still confused because different types of photography have been associated with it. It is simple as its name, but there are some techniques you should learn.
In this complete guide, you will learn everything about still life photography.
Table of Content
What Exactly Is Still Life Photography?

As the name implies, still life photography is the art of taking photos of inanimate objects, natural or man-made. It is equivalent to the art of painting simple objects. This timeless technique may sound boring to ordinary photo viewers because of its simplicity. But for photographic art lovers, creative still life photos are very magical.
The focus of still life photography is the object itself. But with proper lighting, angle, and background, you can tell an interesting story and give emotions to a simple, non-moving subject. Included in the very long list of possible subjects are vases, plants, clothing, shells, a pair of shoes or eyeglasses, rocks, instruments, and many more.
What Are the Different Types of Still Life Photography?
As mentioned above, still life photography is sometimes being confused with other types of photography. But the truth is they are also types or branches of still life photography because their subjects are static or non-moving. To end the confusion, below are the different types of still life photography, which also have different purposes:
1. Tabletop Photography

The terms ‘tabletop photography’ and ‘still life photography’ are usually being used interchangeably. But the former is only a branch of the latter. With tabletop photography, you can use any kind of small, inanimate object or item that can fit on a table. This includes food, cosmetics, and gadgets, whether they are for sale or not.
Being a very strong base of still life photography, this technique requires only minimum investment. In most cases, you will only need a cheaper DSLR camera or even your smartphone, a regular lens, a tripod, natural or artificial lights, and optional props or some materials for the background. But more importantly, you should be very creative.
2. Product Photography
Product photography is a branch of still life photography that focuses more on commercial products. Therefore, your purpose here is to create enticing photos that will make the product irresistible to buy and not just to create art. That commercial goal is the focus of our product photography guide. But again, the products should be non-moving such as prepared food, product packaging, and product line. For small items, a light box delivers clean, even light; here is how to use a lightbox for product photography.
Since product photography is mainly for e-commerce, avoid adding any props around or near the subject that can distract the viewers. Instead, you should highlight the key features of the product to justify why people should buy it. You would also want to have a common color background that can complement the color of your product.
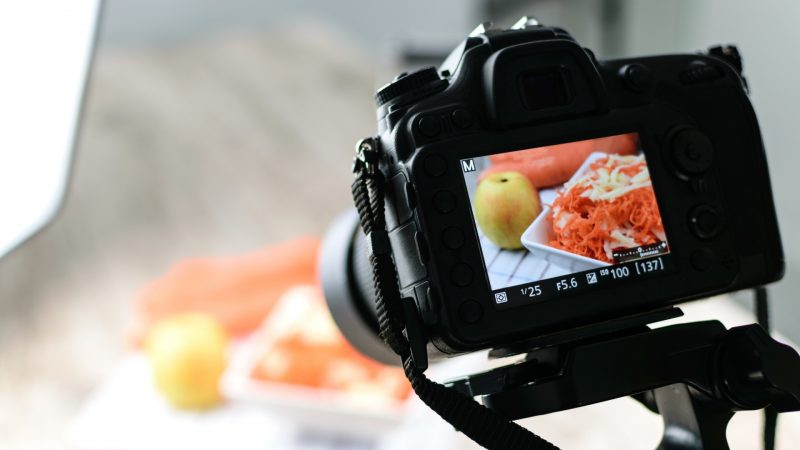
3. Food Photography
As the name suggests, food photography focuses on different kinds of food such as fruits, vegetables, and cooked foods. Whether you eat in a restaurant or fast food, the photos of the menu are the results of the creative minds of food photographers. These days, food photography and product photography are very popular on social media.
The purpose of this photography is to make delicious food look really mouth-watering. To do that, you must arrange the food artistically in such a way that it is very pleasant to the eyes. As a food photographer, you should also be very keen when choosing proper lighting and taking photos with the right angle. In some cases, you may also add props.
Related: 11 Useful Food Photography Tips for Beginners
4. Found Object Photography
In a nutshell, found object photography is taking photos of ordinary objects but modifying or improving them to make it a very interesting form of art. Although this special type of still life photography is not a popular term among ordinary photo viewers, it is now becoming common in social media, especially for famous personalities.
The term “found object” in art has been around since the early 1900s. Famous Spanish painter and sculptor Pablo Picasso used this technique in most of his naturalistic works. Subjects for found object photography could be anything from skeletons to nostalgic family photos, rotary phones, and even junk materials.
What Equipment Do You Need for Still Life Photography?
As mentioned earlier, the required investment for still life photography is minimal, especially if you are a beginner. On the other hand, you may need to upgrade later so that your photos will be more presentable and professional-looking. But for now, here are some tips for the equipment you need to start a still life photography career.
1. Camera
Fortunately, you don’t need to buy those sophisticated cameras. In fact, you can use your smartphone to practice with. After all, you can do all the editing later in the post-processing. For starters, focus on the different angles on different subjects. Make yourself comfortable with what you have, and don’t be afraid to experiment.
On the other hand, you can also use a decent DSLR camera.

- Canon EOS 4000D DSLR Camera(Intertiol Version)- 18.0MP APS-C CMOS Sensor,DIGIC 4+ Image Processor, 6.8 cm (2.7 inch) TFT LCD, approx. 230 K dots, Full HD 1080p Video Recording at 29.97 fps ,9 Point Auto Focus,Dual,Up to 3 fps Shooting and ISO 12800, Scene Intelligent Auto, Instantly transfer photos and movies to your smart device, for easy sharing on social media or cloud backup, and shoot remotely with Wi-Fi and the Canon Connect app,1 Year Limited Seller Supplied
- Canon EF-S 18-55mm F/3.5-5.6 DC III Zoom Lens - EF-S-Mount Lens/APS-C Format, 28.8-88mm (35mm Equivalent) ,Aperture Range: f/3.5 to f/38 ,One Aspherical Element ,Super Spectra Coating ,Micro Motor AF System , Rounded 6-Blade Diaphragm
- SanDisk 64GB Ultra UHS-I SDHC Memory Card (Class 10) - 64GB Storage Capacity , Class 10 / UHS-I , Max. Read Speed: 80 MB/s , Min. Write Speed: 10 MB/s , Water/Temperature/X-Ray/Shockproof ,Built-In Write Protect Switch + USB 2.0 Memory Card Reader
Take advantage of the different features such as aperture, shutter speed, and ISO settings. The key is to explore your ideas and how you create a wonderful result out of a simple object. However, it would be better if your camera allows you to use different kinds of lenses.
Related: Best Entry-Level DSLR Cameras
2. Lens
To start with, you may not need a wide-angle lens since your subjects are small and they won’t eat too much space. Nevertheless, your distance from your subject will matter. However, you don’t need the autofocus or auto-exposure functions. You may choose from macro, prime, zoom, or telephoto lens. All of them are inexpensive.
Many professional still life photographers prefer using prime lenses or macro lenses. Unlike a zoom lens that has many moving parts which can affect image quality, a prime lens also offers sharper images. On the other hand, a telephoto lens may result in perspective issues. Thus, choose a lens that will work well with your camera.
Related: How Do Different Camera Lenses Affect Photo Quality
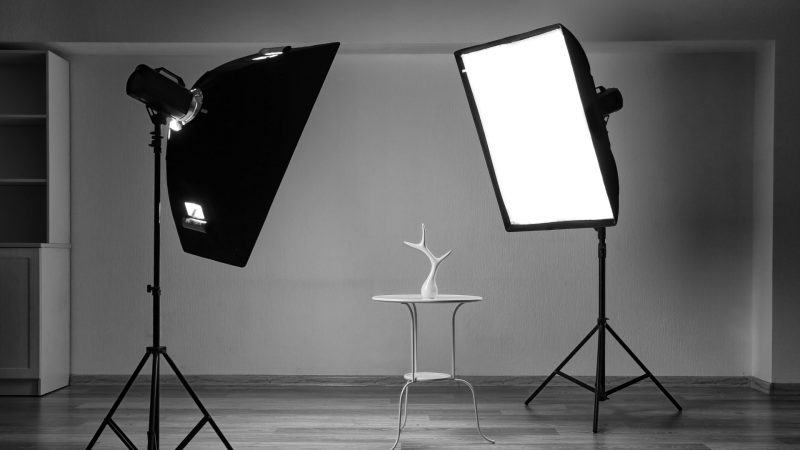
3. Lighting
With still life photography, you can use natural light from your window or artificial light from a simple lamp or even a candle. But if you will choose natural light, you are very likely to need light reflectors, diffusers, and speedlights. Whatever you choose, a subtle light source will be enough since your camera will be dealing with long exposures.
Still, life photography also allows you to test different light intensities. You can use unusually bright lighting to create high-key photos. If you like, you can also create low-key images by using a light source to enhance shadows and hide or reveal some details of your subject. Therefore, lighting in still life photography is very important.
4. Reflectors, Diffusers, and Speedlights
For best results, you may need some light reflectors to manipulate the natural light without adding more light.
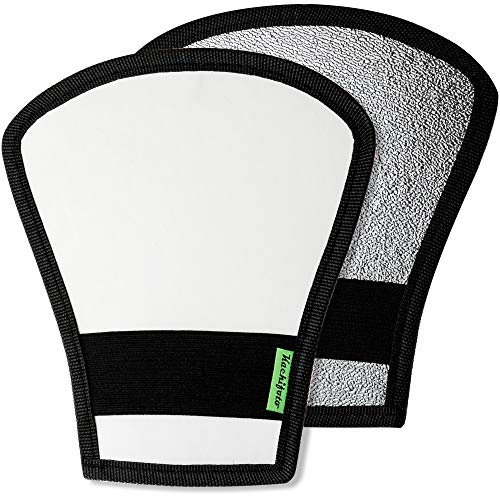
- Removes Harsh Background Shadows – For professional looking images, good lighting is vital. If you want to avoid looking like an amateur while taking photos, you must use our flash diffuser reflector, which can get rid of harsh shadows, soften the lighting on the skin, and make you look like an expert. With our product, you will be able to save hundreds or even thousands of dollars on studio shoots and expensive equipment.
- Double-Sided Provides Flexibilty – Our flash diffuser by Kachifoto provides multiple options for our users depending on their preferences. Use the white side if you want the most diffusion possible. However, if you want a bit more power and more contrast on your photos, then just flip it to the silver side of the flash diffuser, which will give you more output on your photos. Both sides are easy to use.
- Quality – Other flash diffuser reflectors in the market are made from cheap aluminum materials that are glued together and won’t last after a few uses. Our product is made of flexible premium materials, as well as reinforced stitching around the frames and near the elastic strap so it’s incredibility durable and lasts for years. The diffuser is also very portable as you can carry it in any compartments in your backpack or camera case when you’re shooting on the go.
Aside from serving as a light mirror, they also soften some shadows and provide better illumination to your subject. On the other hand, a diffuser softens the light rays before they reach the subject to help eliminate harsh shadows.
Unlike reflectors that should be placed on the opposite side of your subject, the diffuser is placed on the same side of your subject to the light. Meanwhile, a speedlight (also called a flashgun) is a compact, add-on flash that allows you to create interesting light effects. Just like strobe lights, it also emits a short burst of light but is cheaper and lighter.
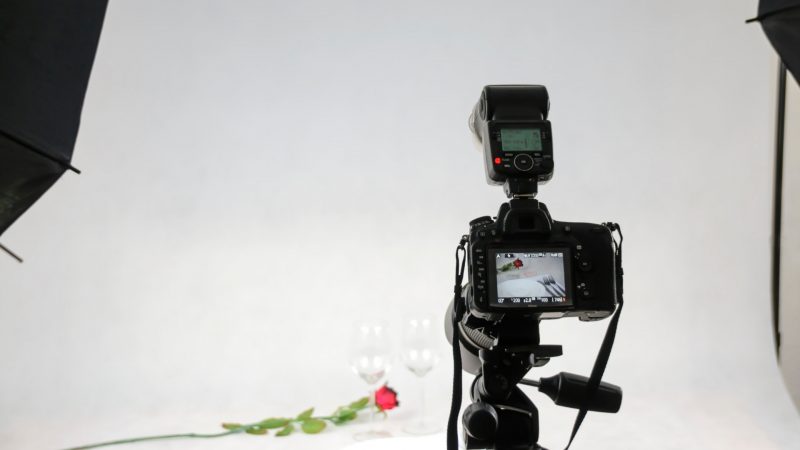
5. Tripod
As you probably know by now, a tripod keeps your camera steady to help you create crispy images, especially during long exposures.
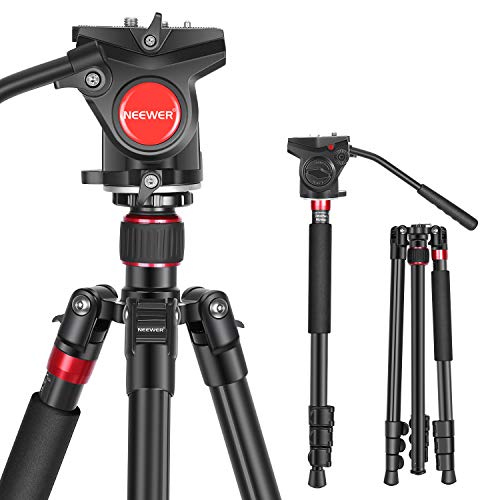
- 【Tripod/Monopod Combo】 The Neewer N555 tripod has a removable leg for use as a monopod with the fluid tripod head. The monopod is adjustable from 20" to 56.7" (20" to 56.7") for flexible camera positioning, and the center column can be reversed for cross-plunge shots
- 【Adjustable Tripod Feet】 The 4-section tripod legs can extend from 62 to 181 cm (24.4 inch to 71.2 inch) and stand on various terrain with stability. With the toggle locks, you can adjust and secure the legs in seconds. It is suitable for all occasions including weddings, parties, portraits, nature, sports and can hold devices up to 26.5 lbs (12 kg)
- 【Versatile Fluid Head】 The fluid head with a 360° pan base and tilt drag from -70° to 90° allows you to shoot from any perspective. The quick release plate with a 1/4" and 3/8" screw mounts your camera instantly, and a bubble level helps with accurate composition. 3/8"-1/4" screw adapter makes this fluid head compatible with all tripods and camera sliders
It creates precision and consistency, which are both critical, especially in food photography. If you prefer using a hand-held camera, there is a very huge possibility of getting blurry photos due to hand shake.
A tripod also saves you time by allowing you to prepare your subject while your camera is already stable. Not to mention, it also allows you to set your ISO lower and to use slower shutter speeds. To have sharper, beautiful compositions, choose a heavy and sturdy tripod. Ideally, a tripod should be about 3 times the total weight of its load.
Related: Best Tripods for Photography
Still Life Photography Tips for Creating Crispy Images
In still life photography, having a subject that does not move is a huge advantage. This means that you have full control over everything. Remember, you are not taking photos to capture a moment but rather to create an image and add art to it. Therefore, here are some helpful tips on how to create crispy, sharp images for still life photography.
1. Choose Any Object
Don’t be worried about choosing an object as your subject unless you’re in the business of food photography and a client has hired you to capture a certain item or menu. Again, there is no ideal subject for still life photography. You have the freedom to choose any inanimate object, as long as you create it into an unconventional, beautiful work of art.
If you are going to group some objects, use the power of three, especially if you are in product photography. The three objects don’t necessarily be the same. However, they should complement each other or have some continuity somewhere. Using three elements in a single photo can also create a pattern and balance within the image.
2. Create a Strong Composition
In any type of photography, composition is the most important factor. But unfortunately, it is also the least priority of some beginners who later wonder why they failed. In simple words, the composition is how you arrange the elements of your photo. Here, you don’t need to be too technical, but you should know how a great photo looks like.
To create a strong composition, you should know its key elements – line, color, shape, texture, space, and depth. All of these elements should create a balance within your image. For example, the negative space (the unused space) is most common if you only have one object at the center.
3. Practice the Rule of Thirds
The rule of thirds is a very important composition guideline that will help you create very pleasing photos. To start with, imagine your frame as a tic-tac-toe board with 9 squares. This means that you have two parallel horizontal lines and two parallel vertical lines. Don’t worry; most new cameras and smartphones have these lines on their screens.
These gridlines can help you position the different composition elements in your photo. By using them as your guides, look at your image as a whole instead of your subject only. Now, you can easily think of what to do with your negative space. So go ahead, practice the rule of thirds. But while this technique is useful, you can still break the rules.
4. Choose a Complementing Background
In most cases, white is the most ideal background in still life photography unless your subject is also white. Although you can choose any color, make sure it will complement your object and will not distract your viewers. Also, avoid using bright colors that can blind them. If you like, you can also soften your background or make it somehow blurry.
If your background (or foreground) is blurred, you will have a shallow depth of field. This only applies if you have objects far from each other, wherein one of them is closest to the camera. You also don’t need to spend money on your background. It can be a piece of paper, cardboard, or fabric. If you prefer using fabric, make sure it has no wrinkles.
Summary
Still life photography is a never-ending learning experience. Don’t be afraid to be unconventional. Don’t rush things and just enjoy the process. Also, don’t waste your time trying to create a perfect image. Any static object can be a perfect subject. The more unique your photos are, the more exciting they can bring to your viewers.