Before the digital camera and Photoshop era, we already had a lot of image manipulation techniques used by old photographers. While some used such tricks for propaganda and political deception, some are used to create surreal images like ghost photos, and mirror images. If you think the cool photo effects like this only emerged when Photoshop was born, one such trick called Double Exposure effect actually dated back to the 1860s.
Table of Content
What is Double Exposure Photography?

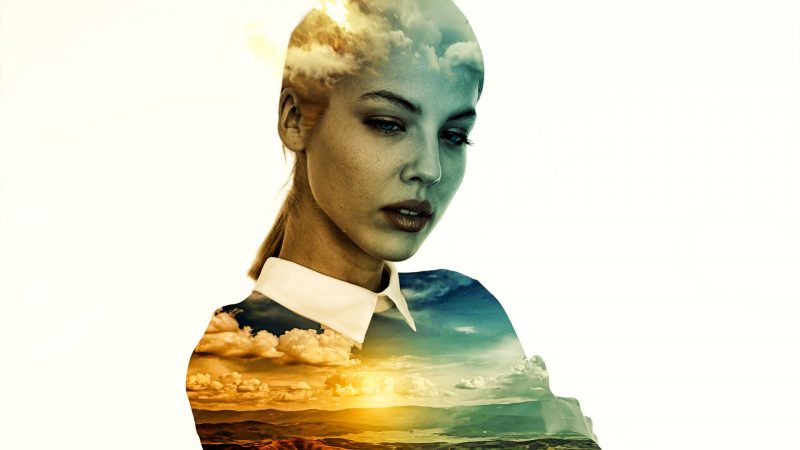
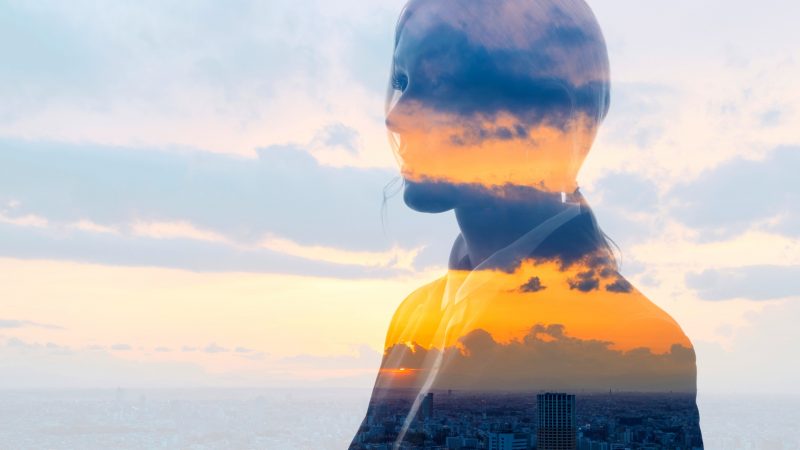
Double Exposure Photography is combining two images to create one striking image. This was done differently before the digital era. Before film photography was born and early photographers were still using rotating lens caps and special plates, double exposure effect was done on camera.
There were two types of photographers during that time:
- one who wanted to shoot and document the world as is
- the other who wanted to show us an alternate perception of reality
The double exposure effect was pretty much discovered as an accident, and while the first type of photographer avoided the ghostly effect caused by double exposure, the other type explored creative ways of using this technique and made it an art form.
Photo shoots during that time took way too long, somewhere around 20 to 40 minutes. If the subject moved between the exposure times, the result would be a double exposure, and it would look like the subject had been in the photograph twice.
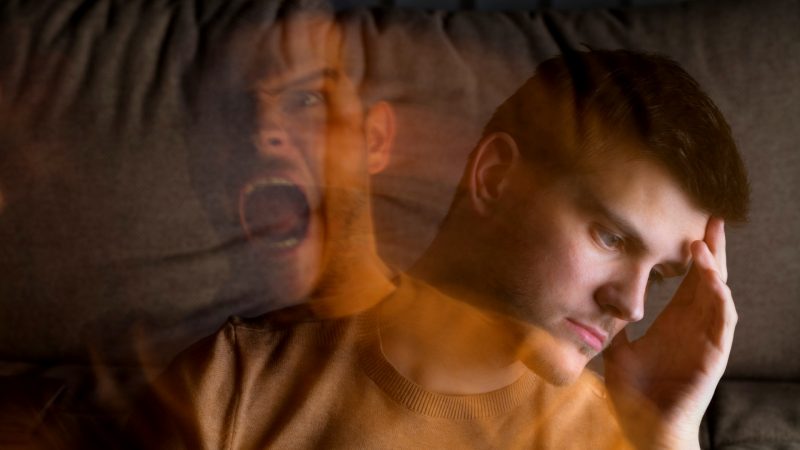
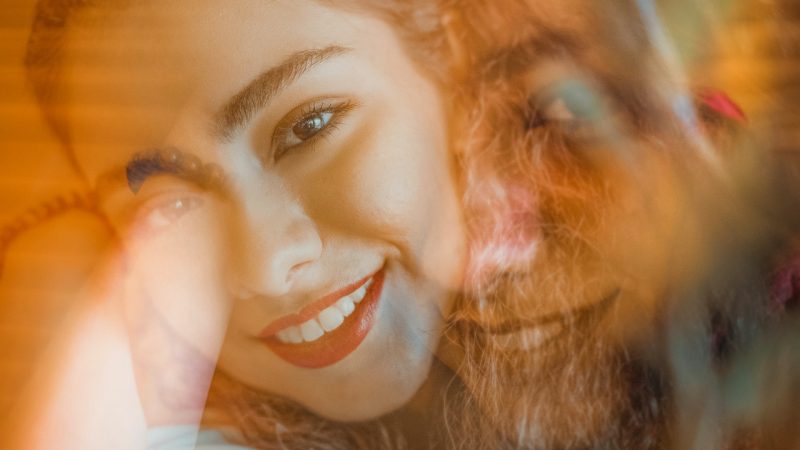
So the early photographers toyed around the phenomenon and created some cool special effects like ghost images and twin images.

This was called spirit photography because using this method of double exposure photography actually created ghost-like effects.
As the camera technology improved, so did double exposure photography. During the film photography era, early film photographers used manual winding cameras to create double or multiple exposure effect rather than an automatic winding one.
To do this, the film would stay on the current frame instead of automatically moving on to the next frame then opening the camera shutter more than once thus exposing the same frame on the film two or more times, resulting in the second and subsequent images being superimposed on the first one. However, the results could be iffy at times because making a mistake on shooting the second exposure meant wasting two perfectly fine images.
So film photographers started learning to create a double exposure effect in the darkroom instead of in-camera. By placing two different negatives above one another in the enlarger, they gained more control over the process. And as they learned more advanced techniques to produce double exposure, they were able to produce more accurate and more astonishing results.
Now in our digital age, some photographers replicate the effect in post-processing using Adobe Photoshop or GIMP. You just need to layer the images on top of each other to create the same superimposed effect. The amount of creative control you have using these tools allows anyone to create fantastic results.
However, not everyone is tech savvy and would like to spend hours learning how to create the same effect using a complicated photo editing software like Photoshop.
How to Shoot Double Exposure Images With Digital Cameras
So is it possible to do double exposure photography using our digital camera that we have available nowadays?
Of course! However, it can’t be done with just any digital camera as not all of them are given this capability.
Once you verify that your digital camera has this function, you should be able to find the Multiple Exposure options under the shooting menu.
But before you dive into double exposure photography, here are some tips that you need to remember:
- Choose a concept. Before you shoot your photos, imagine first what you want your final image to look like. Think of the message or emotion that you want to convey with your final images. For first-timers, superimposing portraits and landscapes is a good starting point. Choose subjects that you can create a connection with.
- Carefully compose your shots. Now that you’ve chosen a concept, it’s time to choose the images that you want to merge. Think of the kind of images that you want to capture and try to visualize what you want them to look like. If you want some inspiration, check out this gallery of beautiful double exposures from old and new photographers.
- Shoot contrasting images. You have to choose images with different contrasts, preferably the first image having a darker contrast than the second one. That is why most double exposure photographers use silhouettes of a person or an object as their first image, either backlit by the sun or artificial light or just using a white background. If you’re using sunlight as your background light source, sunset and sunrise are the best times to take silhouette images. You don’t always have to use silhouettes; you just have to make sure that your images have different contrasts to that each image can be seen separately from one another. If you use two equally bright images, then some details might be blown out on your double exposure image. This can be remediated in Photoshop though it will take a couple of tweaks to produce the desired effect.
- Keep on experimenting. There are times when you blend images that won’t work the way you imagined, or just don’t create a connection. Be patient and try out different portraits, landscapes, and textures. Don’t be afraid to experiment on different combinations and settings until you find that winning formula.
- Familiarise yourself with the capabilities and limitations of your camera. Like mentioned earlier, not all digital cameras have double or multiple exposure functions. And even the ones that have this function differ in their capabilities. Some cameras like the Canon 5D Mark III allow you to use previously shot images as your first layer for the double exposure shot while others like some Nikon entry-level DSLRs won’t allow you to view your first image when shooting the second image – you have to shoot them separately and use overlay function to create a double exposure image. Some others, like Fujifilm X100, will only allow you to shoot two photos in a row. There are also cameras like the Sony A7 II that don’t have built-in multiple exposure functions, but you can download an app from their app store to have this functionality.
For simplicity’s sake, we’ll just cover Nikon and Canon cameras. These two camera brands are pretty much the industry’s standard when it comes to professional photography. If you have a camera from another brand like Fujifilm, the methods won’t differ that much.
Nikon

There are two ways to create double exposure images with Nikon cameras; one is with a camera that has built-in multiple exposure functions and the other with a camera that does not have it. Here are the steps for cameras with built-in multiple exposure functions like the Nikon D4S:
- Go to shooting menu and select Multiple Exposure ON. If there are additional options like ON (series)and ON (single), choose ON (single), so you can shoot the images one by one manually. Your camera will keep on taking multiple exposure shots with ON (series) option until you turn it off.
- Choose the no. of shots. 2 is recommended.
- Keep Auto Gain ON.
- Shoot the first image.
- If your camera has and allows Live View (and most Nikon cameras don’t) check Live Preview. This will allow you to see the first image so you can overlay the second image easily.
- Shoot the second image.
These are the Nikon cameras currently that have multiple exposure functions and their SRP from Nikon USA site:
- Nikon D4S – discontinued
- Nikon D5 CF – $6500
- Nikon D5 XQD – $6500
- Nikon D500 – $1900
- Nikon D5300 – $600
- Nikon D5500 – $700
- Nikon D5600 – $600
- Nikon D610 – $1500
- Nikon D7100 – discontinued
- Nikon D7200 – $1000
- Nikon D750 – $1700
- Nikon D7500 – $1150
- Nikon D810 – $2800
- Nikon D810A – $3800
- Nikon D850 – $3300
- Nikon Z6 – $2000
- Nikon Z7 – $3400
- Nikon Coolpix P900 – discontinued
You might have noticed that most of the cameras above are high level or flagship professional cameras with premium prices.
For entry-level cameras like Nikon D3300, you have to shoot two different images and use the “Image Overlay” function. Here are the steps to do it:
- Choose the images. You can select two previously shot photos or shoot new ones. Keep in mind that you have to compose and frame the first image properly since you can’t preview it while shooting the second image.
- Once you have selected the images that you want to merge, go to Retouch Menu and select Image Overlay.
- Once you select Image Overlay, you’ll see a new dialogue box with three selections: Image 1, Image 2, and Preview. Select your images for Image 1 and Image 2. You can view them in full frame by pressing the QUAL button.
- Preview the overlay image. You can go back to Image 1 and Image 2 and tweak the settings under them to strengthen or lessen the images on the final shot. If you like it, press Save. If you save it as the RAW format, you can make some more tweaks to the overlay image later.
Canon

For Canon cameras with multiple exposure functions, the steps to create double exposure photos aren’t really that much different:
- Press the menu button and go to the 4th Settings tab.
- Go to Multiple Exposure options and choose Enable.
- Once done, choose Multi-expos ctrl.
- Here you’re given two choices: Additive and Average. With Additive, the exposure compensation is added cumulatively for each image, so you have to manually set negative exposure compensation otherwise you’ll end up with an overexposed image. If you’re shooting two images, the recommended exposure compensation is -1. The average automatically applies negative exposure compensation to each image depending on the number of images. This is the recommended setting.
- Go to No. of Exposures and set to 2.
- Under Continue Mult-exp option, choose one shot only if you want to manually shoot the images that you want to merge or Continuously if you want the camera to keep on shooting multiple exposure shots. Like with the ON (series) option in Nikon DSLRs, the camera will keep on shooting until you turn it off.
- Under Save Source Images option, choose All Images so that every exposure is saved.
- Shoot the images. Use Live View mode so you can see the exposures combined so far. If you’re going to use an already saved image, go to Select image for multi.expo option, so you only have to shoot one more image for the double exposure shot.
These are the Canon cameras that have multiple exposure functions and their SRP from Canon website:
- Canon EOS 1DX – $5300
- Canon ESO 5D Mark III – $2800
- Canon EOS 5DS – $3700
- Canon EOS 5DS R – $3900
- Canon EOS 6D – $1700
- Canon EOS 70D – $1200
- Canon EOS 7D Mark II – $1800
- Canon EOS R – $2300
Other Camera Brands
Again, the prices of cameras in this list are pretty steep, but quality-wise they are all worth it if you’re taking double exposure photography professionally or for just about any photography purposes. If you opt for other camera brands, these are the ones that have multiple exposure functions (source):
- Fujifilm GFX 50R
- Fujifilm X-T20
- Fujifilm GFX 50S
- Fujifilm X-A10
- Fujifilm X-A3
- Fujifilm X-A5
- Fujifilm X-E2s
- Fujifilm X-T3
- Fujifilm X-H1
- Fujifilm X-Pro2
- Fujifilm X-Pro2 Graphite
- Fujifilm X-T100
- Fujifilm X-T2
- Fujifilm X-T2 Graphite
- Fujifilm X100F
- Fujifilm XF10
- Pentax 645Z
- Pentax K-1
- Pentax K-1 Mark II
- Pentax K-3 II
- Pentax K-70
- Pentax K-S2
- Pentax KP
- Pentax Ricoh GR II
- Sony Alpha A7R III
Also, I suggest reading our guide on how to choose the best camera for your needs.
Double Exposure Photography: Camera mode vs Photoshop
If you have the budget to purchase these high-end cameras and you really want to be creative with double exposure photography then, by all means, buy one. If you’re budget conscious, then consider one of the entry-level Nikon cameras like D3300. But even with all these remarkable high-tech cameras, doing double exposure photography in-camera is a bit of a hit or miss and requires trial and error to produce the results that you want.
If you need precision and accuracy and you don’t mind spending time with post-processing, then do the double exposure effect using Adobe Photoshop.
Photoshop has sheer editing power, and it’s hard to find a fixed method for merging images for double exposure effect. It will ultimately depend on the images that you want to merge and the result that you want to produce.
Luckily, there are tons of tutorials on the web especially on Youtube where every step is explained in detail. Check out this sample video of double exposure tutorial using Photoshop.
You can also do double exposure photography using your smartphone. There are tons of photo apps out there that can create the same superimposing effect, and while the creative control is much lesser than when using Photoshop, the results are amusing at least.
Some examples of such apps are:
- Double Exposure Pro
- FusionCam
- DXP
- Little Photo
- Afterlight
- Pinhole Camera
- Photo Bender
- Multiple Exposure Pro
- BlendPic
- Snapseed
Multiple Exposure Blending
You might ask, is there any reason to shoot more than two exposures with multiple exposure functions other than creating a chaotic and often overexposed image?
Yes, there is – Multiple Exposure Blending.
This is another photography technique that was born out of double exposure technique, and that deserves a separate topic, but let’s tackle the concept briefly.
While double exposure effect is often used to create abstract photos, multiple exposures blending is done to create a more magnificent photo of a subject than when only shot once. Especially when we take landscape photos in the daytime, it’s very difficult to capture all the details due to the limited dynamic range of our cameras.
Sometimes you can see the details of the landscape, but the details in the clouds and sky are all blown out. Sometimes you can see details in the sky, but the details in the landscape are hidden in the shadows.
This problem can be solved by using multiple exposure blending which is shooting the same subject, preferably with a camera on a tripod, multiple times of differing exposure (by adjusting shutter speed or ISO) then blending them using post-processing software, preferably Photoshop.
This is a great imagery technique to create high dynamic range photos. With enough time and skill, you can produce the most realistic results with your images with multiple exposure blending.
This is the beauty of photography – there’s just so many techniques you can do to a photograph to convey strong emotion or send a powerful message across. Double exposure is just one of the many joys of photography and easily one of the most creative techniques giving photographers unlimited possibilities for extraordinary results. If you enjoy unconventional methods, try kirlian photography, which captures the glowing aura around objects.
No matter what the reason is of the photographer, the purpose is the same for everyone – to create unique, thought-provoking, and compelling photos that will fill people admiration at the photographer’s creativity and imagination.
Related: Fine Art Double-Exposure Photography: Human Nature