Quick answer: Texture is the photography element that captures how a surface would feel to touch — rough bark, smooth glass, soft fur. The secret to revealing texture is light direction: side light (light raking across a surface at a low angle) creates tiny shadows in every bump and groove, making the texture jump out. Front-on, flat light flattens texture and makes surfaces look dull.
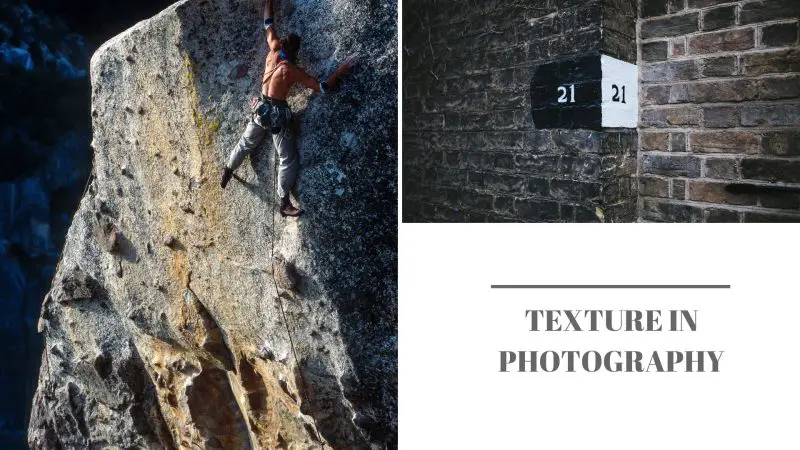
Texture is one of the most underrated elements of photography. It’s the detail that makes a viewer want to reach into the photo and run their hand over the surface. A weathered wooden door, the cracked dry earth of a desert, the soft folds of a wool blanket — texture adds a sense of touch to a flat, two-dimensional image, and that tactile quality is what makes a photo feel real.
The best part is that texture is almost entirely about light. Get the light right and even the most ordinary surface becomes fascinating. This guide covers what texture is, why light matters so much, the camera settings that keep it crisp, and where to find great texture once you start looking.
Table of Content
What Is Texture in Photography?
Texture refers to the surface quality of a subject — the visual detail that tells us whether something is rough, smooth, soft, hard, glossy, or grainy. There are two ways photographers talk about it:
Tactile texture — texture you could physically feel if the subject were in front of you, like sandpaper or velvet.
Visual texture — the impression of texture in the photograph itself, created by the pattern of highlights and shadows your camera records.
Your job as a photographer is to turn tactile texture into convincing visual texture — and that translation happens through light.
Why Texture Matters
Texture does three useful things in an image. First, it adds depth and dimension to a flat photo by giving surfaces a sense of relief. Second, it creates emotion and atmosphere — rust and peeling paint feel nostalgic and weathered, while smooth glass and polished metal feel clean and modern. Third, texture can tell a story: the lines on an elderly person’s hands, the worn leather of an old boot, and the chipped paint of a fishing boat all carry history that a viewer reads instantly.
Light Is Everything: How to Reveal Texture
If you take away one idea from this guide, make it this: the lower the angle of the light, the stronger the texture. When light skims across a surface from the side, every raised bump casts a tiny shadow and every groove fills with darkness. That interplay of micro highlights and shadows is exactly what your eye reads as texture. Here’s how different lighting directions affect it:
| Light direction | Effect on texture | Best for |
|---|---|---|
| Side light (raking) | Maximum texture — long shadows in every detail | Bark, stone, sand, skin, fabric |
| Front light | Flattens texture — shadows fall behind the subject | When you want to hide texture (e.g. smooth skin) |
| Backlight | Reveals translucent and edge texture (fur, leaves, hair) | Rim-lit subjects, translucent materials |
| Soft diffused light | Gentle, subtle texture with smooth transitions | Delicate subjects, flowers, food |
This is why the golden hour, when the sun is low in the sky, is so good for texture — the light naturally rakes across the landscape. You can recreate the same effect indoors with window light or a single off-to-the-side lamp. Move your light (or your subject) until the shadows in the surface are at their longest.
Camera Settings for Sharp Texture
Texture only works when the surface is genuinely sharp, so a few settings matter:
Aperture: Use a moderately narrow aperture (around f/8 to f/11) when you want the whole surface in focus. For close-up texture where you only need a sliver sharp, a wider aperture is fine.
ISO: Keep it as low as possible (ISO 100–400). High-ISO noise is itself an unwanted texture that muddies the real detail.
Focus: Nail focus precisely on the surface — even a slightly soft shot kills the texture. A tripod helps in low raking light.
Get close: Filling the frame with the surface — or shooting macro — turns texture into the subject itself rather than a background detail.
Where to Find Great Texture
Once you start hunting for texture, you’ll see it everywhere. Reliable sources include:
Nature: tree bark, leaves, rock faces, sand ripples, water, frost, animal fur and feathers.
Architecture and the urban scene: weathered brick, rusted metal, peeling paint, cobblestones, cracked concrete.
Still life and food: the crumb of fresh bread, the skin of citrus fruit, rough linen, woven baskets.
Portraits: weathered hands, hair, knitted clothing — texture adds character and realism to people.
Texture vs. Pattern: What’s the Difference?
Texture and pattern are close cousins and often appear together, but they’re not the same thing. Texture is about surface and how something would feel to touch. Pattern is about repetition — the same shape, color, or element recurring across the frame. A brick wall has both: the rough surface of each brick is texture, while the repeating grid of bricks is pattern. You’ll find both covered in our overview of the elements and principles of photography.
A Quick Note on Editing
You can enhance texture in post-processing, but think of it as a finishing touch, not a fix. The Texture and Clarity sliders in editors like Lightroom add local contrast that emphasizes surface detail — a small boost brings out bark and stone beautifully. Just go easy: pushed too far, these sliders create harsh halos and an unnatural, gritty look. Black and white conversion is another great option, because removing color forces the viewer’s attention onto light, shadow, and texture.
Frequently Asked Questions
What is texture in photography?
Texture in photography is the visual quality that shows how a surface would feel to touch — rough, smooth, soft, or hard. It’s created by the pattern of small highlights and shadows on a subject’s surface, and it adds depth, realism, and emotion to an otherwise flat, two-dimensional image. Texture is one of the seven core elements of photography.
What is the best light for texture in photography?
Side light, also called raking light, is the best light for texture. When light hits a surface from a low side angle, every bump and groove casts a tiny shadow that makes the texture stand out dramatically. This is why golden hour, with its low-angle sunlight, is ideal. Flat front lighting, by contrast, hides texture because the shadows fall behind the subject.
What is the difference between texture and pattern?
Texture is about the surface quality of a subject — how rough or smooth it would feel. Pattern is about repetition — the same shape, line, or element recurring across the frame. They often appear together: a brick wall has texture (the rough surface of each brick) and pattern (the repeating grid). Both are elements of photography.
What camera settings are best for capturing texture?
Use a low ISO (100–400) to keep noise from muddying the detail, an aperture around f/8 to f/11 when you want the whole surface sharp, and precise focus on the textured surface. A tripod helps in the low, raking light that texture loves. Getting physically close to the surface, or shooting macro, makes texture the subject of the shot.
How do you enhance texture in editing?
Use the Texture and Clarity sliders in software like Lightroom to add local contrast that emphasizes surface detail, but apply them gently — too much creates harsh halos and an unnatural look. Converting to black and white also strengthens texture by removing color so the viewer focuses on light and shadow. Good in-camera lighting always beats trying to add texture afterward.