If you own a DSLR or mirrorless camera, you probably know what a lens hood looks like — that little flare-deflecting skirt that clips onto the front of a lens. But beyond appearances there’s a fair bit of confusion: when should you use one, when might it hurt your shot, and how do you pick the right hood for your lens? This article walks through the types, the real-world benefits and limits, and practical how-tos so you can make measured choices on the shoot — not just follow a rule of thumb.
New photographers often assume a lens hood is only for covering the glass or for looking “pro.” Neither view tells the whole story. A hood is a simple mechanical tool that controls stray light and gives a degree of physical protection. Knowing the trade-offs — when it helps, when it doesn’t, and how to avoid side effects like vignetting — will let you use one with confidence.
We keep things practical here: clear explanations, short checks you can run on a shoot, and specific steps for attaching, storing, and troubleshooting. Expect a few small decision rules you can memorize and a short buying checklist that speeds up choices in the camera shop.
Table of Content
What Is a Lens Hood?

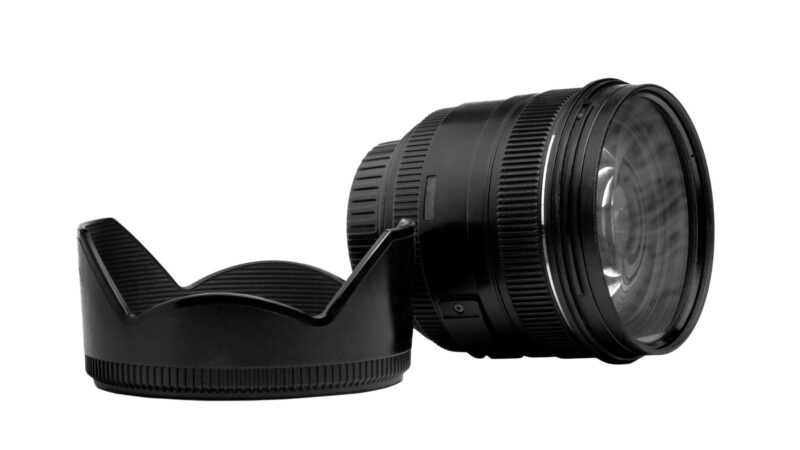
A lens hood is a detachable accessory, usually made of plastic or metal, that mounts on the front of a camera lens. You may also see it called a lens shade. Its simplest job is to block light hitting the front element from outside the lens’s intended field of view — stray rays that can cause flare, wash out contrast, or reduce saturation in a photo.
Beyond stray-light control, a hood also offers some physical protection: it keeps fingers, bumps and light debris off the glass and can take the brunt of a knock before the lens does. Many lenses ship with a matching hood; others require that you buy one separately. Hoods are not universal — you need the right shape and size for your lens.
What Are the Uses of a Lens Hood?
Why use a hood? The quick answers are: reduce flare, improve contrast, and protect the front element. But those are generalities. Here are the concrete ways a hood helps on the job, with short practical notes you can test yourself.
1. Reduces lens flare
Stray light that hits the front element from off-axis angles can scatter inside the lens and show up as flare — bright streaks, washed-out highlights, or softening across the frame. A hood creates a controlled shadow at the very edges of the lens, blocking many off-axis rays before they enter the glass.
2. Adds contrast and color saturation
When stray light is reduced, the image often retains richer blacks and stronger midtone contrast. That can make colors look more saturated and details appear crisper. You’ll notice the effect most when shooting scenes with bright side lighting or when a bright sky sits just outside the frame.
3. Protects the lens
Hoods form a physical buffer around the glass. They help prevent fingerprints and scratches, and they can prevent direct impact to the front element in a light bump. While a hood won’t save a lens in a major drop, it does reduce the chance of cosmetic damage and sometimes buys you time before needing a repair.
What Are the Common Types of Lens Hoods?
Hoods come in several shapes. The most common are round (tubular) and petal (also called tulip or flower), with square and bayonet styles seen less often. Each has benefits and trade-offs depending on focal length and the sensor shape of your camera.
Below are short descriptions plus practical checks for avoiding vignetting or other side effects. At the end of this section you’ll find a compact buying checklist that matches hood types to focal-length ranges.
1. Round Lens Hood
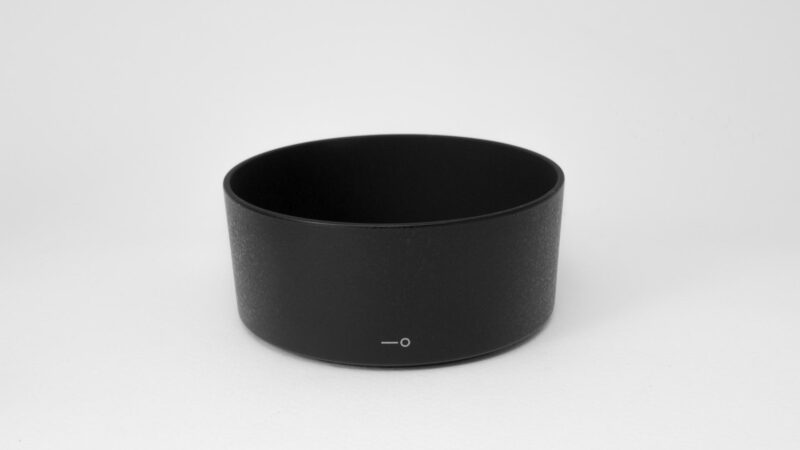
Round hoods are essentially cylindrical. They’re straightforward: no corners or cutouts to line up, so they’re quick to attach and often used with longer focal-length lenses (telephoto and some primes). A round hood tends to provide even shade around the front element and is effective when the lens’s field of view is relatively narrow.
Quick check for vignetting with round hoods: mount the hood, set the lens to its widest angle (if zoom), shoot a high-contrast flat subject (a clear sky or a white wall) at the widest aperture, and inspect the corners. If the corners darken noticeably, try a shorter hood or remove it.
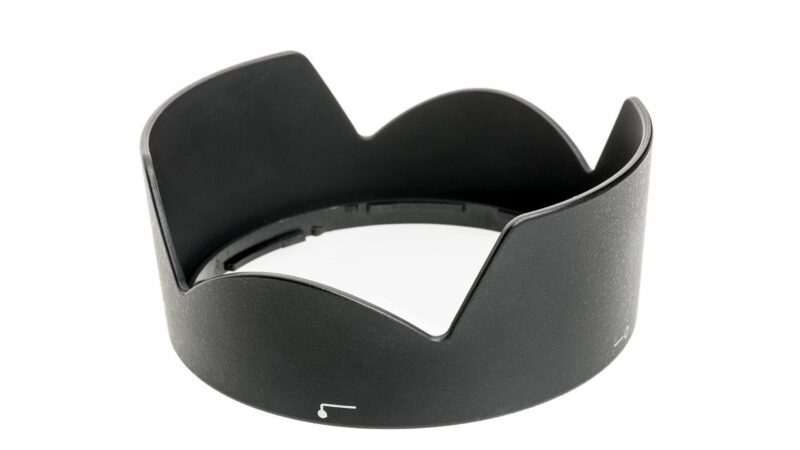
2. Petal (Flower/Tulip) Lens Hood
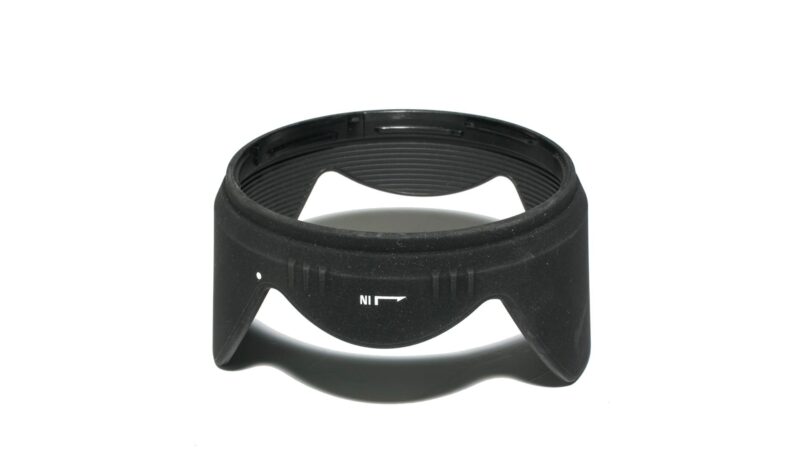
Petal hoods have those distinctive notches or cutouts. They aren’t a round hood with pieces cut away; they’re shaped so the depth of the hood matches the rectangular sensor’s corners and edges. The idea is simple: sensors produce rectangular images, so a hood that’s deeper at the top/bottom and shallower at the sides blocks stray light where it matters without extending into the frame at the corners.
When to prefer a petal hood: wide-angle lenses (where field of view is broad) and lenses mounted on rectangular sensors. The petal shape minimizes the risk of the hood intruding into the image while offering effective stray-light control.
3. Square Lens Hood
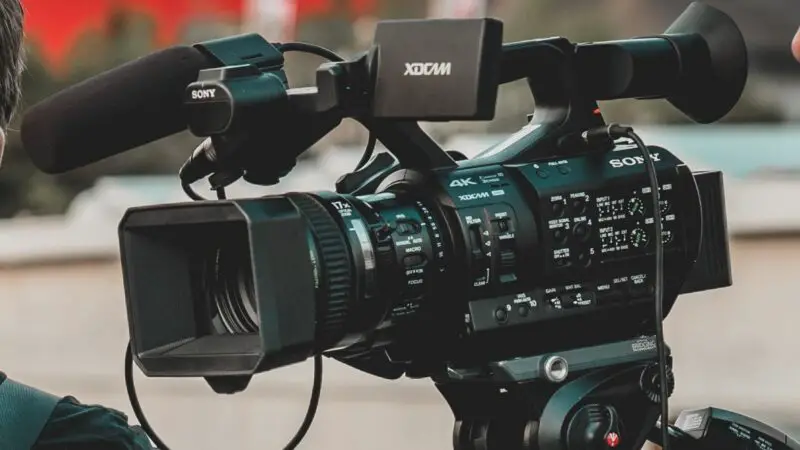
Square hoods are less common and often used when photographers want tighter control of light from a particular direction — for instance, when shooting with ultra-wide lenses in a studio or when combining the hood with matte boxes (common in video rigs). They can be shorter than other types, so they’re less likely to vignette at ultra-wide angles.
Positioning tips to avoid vignetting with square hoods:
-
Shoot a test frame at the lens’s widest focal length and aperture; examine the corners at 100% magnification.
-
If you see darkening, retract the hood slightly (if adjustable) or switch to a shorter hood model.
-
Make small rotational adjustments — even a few degrees can change the edge incidence and remove a corner shadow.
4. Bayonet Lens Hood
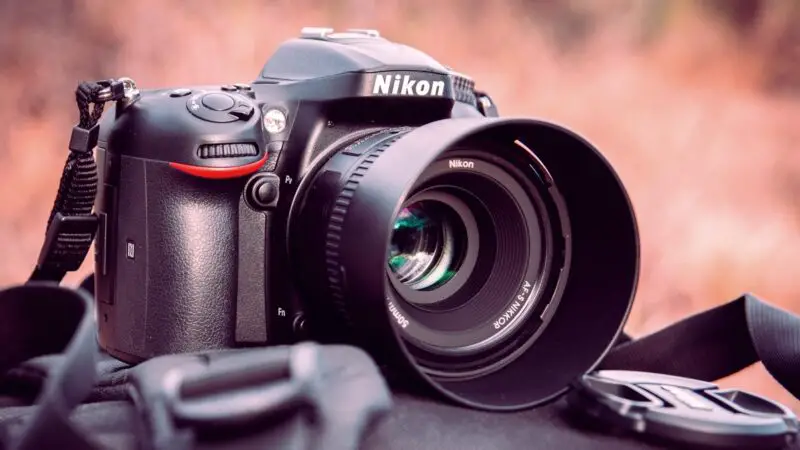
Bayonet-style hoods mount with a twist-and-lock and sometimes are built into the lens design. They can resemble tulip shapes but are less adjustable; many are shorter and intended to be compact and inexpensive. Because they’re often shallow, they provide some protection and stray-light reduction but not as much blocking power as deeper petal or round hoods.
Round Lens Hood vs. Petal Lens Hood: Which One is Better?
There’s no universal “better.” The petal hood is commonly recommended for wide-angle lenses because its shape accounts for the rectangular sensor and broader field of view: deeper in the middle where it can block side light, shallower at the corners so the hood itself doesn’t appear in the image. A round hood is often preferred on longer lenses and primes where the circular field of view makes a tubular shape effective and simpler to manufacture.
Think in terms of matching shape to use: if you shoot wide and want maximal stray-light blocking without corner intrusion, go petal. If you shoot telephoto or primes with narrower fields, a round hood will do the job and is usually less fussy to fit.
How to Attach a Lens Hood Properly?
Attaching a hood correctly is important — a misaligned hood can wobble, vignette, or fall off. Follow this simple, reliable step-by-step that works on almost any lens.
-
Locate the alignment marks. Most hoods and lenses have a small colored dot or line (often red or white). Line the mark on the hood up with the matching mark on the lens mount ring.
-
Place the hood on the front of the lens so the two marks sit opposite each other and the hood’s bayonet tabs (or screw threads) engage the lens front.
-
Rotate the hood gently in the direction indicated by the hood (usually clockwise for bayonet mounts). Turn until you feel the hood seat and a small click or stop is felt. That click means the locking tabs engaged.
-
Confirm it is secure by giving the hood a light twist back and forth; it should not rotate freely. For screw-on hoods, thread until resistance increases and the hood is snug — don’t overtighten.
-
Before shooting, do a quick visual check at the lens’s widest focal length or widest aperture to ensure the hood is not intruding on the frame (especially important for petal or square hoods on wide lenses).
If your hood also supports reverse storage, there will be a secondary set of grooves. To reverse-mount, align the hood in the reverse position, push gently and rotate the opposite direction until it locks. You should hear or feel the same click; that verifies it’s secured for travel.
When Do You Need a Lens Hood?
A blanket rule like “you should always have a lens hood” overlooks nuance. A better approach is conditional: carry one and use it in situations where stray light or physical risk is present; it’s optional if the light is evenly diffused and you need every last millimeter of reach (for macro or certain tight rig setups). Below are clear scenarios where a hood is especially useful.
Situations where a hood is most beneficial:
-
Side-light or backlight where the sun or a bright source sits just outside the frame.
-
Urban shooting where accidental bumps, rain, or fingerprints are likely.
-
Outdoor portraits and landscapes where improved contrast will help colors and midtone separation.
-
Any time you want extra protection — even when you’re not actively shooting (the hood can stay on in many cases).
When light is soft and evenly diffused (e.g., overcast skies, evenly lit studio conditions) the hood’s impact on image contrast may be minor. In those cases it’s acceptable to remove the hood if it’s interfering with a rig or blocking an accessory — but consider leaving it on if you also want the physical protection.
And remember: a hood is most effective when it matches the lens’s focal length and the camera’s sensor size — more on picking a hood below.
When Do You Not Need a Lens Hood?
Although hoods are broadly useful, there are situations where they can cause problems or simply provide little benefit. The list below explains each scenario and — where relevant — gives practical mitigation steps so you don’t unknowingly sacrifice image quality.
Here are some specific scenarios when you might leave the hood off:
1. Windy conditions or vibration-prone situations
Hoods add frontal area and, on long lenses, additional leverage. In strong wind the hood can act like a sail and transfer force into the lens, which may cause small vibrations or sway that soften an image at slow shutter speeds. It’s not that the hood’s weight magically blurs photos — it’s the increased wind load and moment arm that can induce movement.
Troubleshooting and mitigation:
-
If wind is a factor, use a tripod or monopod and add a weight to stabilize the setup.
-
Switch to a shorter hood or remove it for critical long-exposure shots in gusty conditions.
-
Use faster shutter speeds or enable image stabilization (if available) to counter small vibrations.
2. Golden hour and intentional flare shots
When shooting during the so-called magic hour you may prefer flare or the soft glow you get from the low, warm sun. During these times the sun is low and often sits partially in or just outside the frame; a hood will block some of those rays and reduce that effect. If you want flare artistically, remove the hood. If you want maximum contrast without flare, keep it on.
3. Small-sensor cameras and extreme wide-angle setups
On lenses designed for smaller sensors (or when using adapters that change the optical path), an oversized hood can intrude into the image. If you see parts of the hood in the frame at wide angles, choose a hood designed for that sensor format or remove it for those shots.
4. Macro photography
Macro work often places the front of the lens very close to the subject. A full-size hood may shadow the subject or physically block you from getting close enough. That said, you still might want some protection or stray-light control. Practical options:
-
Use a minimal or short hood designed for close focus work.
-
Reverse-mount the hood for transport, but remove it for critical macro shots where it interferes.
-
Use a small ring flash or diffuser to provide light that won’t be blocked by a short hood.
5. On-camera flash or tight accessory setups
If you’re using an on-camera flash, a deep hood can cast a shadow from the flash onto the scene. Remove the hood or use a shorter one when the flash is close to the lens axis. With off-camera flash, you have more flexibility — you can keep the hood on because the light source won’t be blocked by the hood.
Should I Use a Lens Hood Indoors?
Indoors, decide based on stray light and protection rather than default rules. If stray light from windows or lamps is striking the lens and reducing contrast, keep the hood on. If lighting is soft and even — studio-controlled lighting, for example — removing the hood may make no difference to image quality and can simplify using accessories like flashes or diffusers.
Decision rule: keep the hood if stray light is present or if you want extra protection; otherwise it’s optional. Quick test: shoot one frame with the hood and one without; compare for flare and contrast — it’s the fastest way to know which setting works for that room.
How to Store a Lens Hood Properly?
When you’re done shooting, remove the hood by rotating it counterclockwise (or unscrew it for threaded hoods). If you want to save space and keep the hood paired with the lens, you can reverse-mount the hood on the lens for transport. Here’s the precise reverse-attachment step so it locks securely:
-
Line up the hood so the larger opening faces the lens and the smaller opening faces away.
-
Push the hood gently toward the lens and rotate in the direction opposite the normal mount direction (usually counterclockwise for bayonet hoods) until the secondary reverse-lock groove seats with a small click.
-
Verify the hood is locked by giving it a light twist; it should stay in place and not rotate freely. If it moves easily, rotate back slightly until it locks again.
You can also stack small hoods inside each other for storage if they’re the same type; keep larger, deeper hoods separate to avoid deformation. For long-term storage, keep hoods away from extreme heat which can warp plastic versions.
Practical Tests and Troubleshooting
Before important shoots, run these quick tests to make sure the hood is helping and not harming your images. They’re fast and simple.
-
Rotate the hood test: With the hood mounted, rotate it slightly and shoot the same scene. If image corners change or shadows shift, the hood may be intruding — try a shorter hood or a different shape.
-
Angle test: Change your shooting angle a few degrees while keeping the hood mounted. If flare disappears or appears predictably, the hood is doing its job of blocking off-axis light; adjust angle to control it.
-
Remove-and-compare: Shoot one frame with the hood and one without under the same settings. Compare for contrast, flare, and color saturation. That tells you whether the hood is beneficial in that lighting.
Buying Checklist: Match Hood to Lens
Here’s a compact guide to help you choose a hood quickly based on focal length and lens type. These are general recommendations; always verify fit and vignetting on your specific lens model.
-
Telephoto (100mm and above): Round, deep hoods for maximum stray-light blocking and protection.
-
Standard/portrait (35–85mm): Medium round or shallow petal hoods — balance protection and size.
-
Wide-angle (10–35mm): Petal (tulip) hoods sized for the lens’s field of view to avoid corner intrusion.
-
Ultra-wide and fisheye: Very short, specially designed hoods; often hoodless is acceptable if vignetting is a risk.
-
Macro: Short or removable hoods; consider dedicated lens collars or diffusers to avoid shadowing the subject.
Compatibility, Filters, and Adapters — What to Watch For
Hood compatibility is more than matching threads. Follow these rules to avoid fit issues and unwanted vignetting:
-
Match thread sizes exactly. If the hood is screw-on, the thread diameter must equal your lens’s filter thread. The filter thread size is usually printed on the front of the lens (e.g., Ø52mm).
-
Bayonet hoods must be the model-specific version or a correct third-party replacement designed for that lens. Generic bayonet hoods often don’t seat correctly and can cause alignment problems.
-
Account for stacked filters and adapters. Adding a thick filter stack or step-up ring increases the distance from the hood to the front element and can shift the effective hood depth; test for vignetting after installing filters.
-
If you use a wide-angle adapter or converter, choose a hood specifically designed for that adapter-lens combination — otherwise the hood may block the expanded field of view.
Two quick checks before buying: confirm the filter thread printed on your lens matches the hood’s thread, and mount the hood and test at the lens’s widest focal length (or widest aperture) to check for corner darkening.
Extra Tips: Avoiding Vignetting on Wide Lenses
Vignetting (darker corners) is the main worry with wide-angle and square-type hoods. Concrete checks you can run on the spot:
-
Shoot a flat, evenly lit surface at the widest focal length; inspect corners at 100% on your camera’s LCD (zoom in).
-
If corners darken, try a shorter hood or rotate the hood slightly and retest — some hood geometries respond to small rotations.
-
Open the aperture and retest: vignetting is often more visible at wide apertures, so try stopping down one or two stops as a practical workaround in the field.
Conclusion and Final Practical Advice
Lens hoods are simple but effective tools. They cut stray light, improve contrast, and offer physical protection. That said, they aren’t universally helpful in every single situation. Carry the hood, know the quick tests, and make a choice on the shoot: hood on for stray light and protection; hood off for intentional flare, tight macro work, or when a hood causes wind-related vibration or vignetting.
Before buying or using a hood, confirm the exact thread size printed on your lens matches the hood or that the hood is model-specific (for bayonet mounts). When using filters or step-up rings, test for vignetting because stacked accessories change the optical geometry. If you ever see strange corner shadows, run the simple tests above: rotate, angle-shift, and remove-and-compare. That will tell you quickly whether the hood is helping or harming.
One last practical checklist:
-
Match thread size or model-specific bayonet fit.
-
Test at widest focal length/aperture for vignetting.
-
Use a shorter hood or remove it in windy, macro, or on-camera flash scenarios.
-
If using a hood in wind, stabilize the camera with a tripod/weight or switch to a shorter design.
Keep a hood with your kit. Learn the quick attachment and reverse-mount steps so it’s never a last-minute guess. With a little practice you’ll instinctively know when the hood is your friend and when it’s best set aside.